


Update 10 July 2020: See this post for how to run
PowerShell Jupyter Notebook locally in a Docker
Container or online using Binder.
This post details how to run Local PowerShell
Jupyter Notebook on Windows.

You may also be interested in my Microsoft Reactor
session "Elevate your documentation with PowerShell
Jupyter Notebook".
Earlier in March 2020 Tyler Leonhardt from the Microsoft PowerShell team announced the Public Preview of PowerShell Support in Jupyter Notebooks on the PowerShell Dev Blog. At the time I had a quick play with the early release and was very impressed. I’ve since given it much more of a workout as PowerShell is my automation tool of choice. But I also wanted to run a local PowerShell Jupyter Notebook until .NET Interactive (which is what provides PowerShell functionality in Jupyter) is available in Azure Notebooks. In this post I detail how I got started with a local PowerShell Jupyter Notebook.
Jupyter Notebook is an open-source web application that allows you to create and share documents that contain live code, equations, visualizations and narrative text. Uses include; data cleaning and transformation, numerical simulation, statistical modelling, data visualization, machine learning, and much more.
Local PowerShell Jupyter Notebook Prerequisites
I already had PowerShell 7, Python 2.7 and the .NET SDK 3.1 installed. If you’re doing this, chances are you already do too. If not install PowerShell7, Python and .NET SDK 3.1 using the links below.
- PowerShell 7
- Python v2.7 (3.x should work too)
- .NET SDK 3.1
JupyterLab Installation
With the prerequisites satisfied before we can start our first local PowerShell Jupyter Notebook, we need to;
- Install .NET Interactive
- Install JupyterLab
- Register .NET Interactive as a Jupyter Kernel
Install .NET Interactive
Update: April 2021
The myget dotnet repo (detailed below) is now deprecated.
The latest versions of dotnet-interactive can now be obtained from Nuget.
Omit the –add-source and –version switches to obtain the latest package from Nuget.
Also, the latest .NET Interactive supports PowerShell 7.1+ which in turn requires the .NET 5 SDK. Install that with the following command.
sudo apt-get install -y dotnet-sdk-5.0
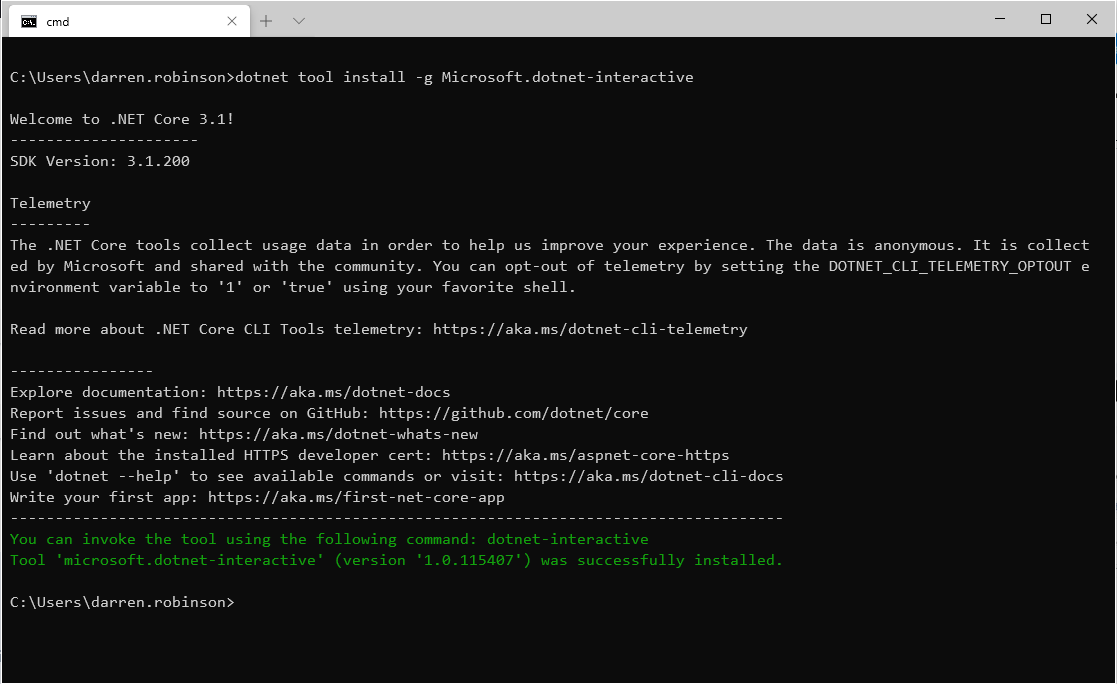
With the .NET SDK 3.1 installed, I installed .NET Interactive from a command prompt;
dotnet tool install -g Microsoft.dotnet-interactive --version 1.0.136005 --add-source "https://dotnet.myget.org/F/dotnet-try/api/v3/index.json"
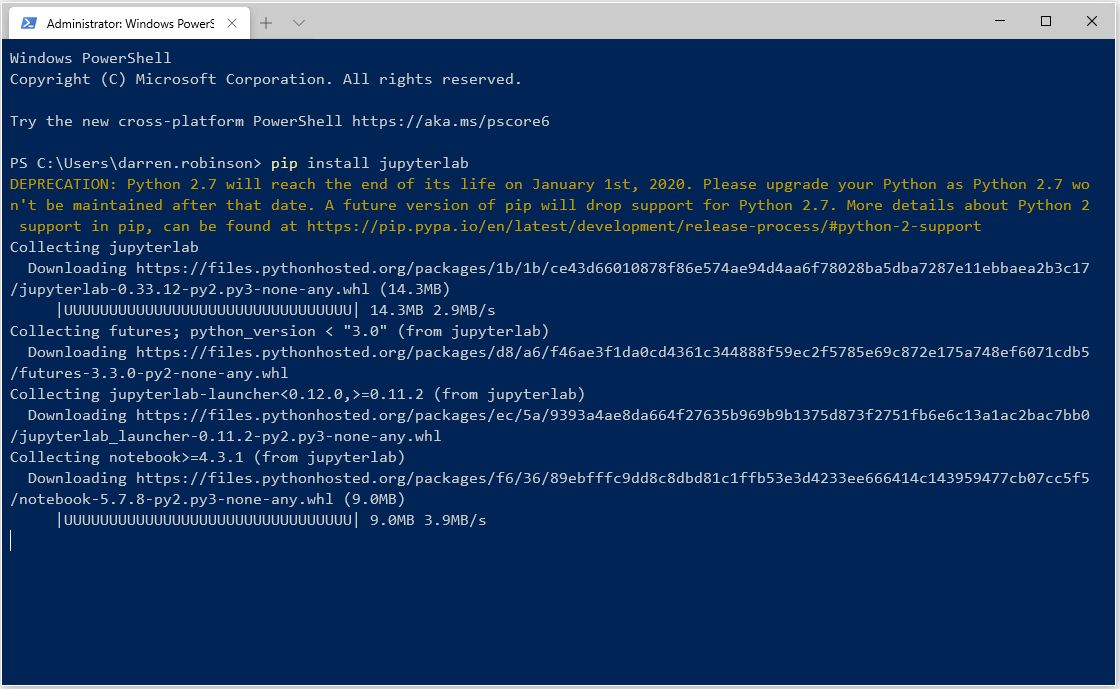
Install JupyterLab
To install JupyterLab we use Python PIP. From an Administrative PowerShell command line run;
pip install jupyterlab
Register .NET Interactive as a Jupyter Kernel
Finally, we need to register .NET Interactive as a Jupyter Kernel. From an Administrative command prompt run;
dotnet interactive jupyter install

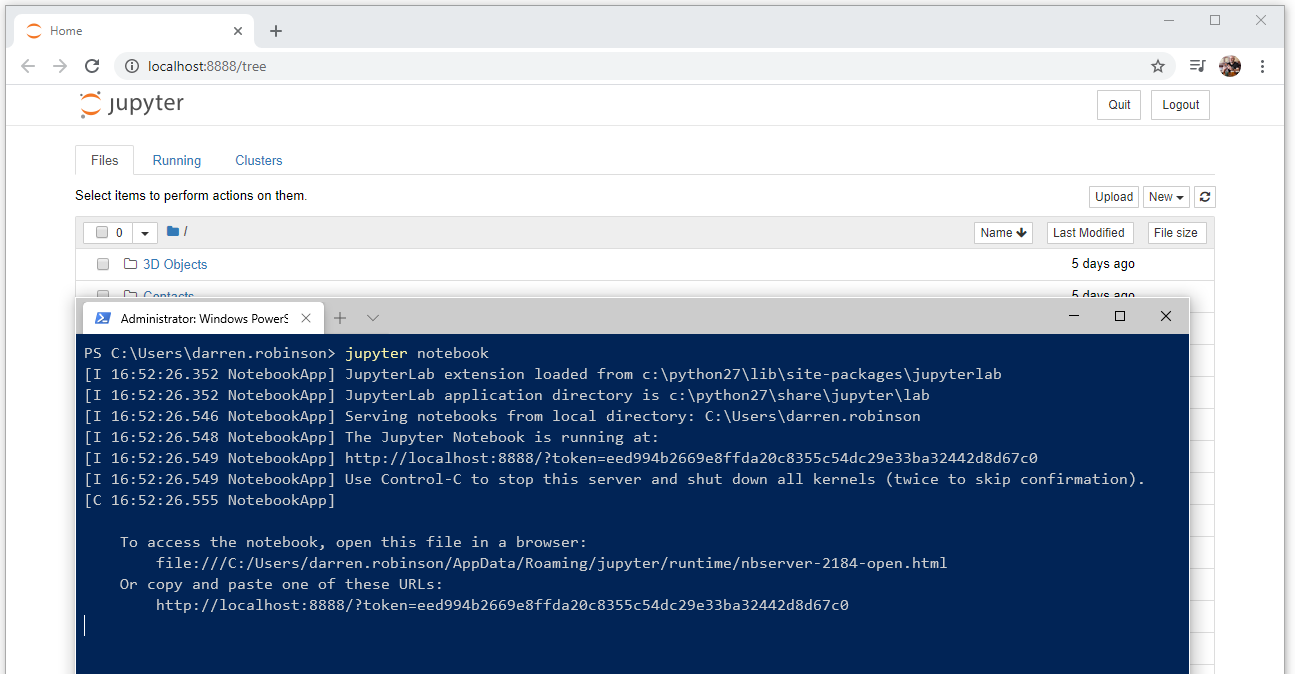
Starting Jupyter
We are now ready to start Jupyter Notebook. From an administrative PowerShell command line, run;
jupyter notebook
which will start JupyterLab and open a browser window to your localhost:8888 displaying the directory/folder of your Windows User Profile.
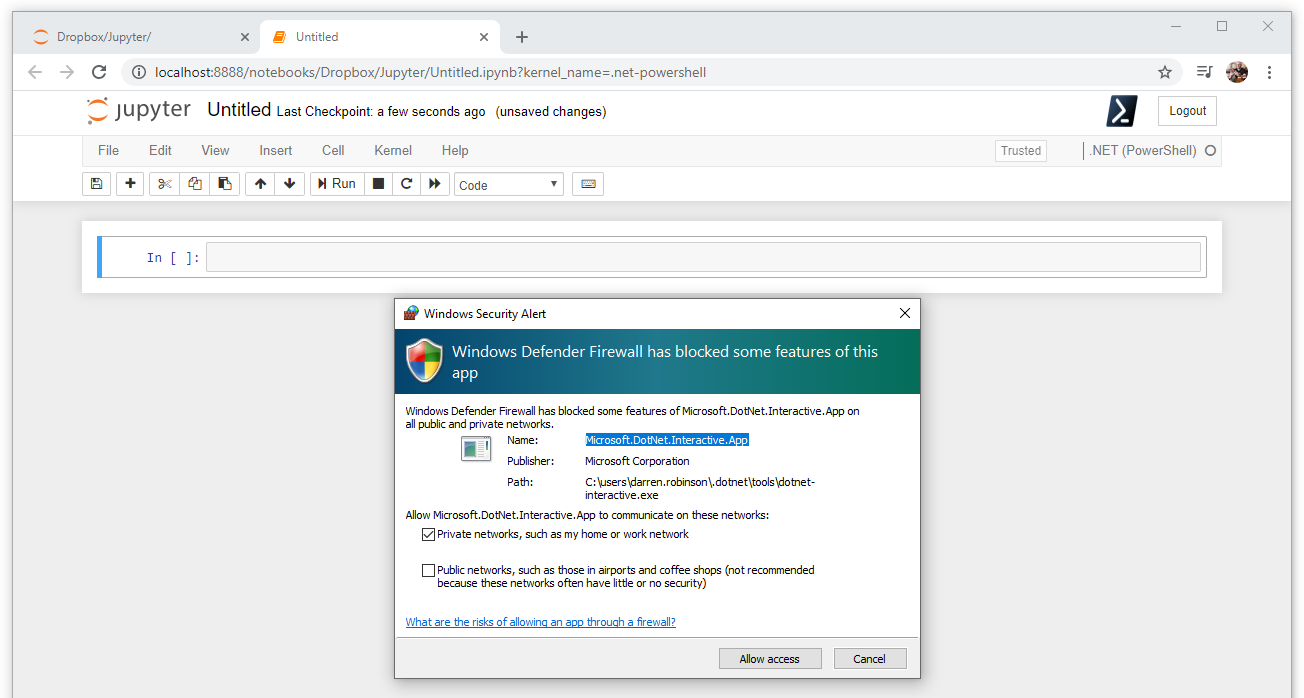
Creating a local Jupyter PowerShell Notebook
After navigating to a directory in my Windows Profile where I wanted to create my local PowerShell Notebook, I selected New => .NET (PowerShell)

Depending on your workstation’s configuration, you may be prompted to allow communications through your local firewall for .NET Interactive. If you will be interacting with Cloud services using your notebook you will need to enable this communication.
Testing a local PowerShell Jupyter Notebook
Now it’s time to validate we’ve got our environment all setup and configured correctly by trying a few easy PowerShell commands. I started with Get-Date and $psversiontable
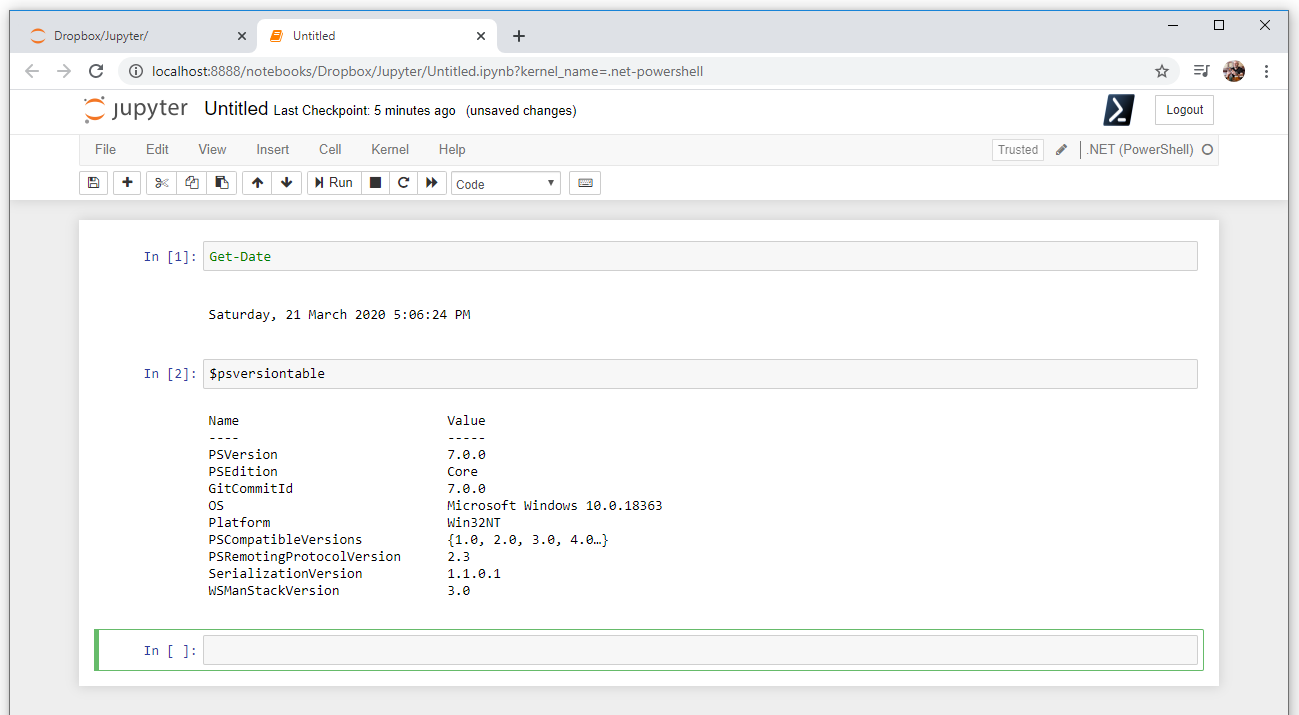
Success, up and running.
Importing PowerShell Modules
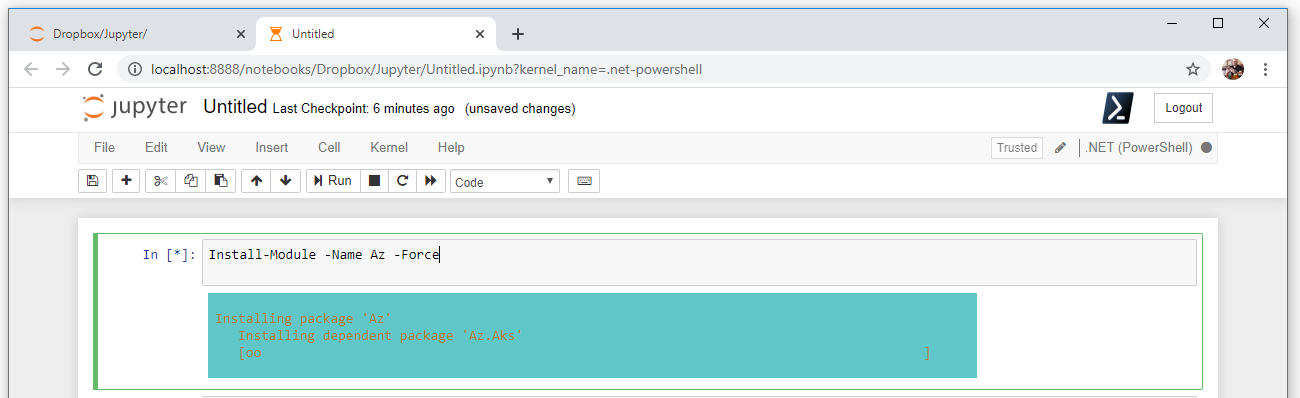
It is highly likely that you’ll want to interact with a Cloud service. For me Azure. For that we will need to install some PowerShell Modules. I’m going to start with the Az PowerShell Module. As per the announcement blog post currently there is no ability to read from the host, so the -Force switch must be used when installing modules.
NOTE: Keep in mind .NET Interactive utilises PowerShell 6/7 so you won’t be able to use PowerShell Modules that require Windows PowerShell. Anything that previously worked with PowerShell Core 6.x should be good.

Install-Module -Name Az -Force
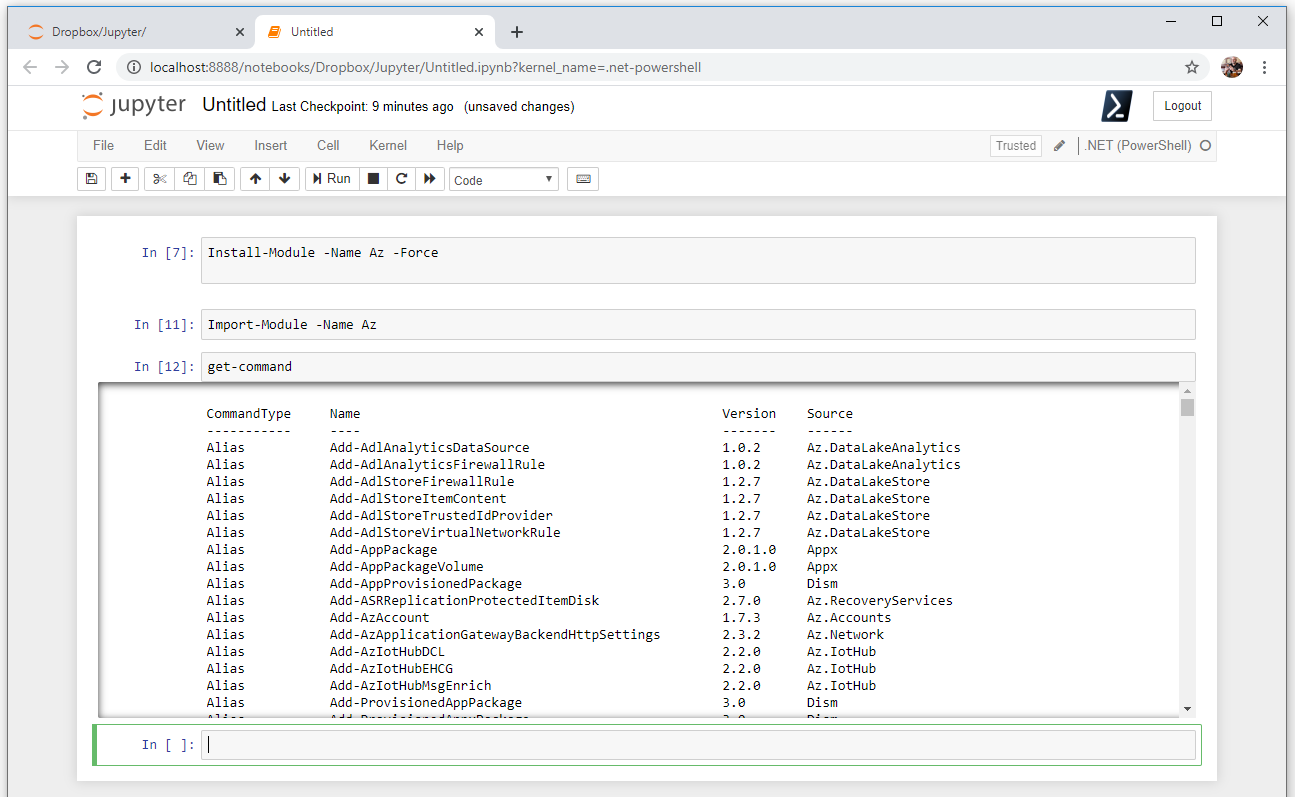
With the Az Module now installed it can be loaded and we can see the Az cmdlets that are available.
Import-Module -Name Az
get-command
We can use the Az module Connect-AzAccount cmdlet to authenticate to Azure.
Connect-AzAccount

We are now authenticated to Azure from within our PowerShell Jupyter Notebook.

We can now use other Az cmdlets to interact with Azure. Using Get-AzVM will list our Azure Virtual Machines. Using tab we can see Get-AzVm options and switches.
Get-AzVM -Name [<vmName>] or use tab completion to see other cmdlet options.

Themes
Jupyter Notebook also supports themes. To install Jupyter Notebook themes, from an Administrative PowerShell session run;
pip install jupyterthemes
You can then switch themes from the command line as shown below. You can test out the available options here. Theme options are;
- onedork
- chesterish
- grade3
- oceans16
- solarizedl
- solarizedd
- monokai
NOTE: after installing Jupyter Themes you will likely need to restart Jupyter Notebook.
jt -t chesterish

The screenshot below is the ‘chesterish‘ theme.

Summary
We are now up and running with a local PowerShell Jupyter Notebook environment. We can start creating notebooks for documentation, creating interactive guides and providing reproducible and shareable snippets. There is a lot more to come with PowerShell support in Jupyter Notebook so stay tuned for future posts.
I’ve stored my getting started Jupyter Notebook from this post as a GitHub Gist and embedded it below.