Recently I’ve posted about accessing Microsoft Graph using MicroSoft Authentication Libraries (MSAL) with Python and using MSAL with Python and Delegated Permissions. This is the final post in the series where I give an example and script for accessing Microsoft Graph using MSAL with Python and Certificate Authentication.
Prerequisites
This post assumes you have Python installed and configured as well as PIP on your local host. Ideally you should also be using VSCode along with the Microsoft Python extension for VSCode.
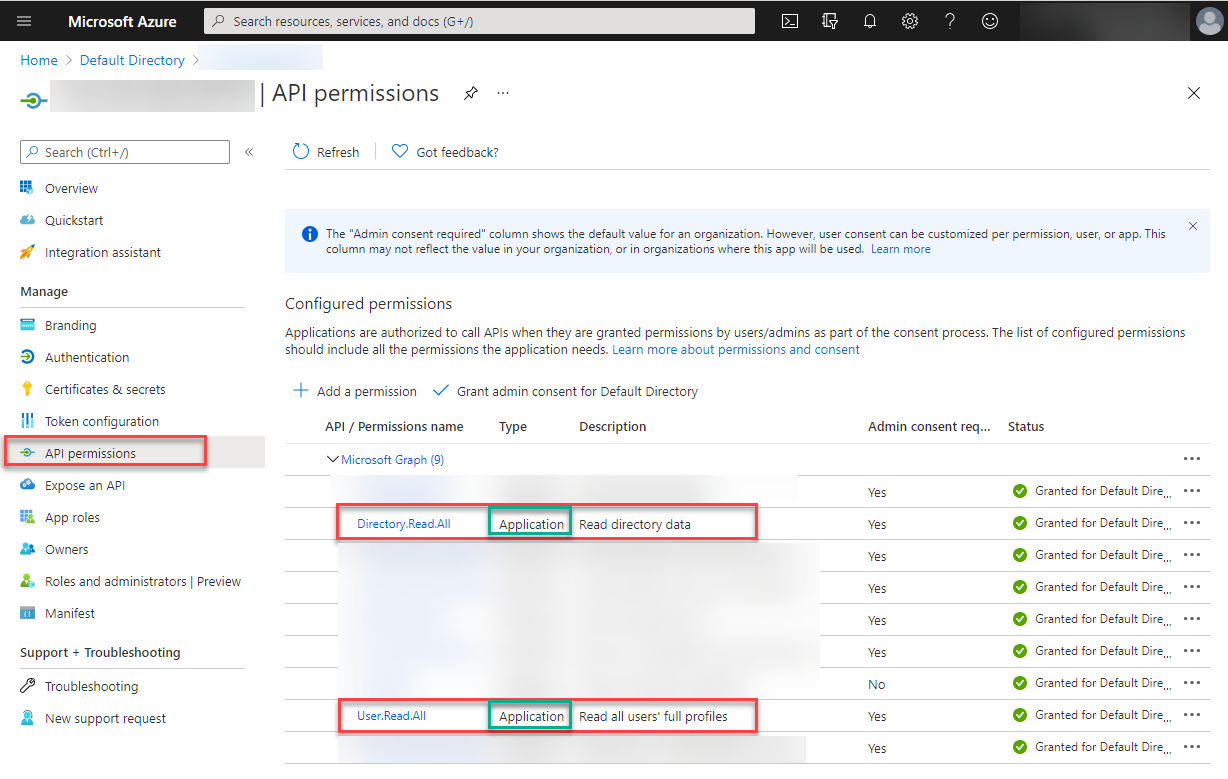
You will also need to have registered an Azure AD Application with Application Permissions.

Dependencies
The Python packages I am using for integration with Microsoft Graph are:
- MSAL (simplifies authentication and access token refresh with Microsoft Graph)
- PyJWT (we will be using this to decode the Microsoft Graph Access Token)
- You will need v1.7.1 of PyJWT. Version 2.x + of PyJWT has breaking changes for jwt.decode. Thx for the info Nick.
- UPDATE June 2022: See this post to utilise PyJWT version 2.4.0+
- JSON (for manipulation of the results from Microsoft Graph queries)
- REQUESTS (for REST requests to Microsoft Graph)
- DATETIME (to convert access token expiry from a Unix timestamp)
Python includes some of these packages. Install them using PIP.
Note: In the screenshot below, I already have all the packages installed.
pip install msal json pyjwt==1.7.1 requests datetime

MSAL with Python and Certificate Authentication Overview
The process is similar to using PowerShell for certificate based authentication.
- Register an Azure Active Directory Application
- Generate a Certificate
- Update the Azure Active Directory Application with the Certificate
- Python Script for Azure AD Certificate based Authentication
Generate a Self-Signed Certificate
To generate a self-signed certificate I’m using OpenSSL in Ubuntu via WSL (Windows Subsystem for Linux) that I previously wrote about a few years ago in this post. Subsequently WSL2 has become available, and Thomas has a great installation guide here. Using OpenSSL in Ubuntu we can generate a self-signed certificate by:
- Generating a key
- Creating a certificate request
- Generating a certificate
Generate a Key
The following OpenSSL command will generate a 2048-bit RSA Key.
openssl genrsa -out aadappcert.pem 2048
Create a Certificate Request
Then we can generate a Certificate Signing Request.
openssl req -new -key aadappcert.pem -out aadappcert.csr
Generate a Certificate
And finally generate our self-signed certificate.
openssl x509 -req -days 365 -in aadappcert.csr -signkey aadappcert.pem -out aadappcert.crt

Update the Azure AD Application with the Certificate
With our self-signed certificate generated we can then upload it to our Azure AD Registered Application.

Once uploaded record the thumbprint. We will need this for our Python authentication script.

MSAL with Python and Certificate Authentication Script Configuration
You will need to update the following variables near the top of the script below.
- your tenantID (tenant GUID) or tenant name (yourTenant.onmicrosoft.com), of your registered Azure AD Application
- clientID of your registered Azure AD Application
- thumbprint of the uploaded certificate
- certfile for the location of your self-signed certificate
- scope for your scope(s) associated with your registered Azure AD Application
- queryUser that you will perform a test query for after authentication
Script Functions
To make this example reusable for future scripts I’ve created three functions.
- msal_certificate_auth
- this function is the certificate-based client credentials flow authentication process to Azure Active Directory.
- msal_jwt_expiry
- this function looks at the access token and displays the expiry time of the access token.
- msgraph_request
- a function to perform GET requests from Microsoft Graph.
The Script
Here is the script. Do not forget to install the dependency packages and update the tenantID, clientID, scope(s), queryUser, certificate thumbprint and file name/location before executing it. In the example script below the path (.\\filename.pem) of the certificate file is for the same directory as the script.
It will load the local certificate and use it for authentication to Azure AD using the registered Azure AD Application, display the Access Token and its expiry time before querying Microsoft Graph for an Azure AD User.

Summary
In this post I have shown how to configure an Azure AD Application with Application Permissions, generate a self-signed certificate and assign it as a secret on an Azure AD App and use Python and the Microsoft Authentication Libraries (MSAL) with Certificate Authentication.


