Update: Oct 2019. IdentityNow Roles can be easily managed using the SailPoint IdentityNow PowerShell Module.
Managing SailPoint IdentityNow Role Groups typically involves leveraging the SailPoint IdentityNow Portal for the creation and on-going management. That’s because the API for Roles is not published or documented.
What happens then if you have many to create, update/manage? How does the IdentityNow Portal use the non-published undocumented API’s to create and manage them? I’ve worked it out and am documenting it here in the interim until the API’s get versioned and published.
Note: There is a chance that the Roles API may change in the future,
so use at your own risk.
Roles API Authentication
First up the Roles API URI looks like this.
https://OrgName.api.identitynow.com/cc/api/role
The /cc/ part is a good indication that the API isn’t documented, but also that the Authentication mechanism to interact with it is using a JWT Bearer Token. I covered how to obtain a JWT Bearer Token specifically for interacting with these API’s in this post here. I’m not going to cover that here so read that post to get up to speed with that process.
Associated with managing the criteria of Roles we will also need to reference IdentityNow Sources. We can do that via a non-published API too.
https://OrgName.api.identitynow.com/cc/api/source
Listing all IdentityNow Roles
Similar to Governance Groups that I detailed in this post Roles can be returned on an individual basis (if you know the ID of the Role which you won’t). So the simplest way is to query and return them all (no, the Search (BETA) doesn’t support Roles either). The API to list all roles is:
https://OrgName.api.identitynow.com/cc/api/role/list
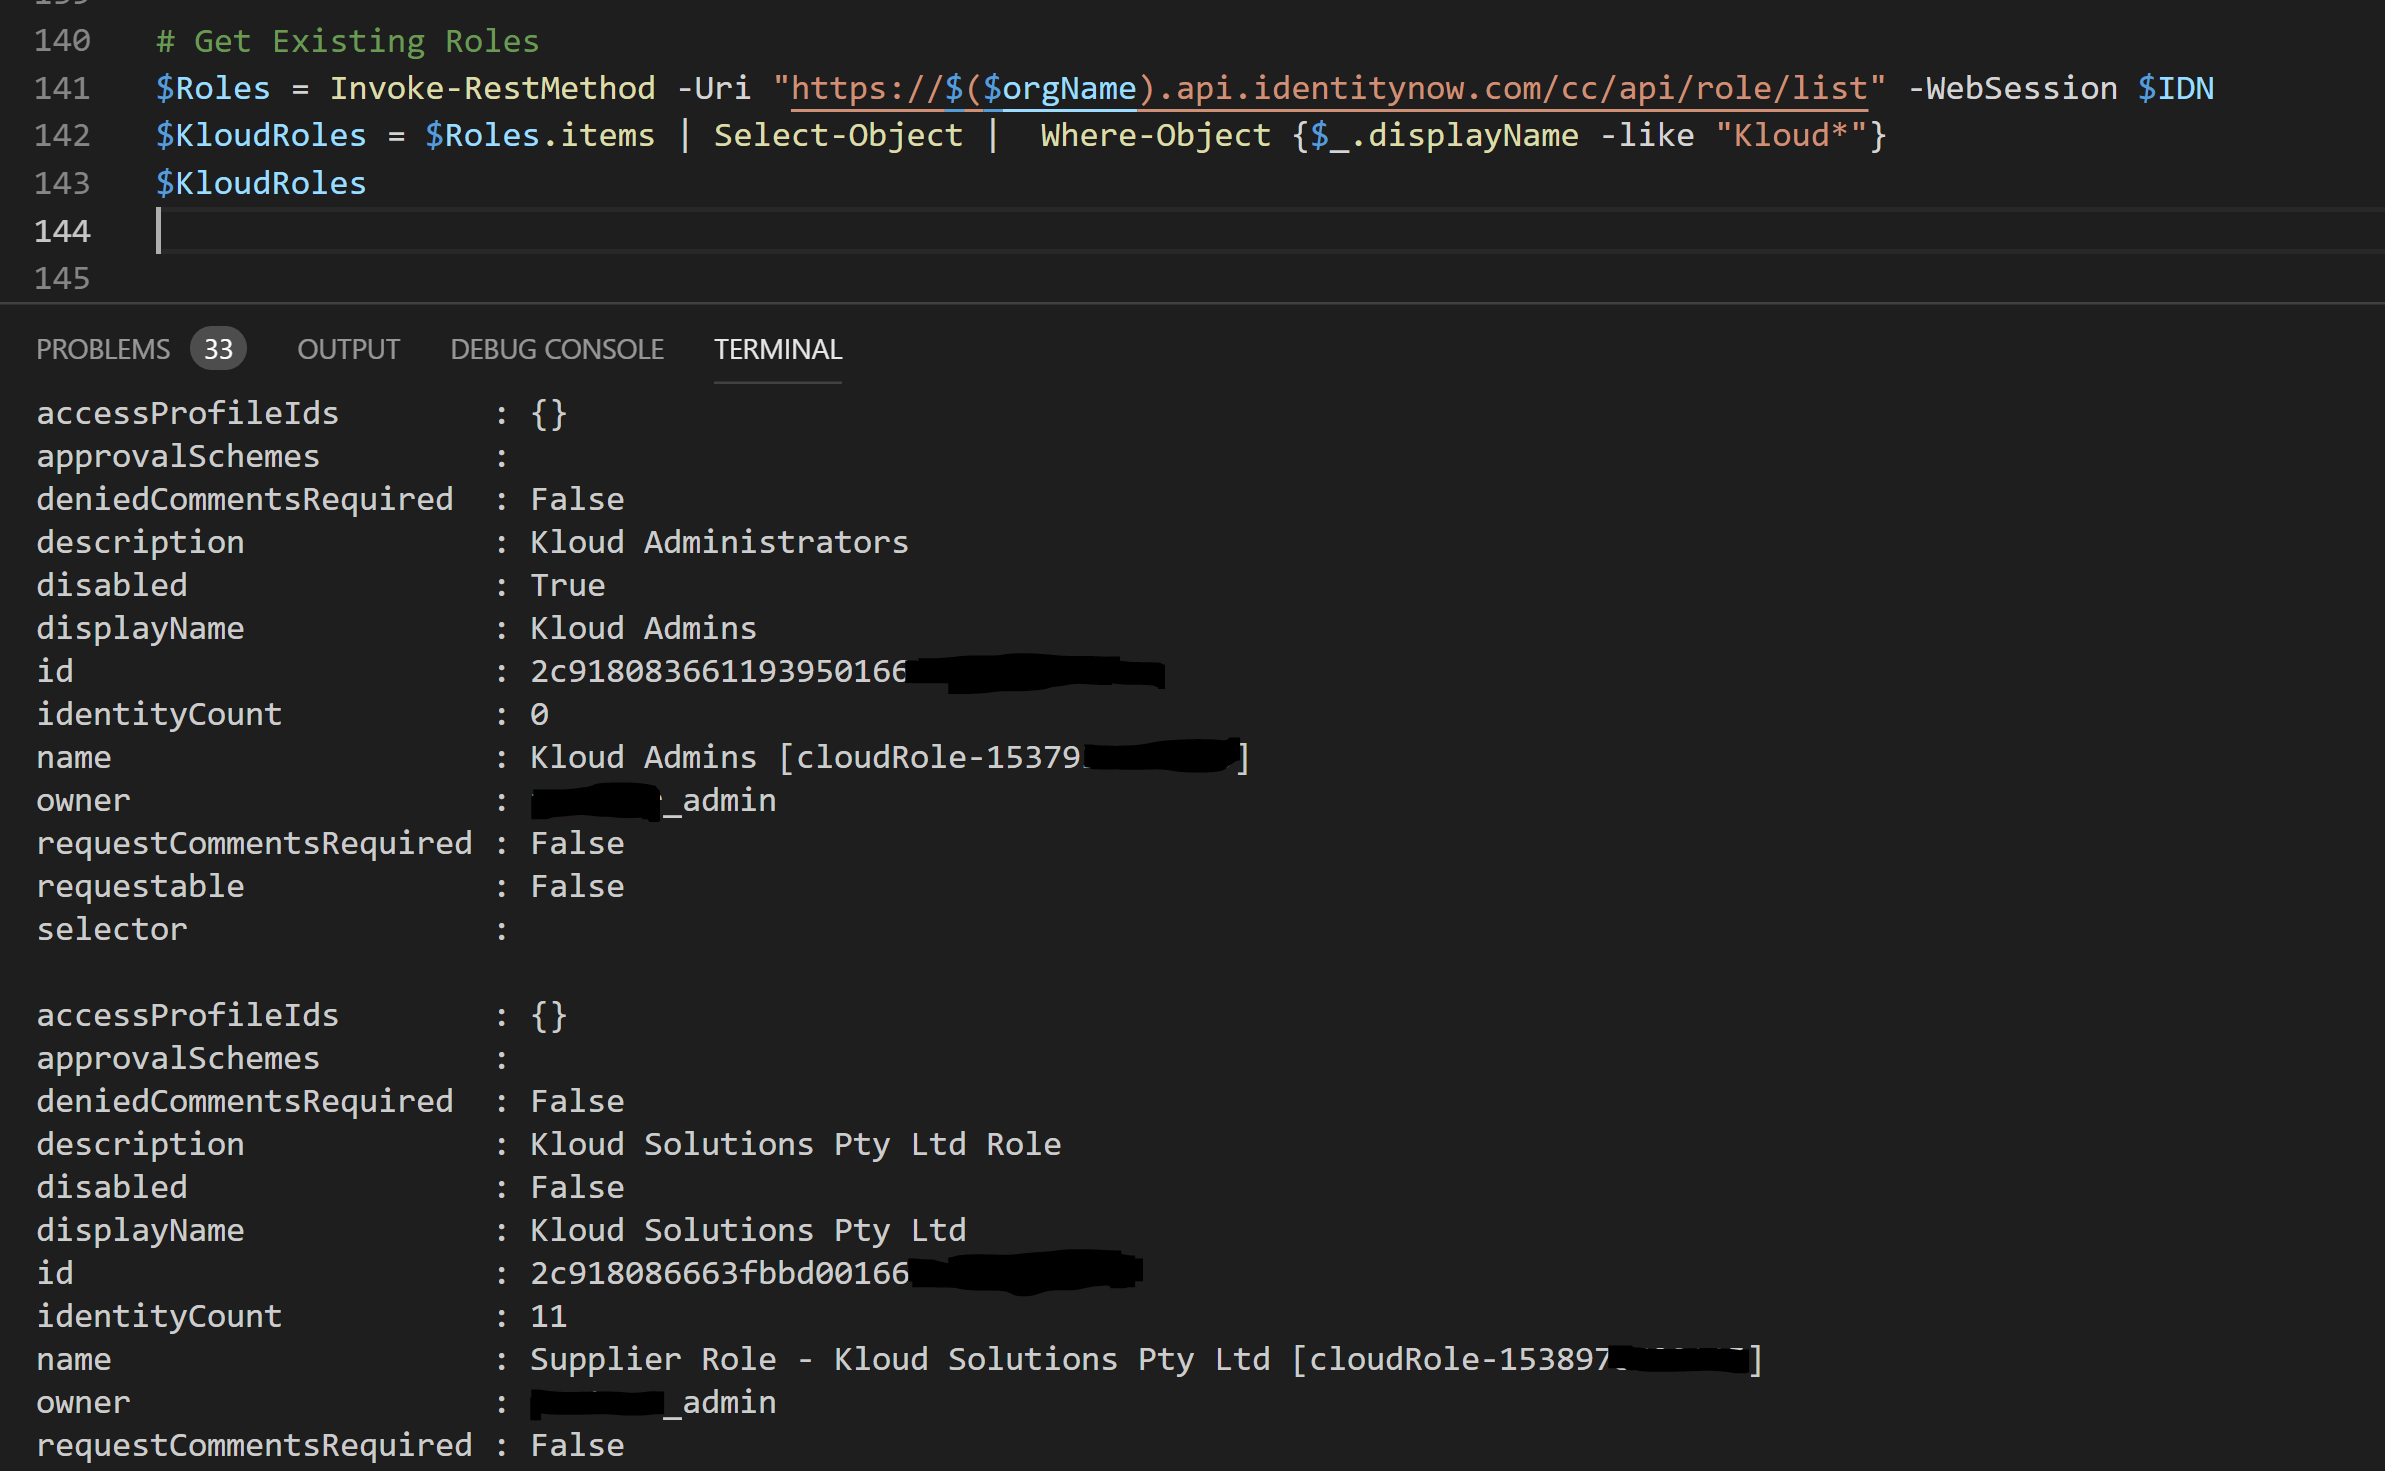
Doing this then via PowerShell to return all roles looks like this:
Roles = Invoke-RestMethod -Uri "https://OrgName.api.identitynow.com/cc/api/role/list" -WebSession $IDN
$Roles.items | Select-Object | Where-Object {$_.displayName -like "Kloud*"}
Creating Roles
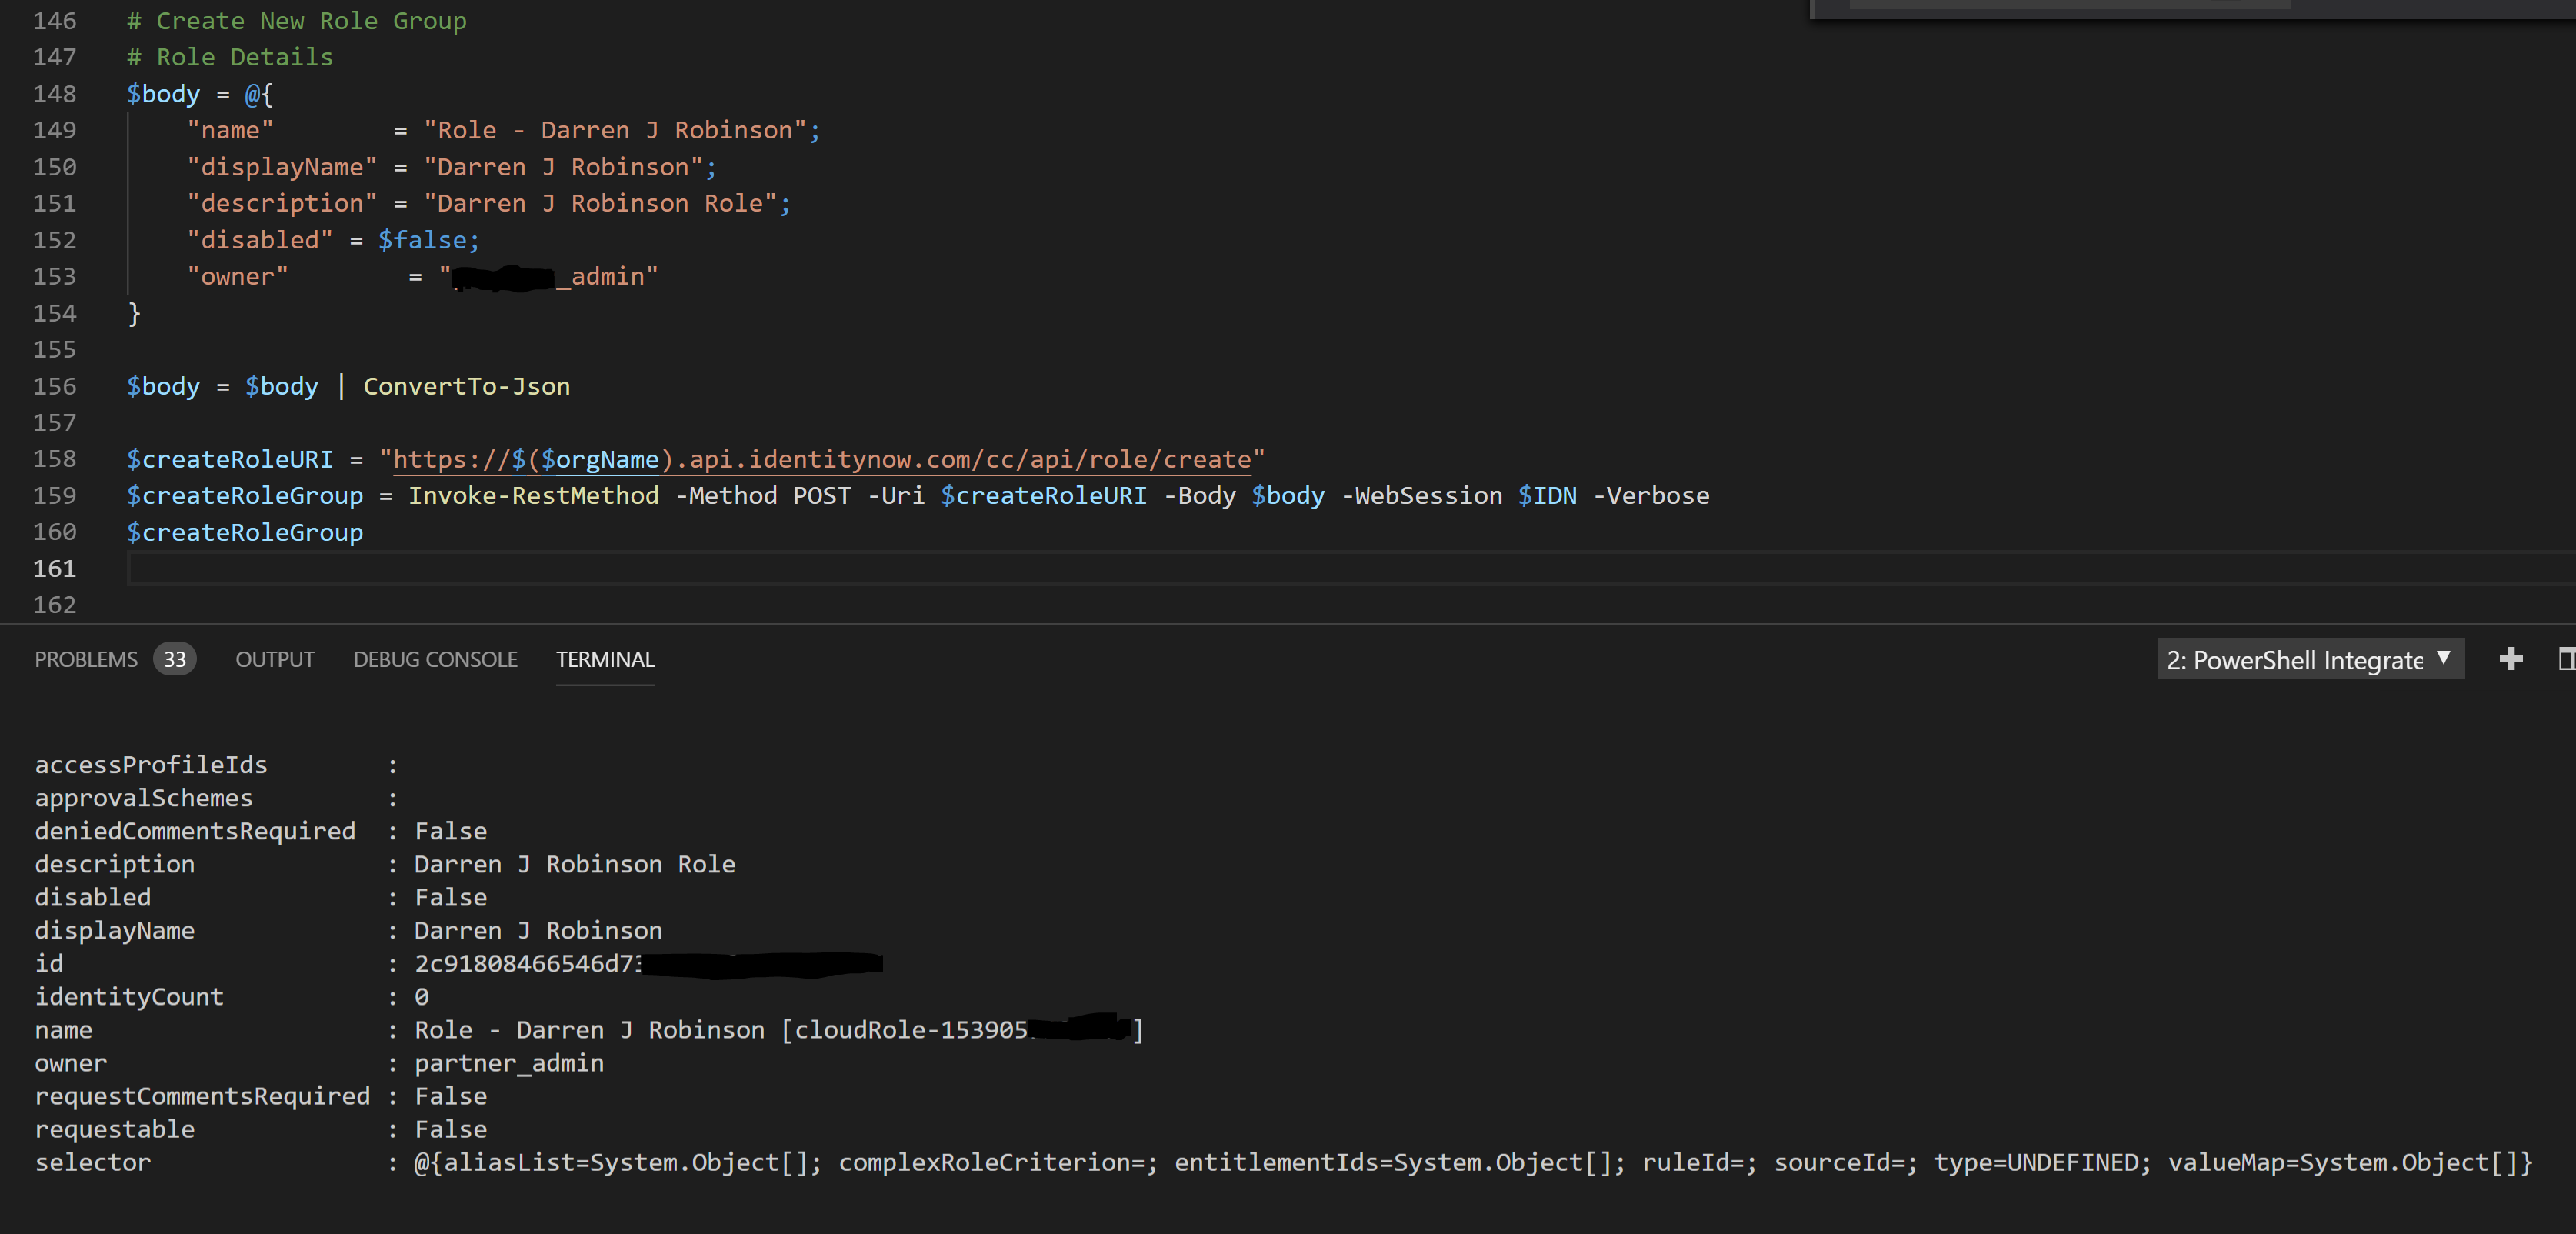
The example script below shows the generation of information for a Role Object. Specifically;
- name
- displayname
- description
- disabled (whether the Role is enabled or disabled)
- owner (the IdentityNow NAME attribute value of the owner of the Role)
Executing this creates the Role.
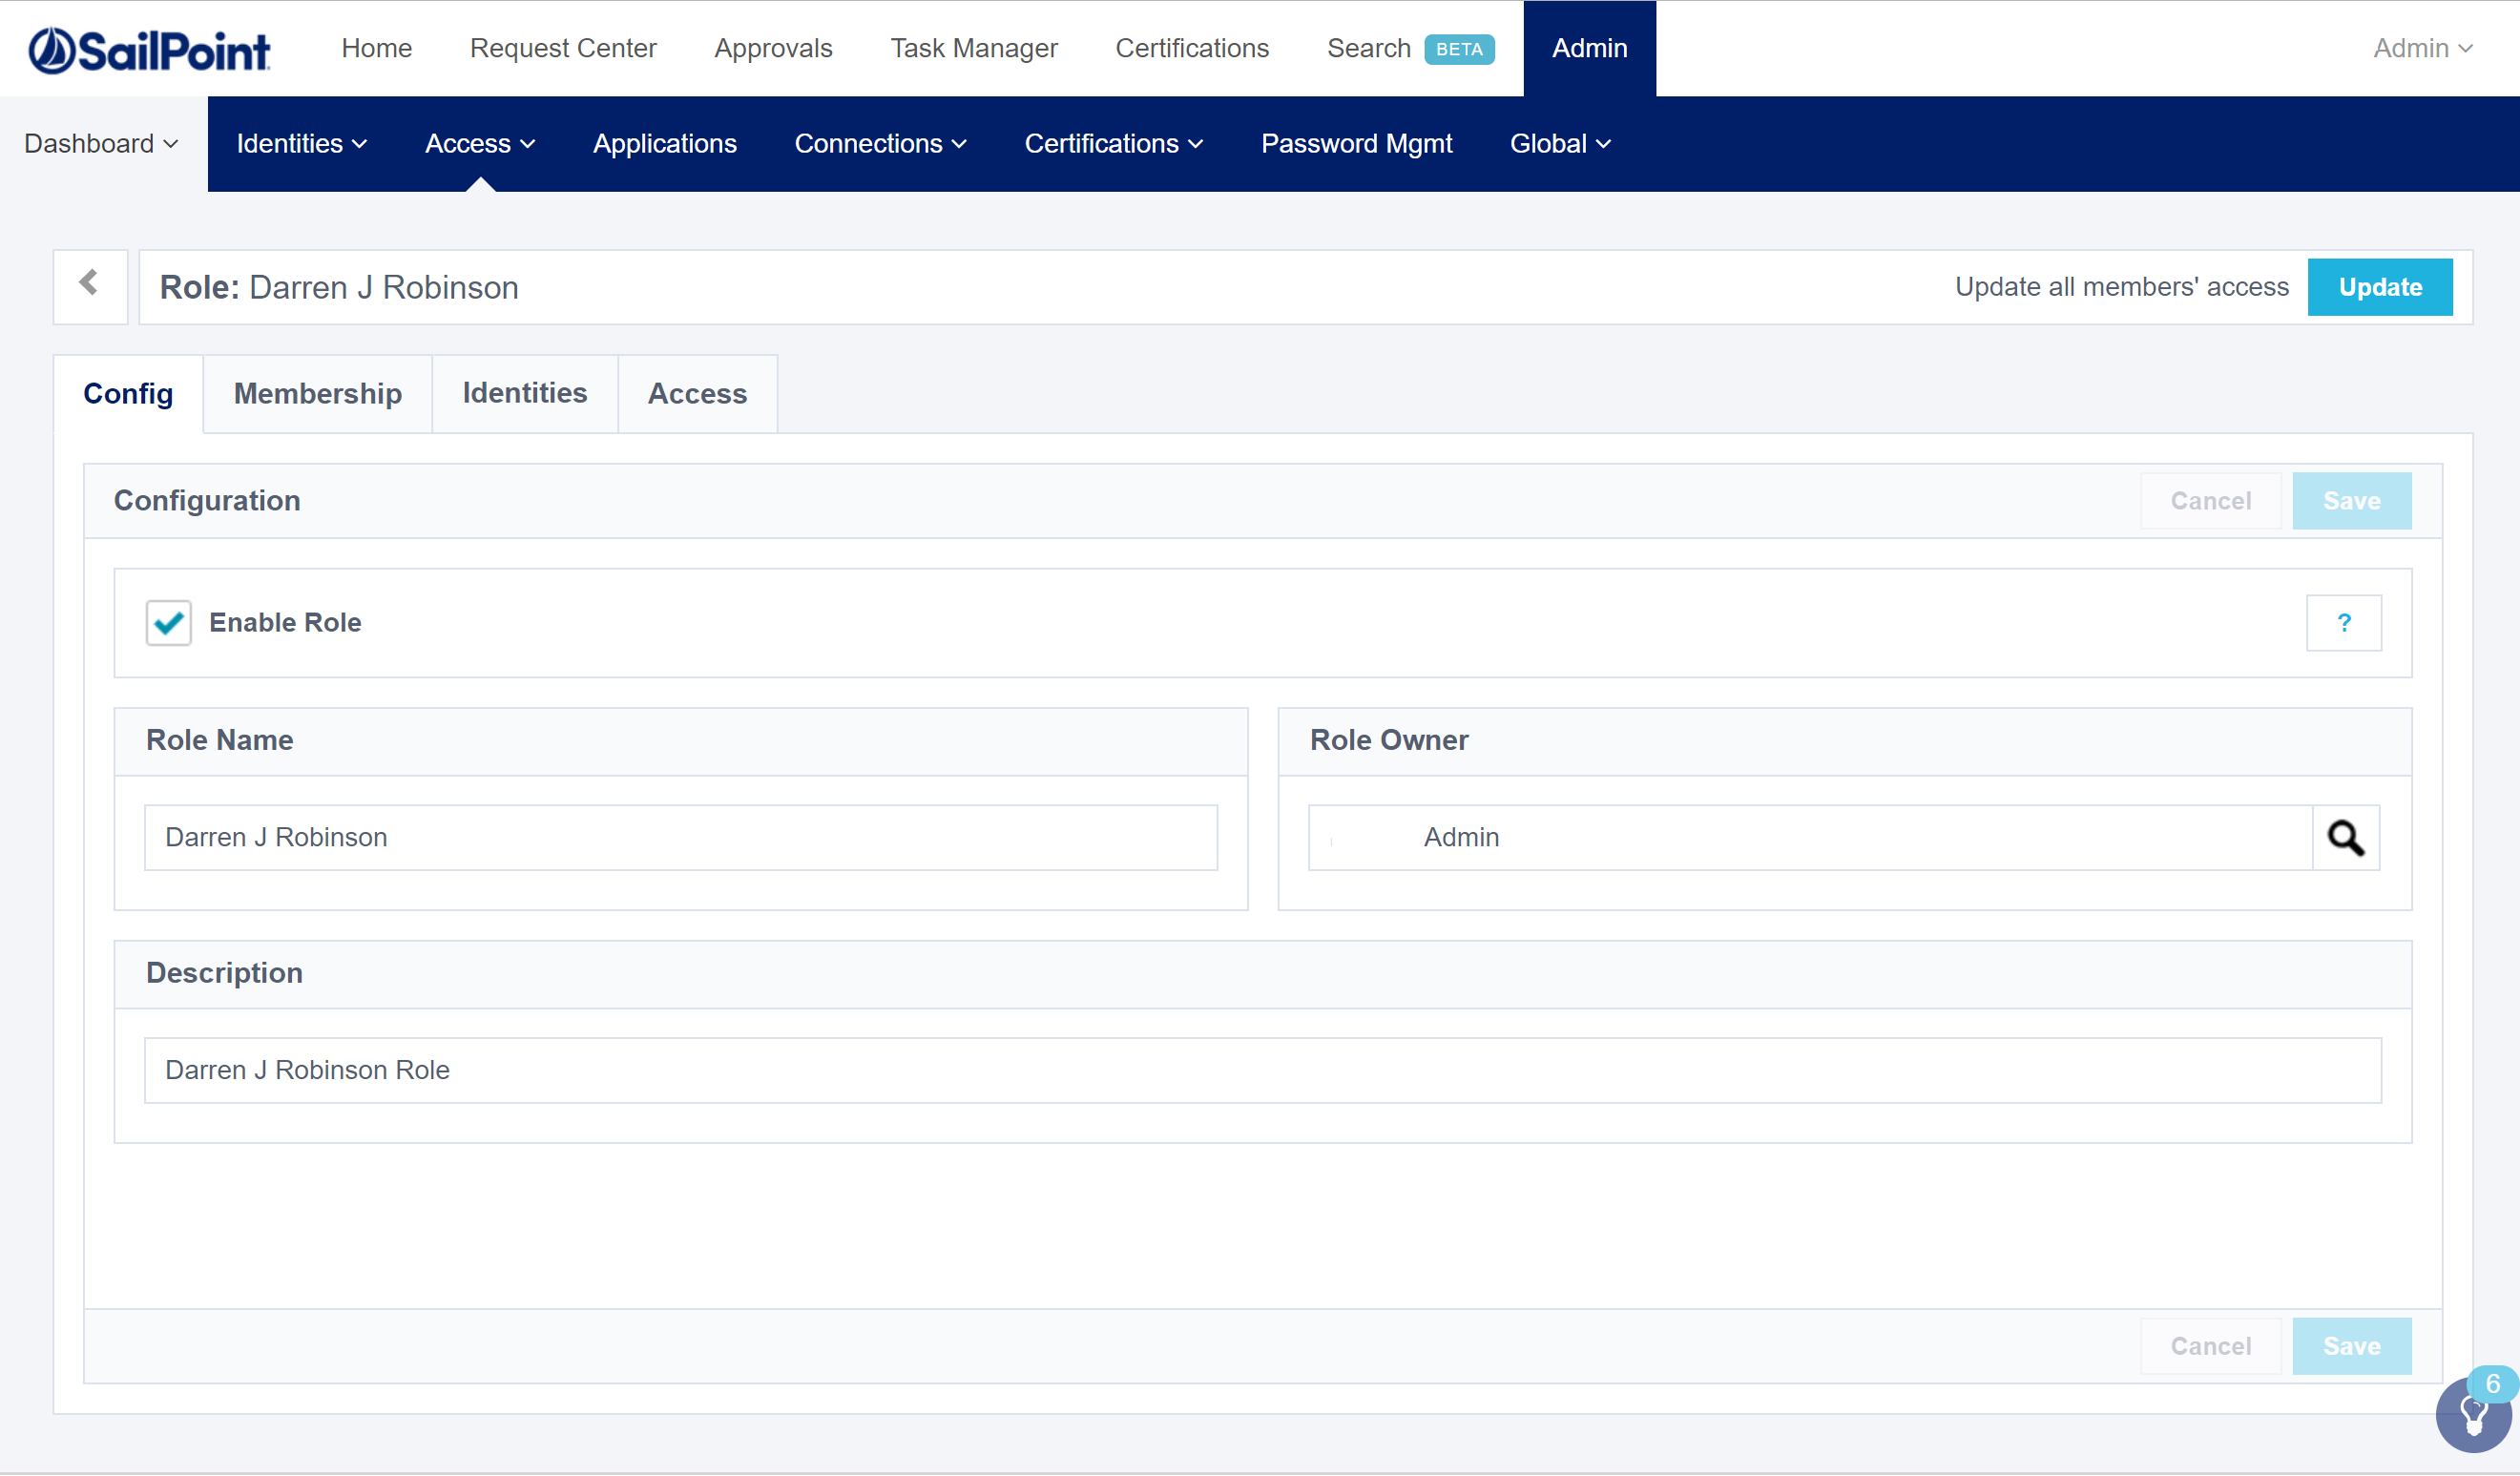
Looking in the Portal we can then see the Role.
Managing Role Criteria
The Role Criteria will obviously depend on what your criteria is. Is it based on Standard Group Rules, a List of Identities or Custom? I’ll cover a List of Identities and Group based criteria.
Adding a List of Identities to a Role
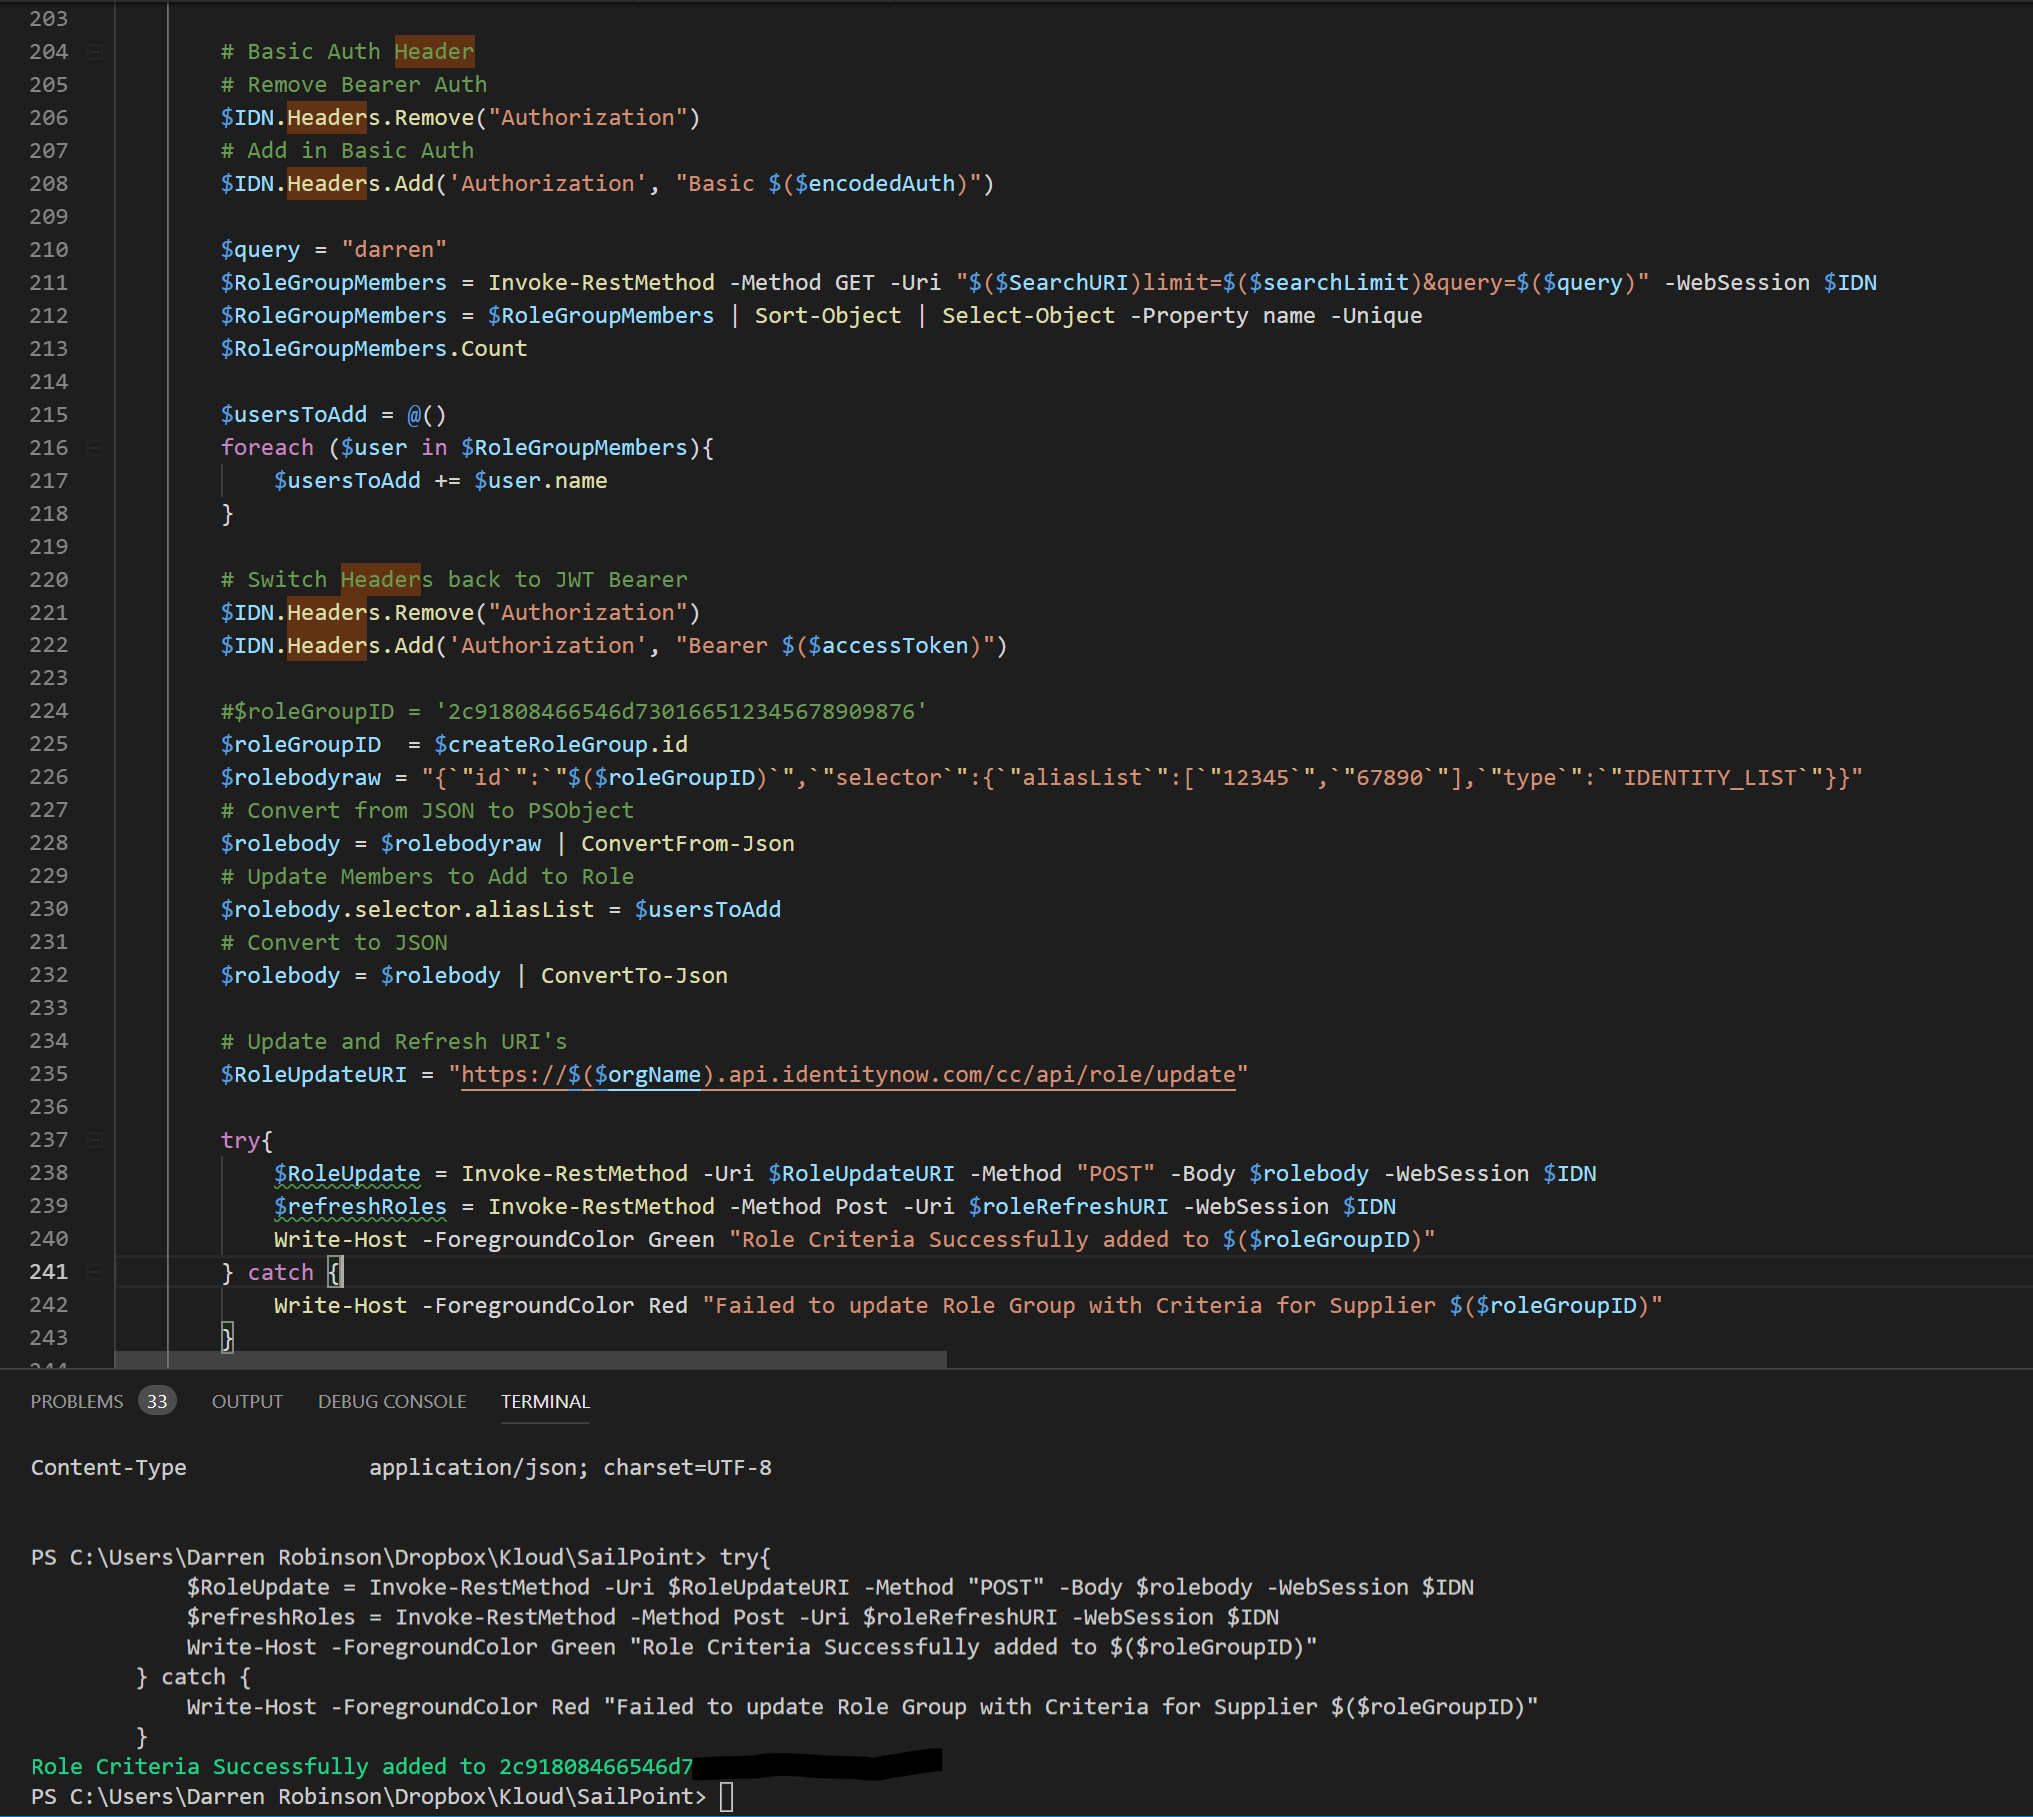
This isn’t too dis-similar to Governance Roles. We search for the list of users we want to add to the Role and add them to a collection. The key difference is that we use Name instead of ID. We then specify the type of Criteria (Identity_List) and the ID of the Group to update.
Executing the Script
The example script below switches the Headers for Basic Auth to use the v2 endpoint to search and locate the users to add to the Role. It then switches the Headers over to JWT Bearer Auth, generates the body for the request to update the Role Group and updates the Role Group.
Executing the script looks as per below and runs through successfully.
Checking the Role Group in the IdentityNow Portal
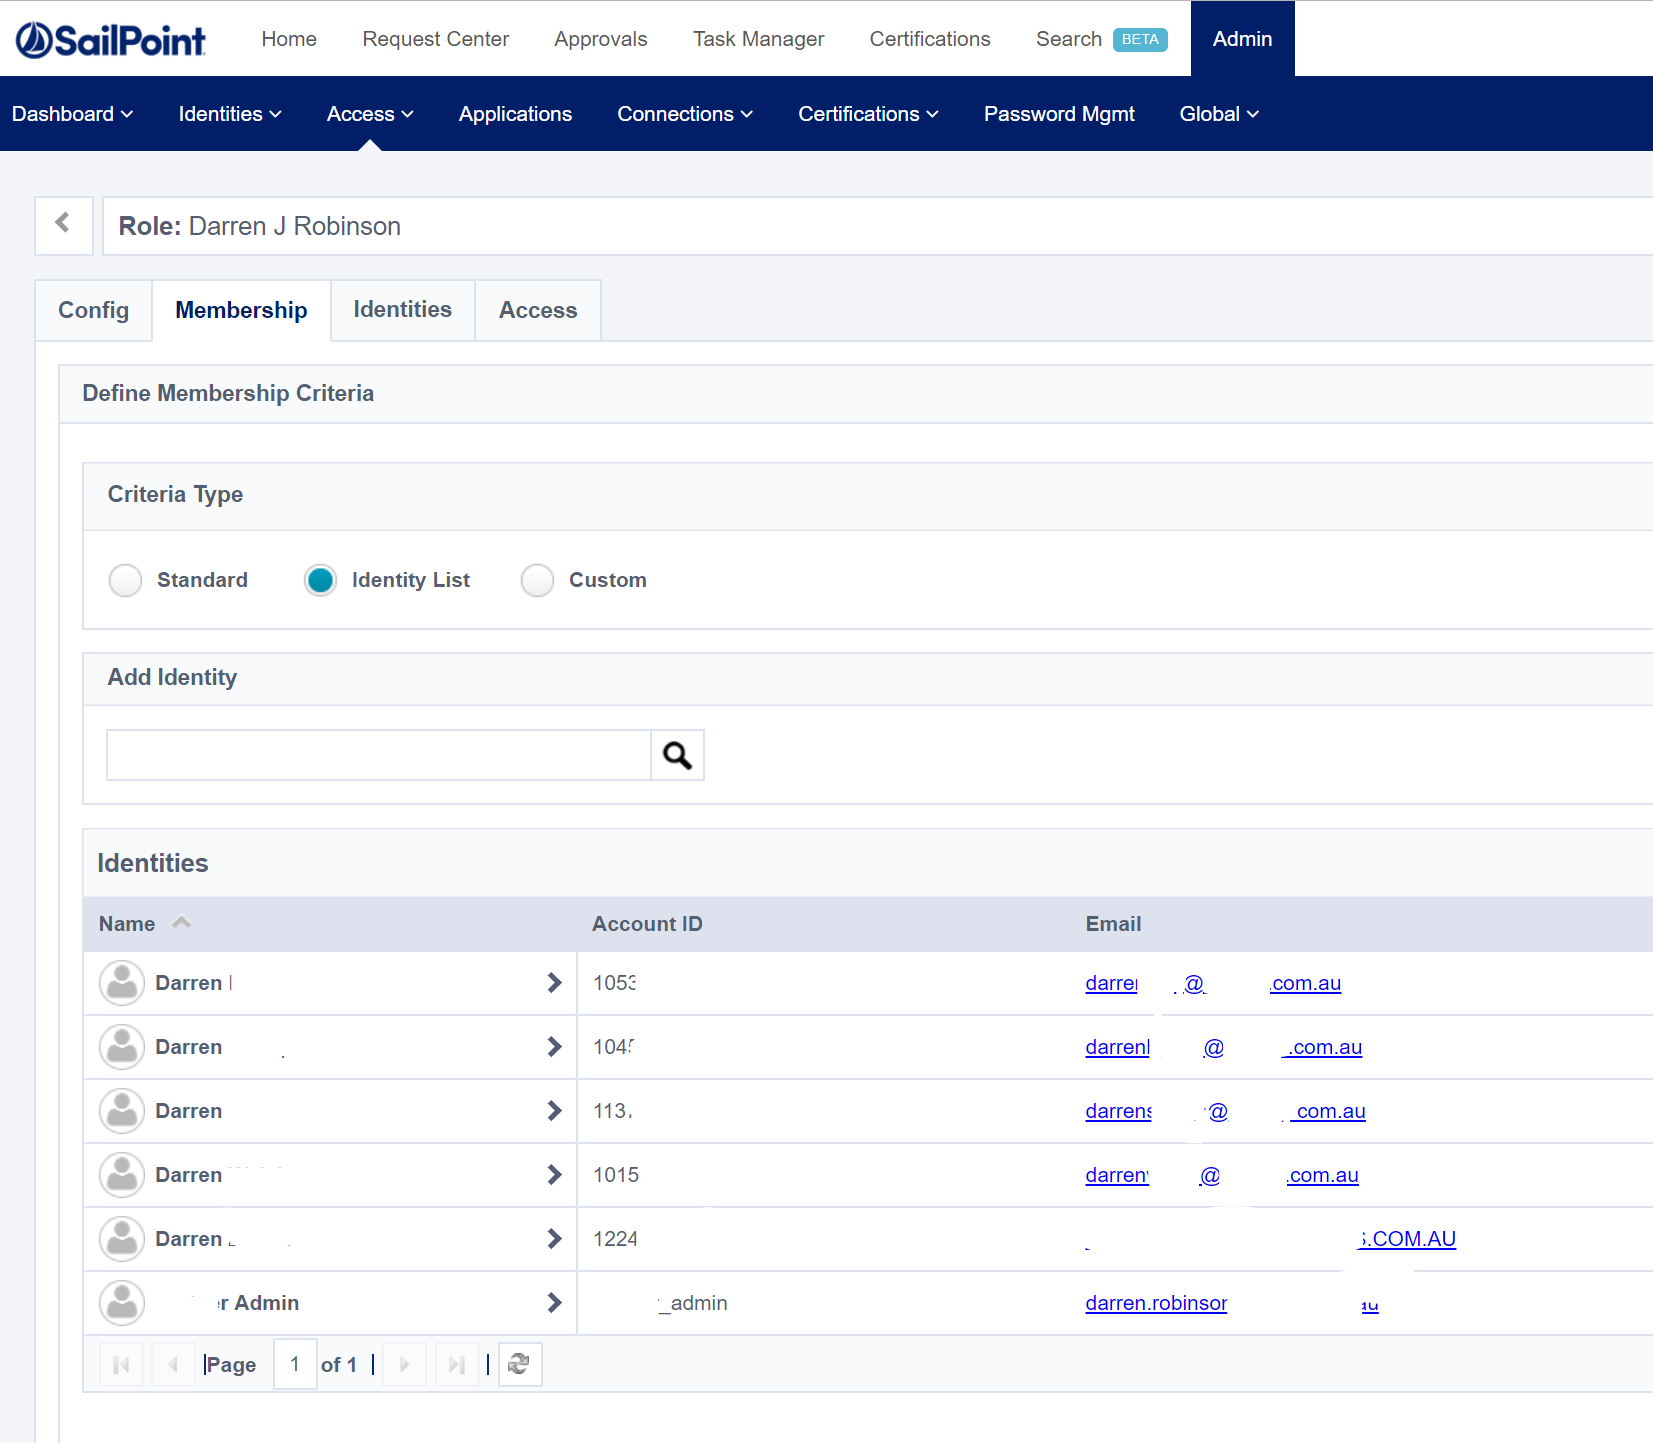
Adding a Members Based on Criteria to a Role
Adding users to a Role based on Criteria is similar to above except rather than searching for Identities we are adding the criteria for a role.
The criteria can be based on an Identity Attribute an Account Attribute or an Entitlement. I’ll show using an Identity Attribute and an Account Attribute.
Account Attribute based Criteria
Account criteria is based on attributes available in the Schema of a Source. In order to reference the Source we need the ID of the Source. This is available via the non-published Source API cc/api/source
The example script below shows getting all Sources and finding the one you want to base your Role Criteria off (based on name). You can of course mix criteria across many sources, but I’m showing you doing it from one. Running the following script will return your Sources. You require the ID of the Source you want to leverage attributes from to base your criteria off. The attribute that contains this used further along in these examples is $RoleSource
Now that we have the Source ID for the Source that contains the attribute that we want to base our Role Criteria on, we need to build the criteria. Let’s start with a simple one and Single Criteria.
Here is an example JSON document with a Single Criteria that contains the variables for the Role that we just created (Role ID), the Source ID for the Source with the attribute we are using for the criteria and the value we want to match (RoleCriteriaValue). The Attribute from my Source that I’m using is Supplier. Update for the attribute you’re using on your Source.
"{`"id`":`"$($newRole.id)`",`"accessProfileIds`":[],`"selector`":{`"type`":`"COMPLEX_CRITERIA`",`"entitlementIds`":[],`"aliasList`":[],`"valueMap`":[],`"complexRoleCriterion`":{`"operation`":`"OR`",`"children`":[{`"operation`":`"EQUALS`",`"key`":{`"type`":`"ACCOUNT`",`"property`":`"attribute.Supplier`",`"sourceId`":`"$($RoleSource)`"},`"value`":`"$($RoleCriteriaValue)`"}]}}}"

Having it as a PowerShell Object also makes it easy to modify. If you wanted to change the criteria to match against, the Operator and/or the operation then just change the value. e.g. the following will change the value to match from “Kloud Solutions Pty Ltd” to “Darren J Robinson”
$RoleCriteria.selector.complexRoleCriterion.children.value = "Darren J Robinson"
Convert back to JSON for Post via the webrequest to the API. That and updating the Role with the criteria thereby is;
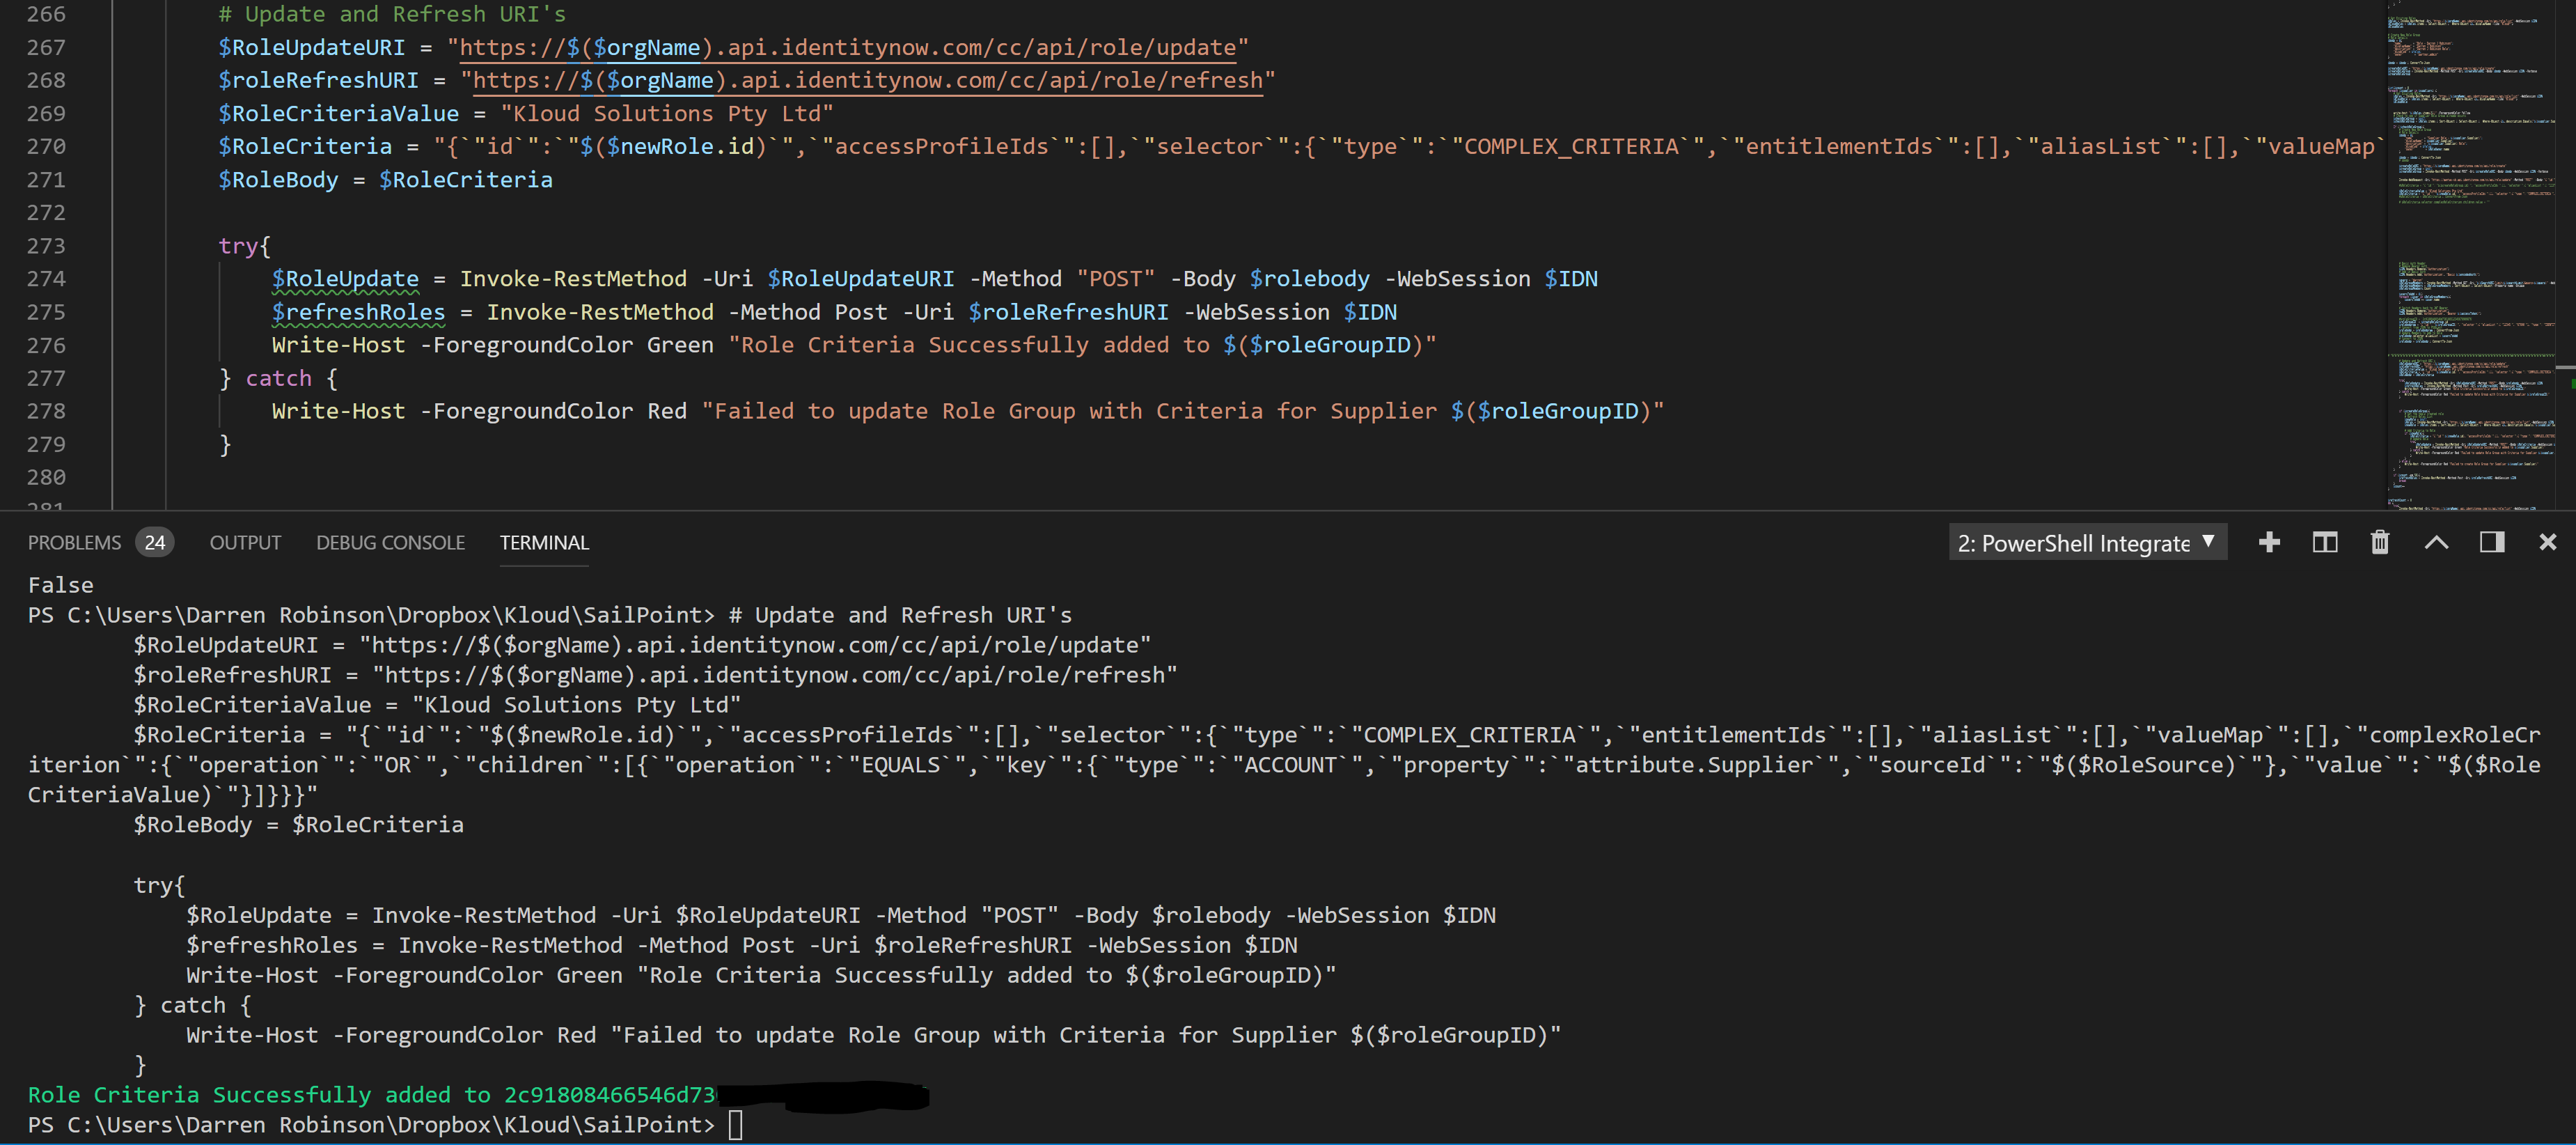
In the Portal we can see that the Criteria has been added.
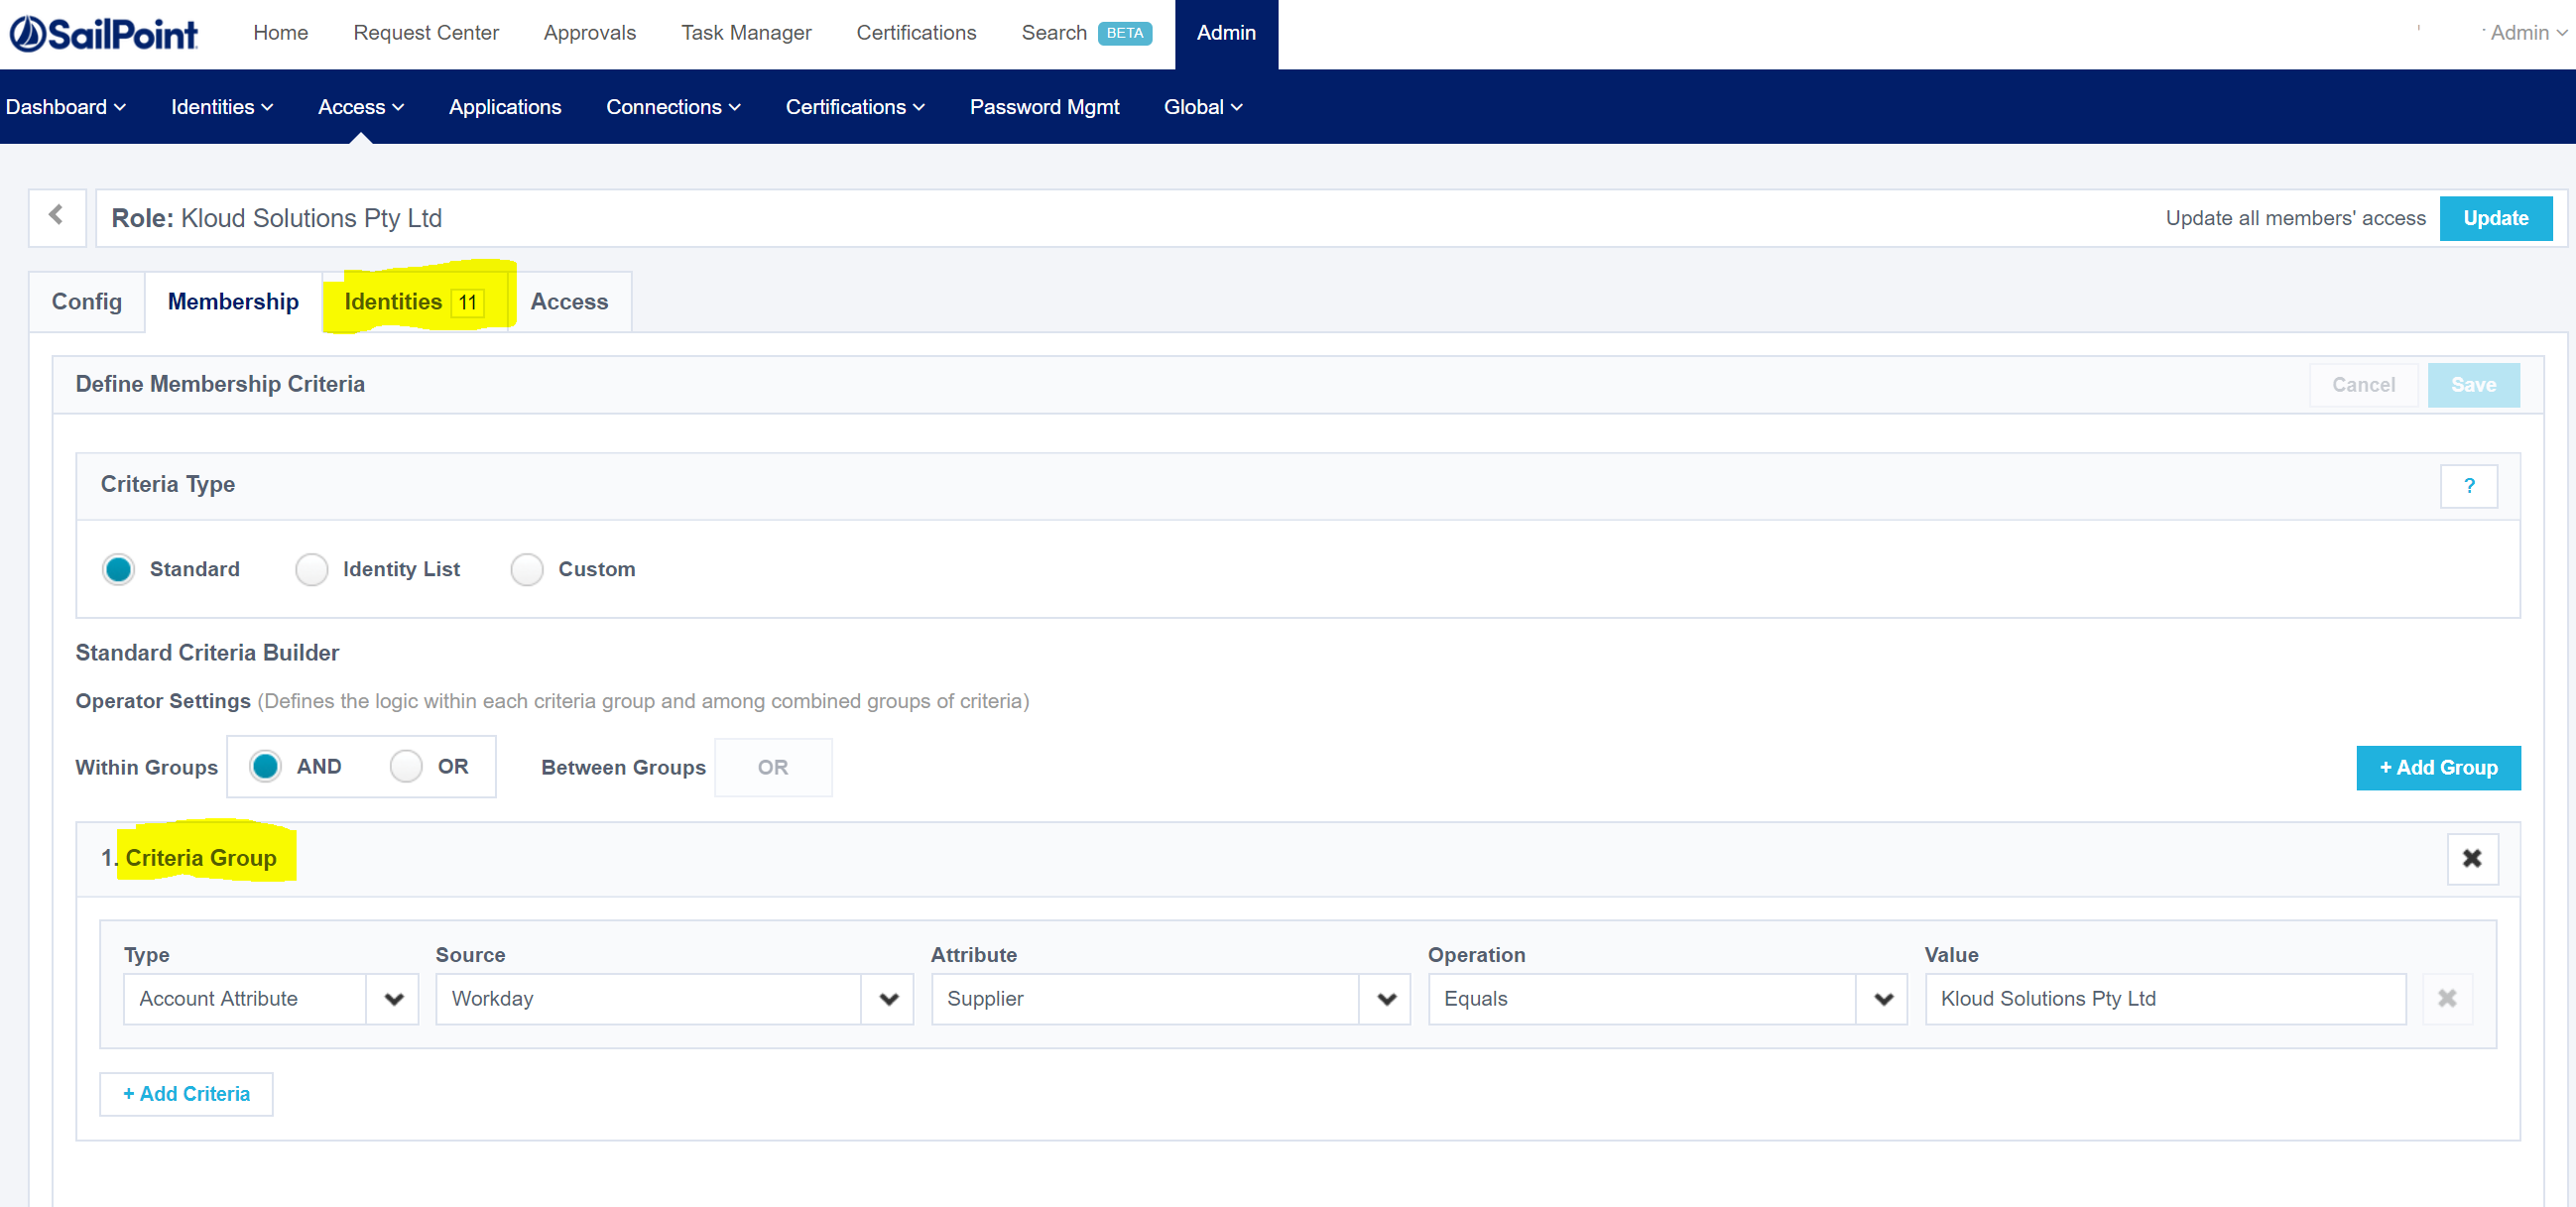
And you will notice I have a Role Refresh call after the update to update the Role Membership as it is now based on Criteria. If you are updating/adding criteria to numerous roles only call the Refresh at the end.

Adding Multiple Criterion
Multiple criterion is just more information to pass to the update. The format can be a little confusing so here is a template for three criteria showing the three Operators (Equals, Contains and Not_Equals).
$RoleCriteria = "{`"id`":`"$($newRole.id)`",`"accessProfileIds`":[],`"selector`":{`"type`":`"COMPLEX_CRITERIA`",`"entitlementIds`":[],`"aliasList`":[],`"valueMap`":[],`"complexRoleCriterion`":{`"operation`":`"OR`",`"children`":[{`"operation`":`"AND`",`"children`":[{`"operation`":`"EQUALS`",`"key`":{`"type`":`"ACCOUNT`",`"property`":`"attribute.Supplier`",`"sourceId`":`"$($RoleSource)`"},`"value`":`"$($RoleCriteriaValue)`"},{`"operation`":`"NOT_EQUALS`",`"key`":{`"type`":`"ACCOUNT`",`"property`":`"attribute.country`",`"sourceId`":`"$($RoleSource)`"},`"value`":`"New Zealand`"},{`"operation`":`"CONTAINS`",`"key`":{`"type`":`"ACCOUNT`",`"property`":`"attribute.email`",`"sourceId`":`"$($RoleSource)`"},`"value`":`".com.au`"}]}]}}}"
When converted to a PowerShell Object and displayed it looks like this;

Identity Attribute based Criteria
The last example is Identity Attribute Criteria. This is simpler than the Account Attribute Criteria as we just need to reference the Identity Attribute and don’t need to reference a Source. A single criteria for isEmployee = True looks like this;
{`"operation`":`"EQUALS`",`"key`":{`"type`":`"IDENTITY`",`"property`":`"attribute.isemployee`"},`"value`":`"true`"}
As a second Criteria Group though in the Portal it looks like this;
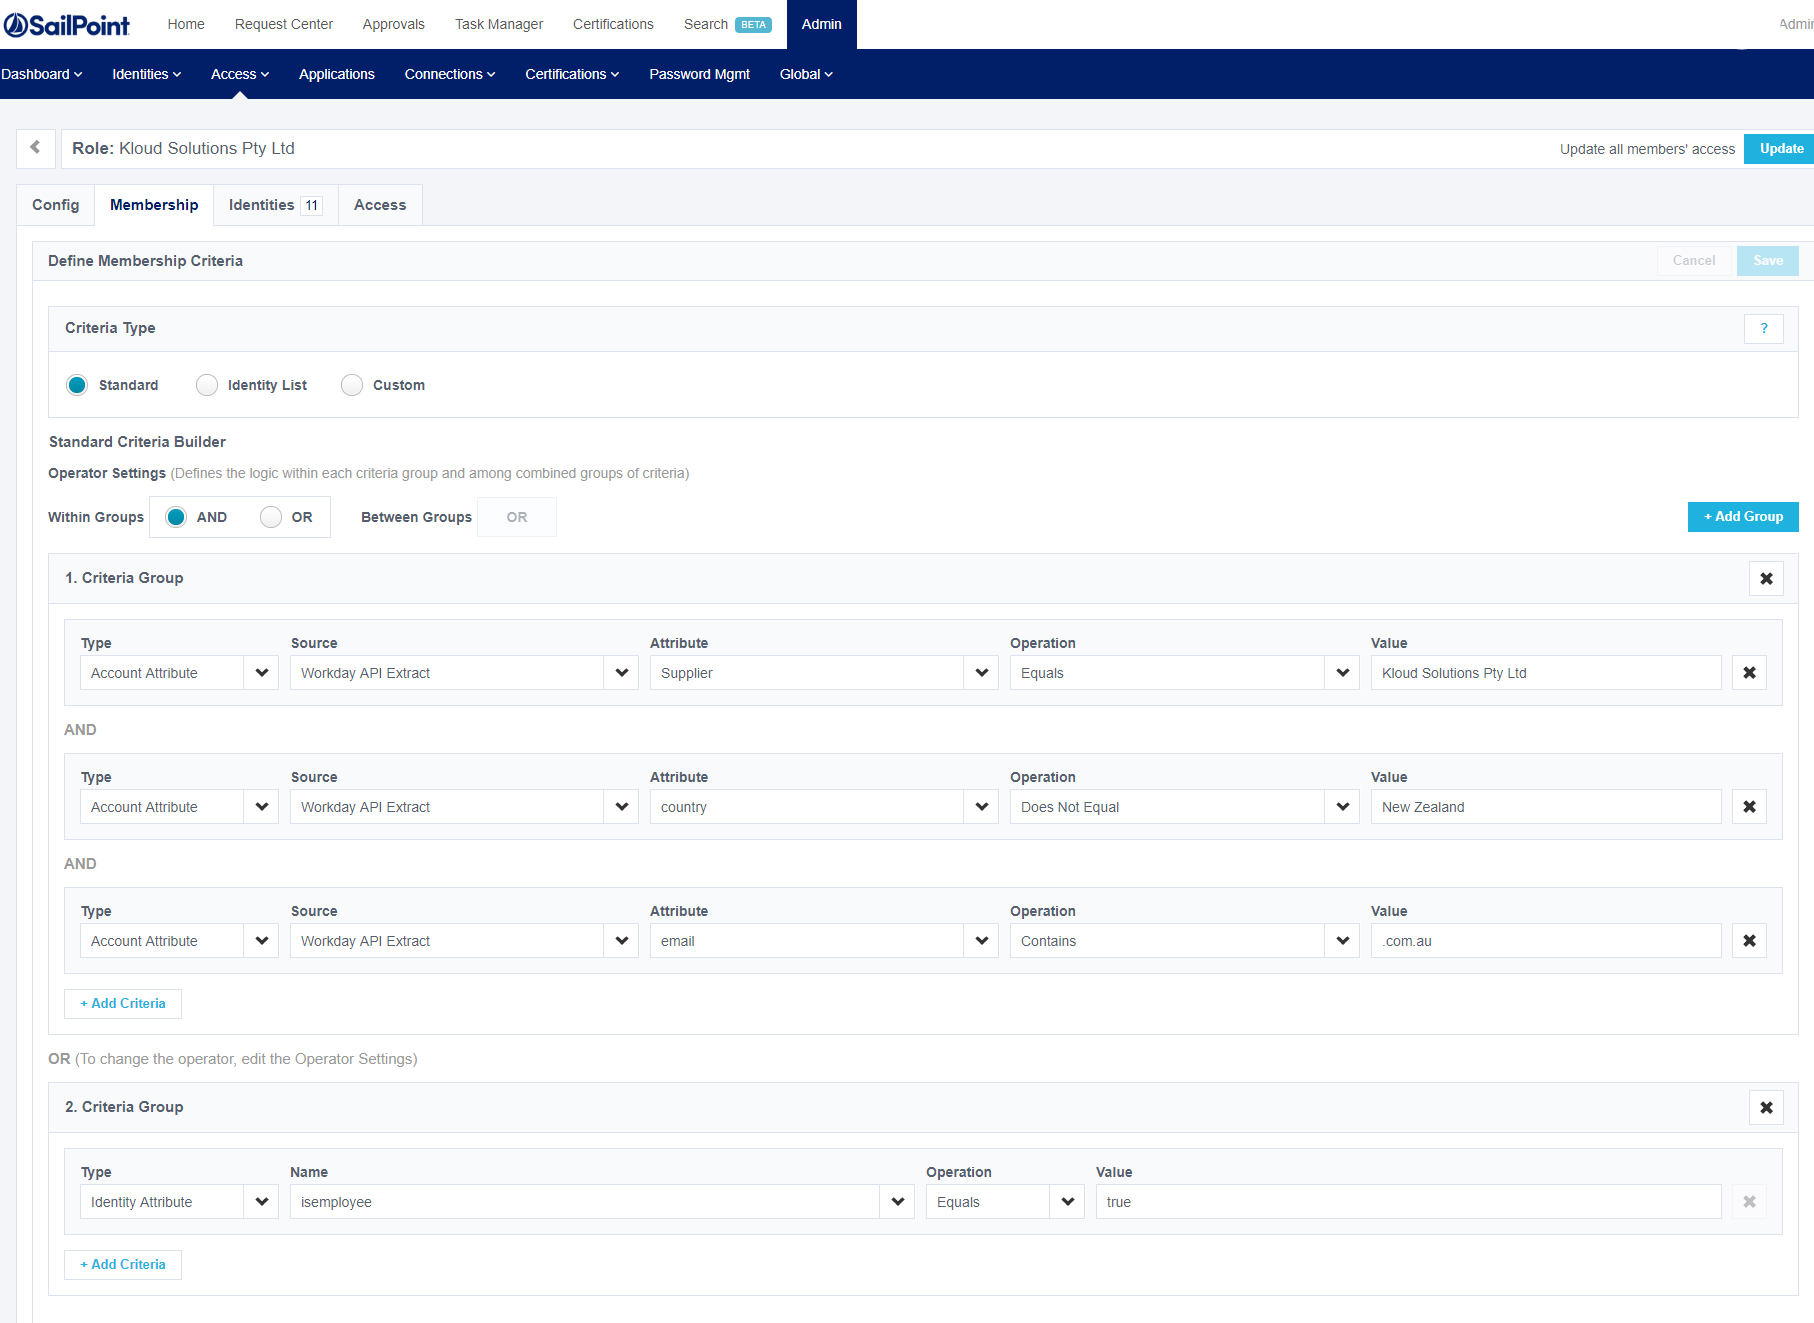
and for the JSON object (RAW without variablizing) looks like this;
"{`"id`":`"2c918086663fbbd0016612345678909876`",`"accessProfileIds`":[],`"selector`":{`"type`":`"COMPLEX_CRITERIA`",`"entitlementIds`":[],`"aliasList`":[],`"valueMap`":[],`"complexRoleCriterion`":{`"operation`":`"OR`",`"children`":[{`"operation`":`"AND`",`"children`":[{`"operation`":`"EQUALS`",`"key`":{`"type`":`"ACCOUNT`",`"property`":`"attribute.Supplier`",`"sourceId`":`"2c91808365f742620165f9ba0e831bf8`"},`"value`":`"Kloud Solutions Pty Ltd`"},{`"operation`":`"NOT_EQUALS`",`"key`":{`"type`":`"ACCOUNT`",`"property`":`"attribute.country`",`"sourceId`":`"2c91808365f742620165f9ba0e831bf8`"},`"value`":`"New Zealand`"},{`"operation`":`"CONTAINS`",`"key`":{`"type`":`"ACCOUNT`",`"property`":`"attribute.email`",`"sourceId`":`"2c91808365f742620165f9ba0e831bf8`"},`"value`":`".com.au`"}]},{`"operation`":`"EQUALS`",`"key`":{`"type`":`"IDENTITY`",`"property`":`"attribute.isemployee`"},`"value`":`"true`"}]}}}"
Summary
Using the cc/api/role APIs we can Create Role Groups, Update Roles Groups to contain Criteria and Refresh Role Groups to have the membership calculated. With the base functionality detailed we can now use this to create and manage our Role Groups through automation. Happy Days.


