Update: Oct 2019. Leveraging the SailPoint IdentityNow API's is now easier using the SailPoint IdentityNow PowerShell Module.
Also see this post for how to generate v2 and v3 API credentials.
UPDATE: 18 Dec 2018 Please see this new post on
accessing v3 / non-published SailPoint
IdentityNow API's using PowerShell.
The details in this post will still work for v1
& v2 API's.
This post supersedes (see above) my previous posts on leveraging the IdentityNow API’s in relation to API Authentication/Authorization;
- Reporting on SailPoint IdentityNow Identities using the ‘Search’ (Beta) API and PowerShell
- Integrating with SailPoint IdentityNow Private (v1) API’s using PowerShell
Using this Compass document as my guide (which takes a bit of finding) I’ve automated the process of being able to use PowerShell to leverage the non versioned/published API’s. The method I show below is also valid for the documented and versioned API’s.
I show how I generate the necessary credentials required for:
- IdentityNow Basic Authentication
- IdentityNow Cookie Authentication
- IdentityNow JWT oAuth Bearer Authentication
I also show working calls using Basic and JWT oAuth Authentication. The CCSessionID is extracted for use in Cookie Authentication for completeness, but everything can be accomplished using Basic and JWT oAuth Authentication. This document on SailPoint Compass provides more details on each.
Script Overview
Using PowerShell I;
- authenticate to the IdentityNow Portal
- elevate via authentication to the Admin section of the IdentityNow Portal
- obtain the CCSESSIONID Cookie and the CSRF Token
- provide the ability to add into the Web Session Header IdentityNow Basic or JWT oAuth Authentication credentials
That then allows access to the non-published API’s that are leveraged via the IdentityNow Portal and published API’s.
Obtaining the CSRF Token, JWT Access Token and Session Cookie Programatically with PowerShell
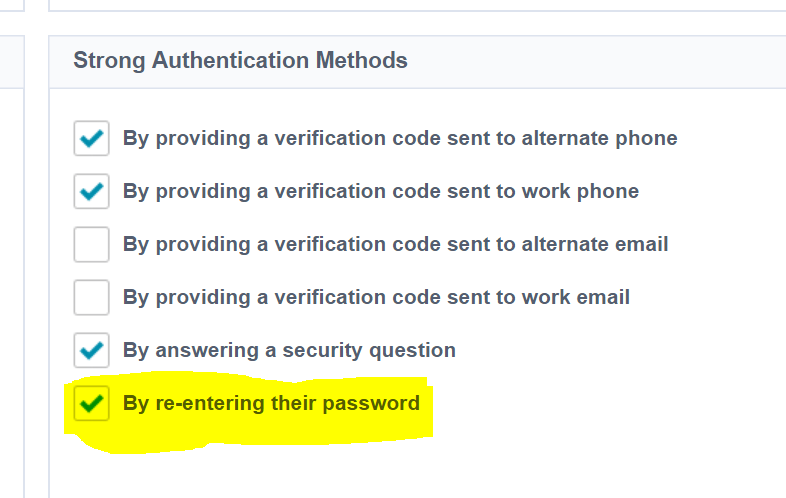
Update the Strong Authentication Methods for IdentityNow Admins
As we need to programatically authenticate to the Portal itself to get the necessary information required for API authorization, we need a mechanism that supports that. The only one that does easily is password. So you will need to enable that.
- NOTE: chances are you’re using programmatic access to configure/ingest data or configuration as part of service enablement. Once that is done, REMOVE “re-entering password” as a Strong Authentication Method.
In the IdentityNow Portal go to Admin => Identities => Identity Profiles => IdentityNow Admins =>Enable By re-entering their password
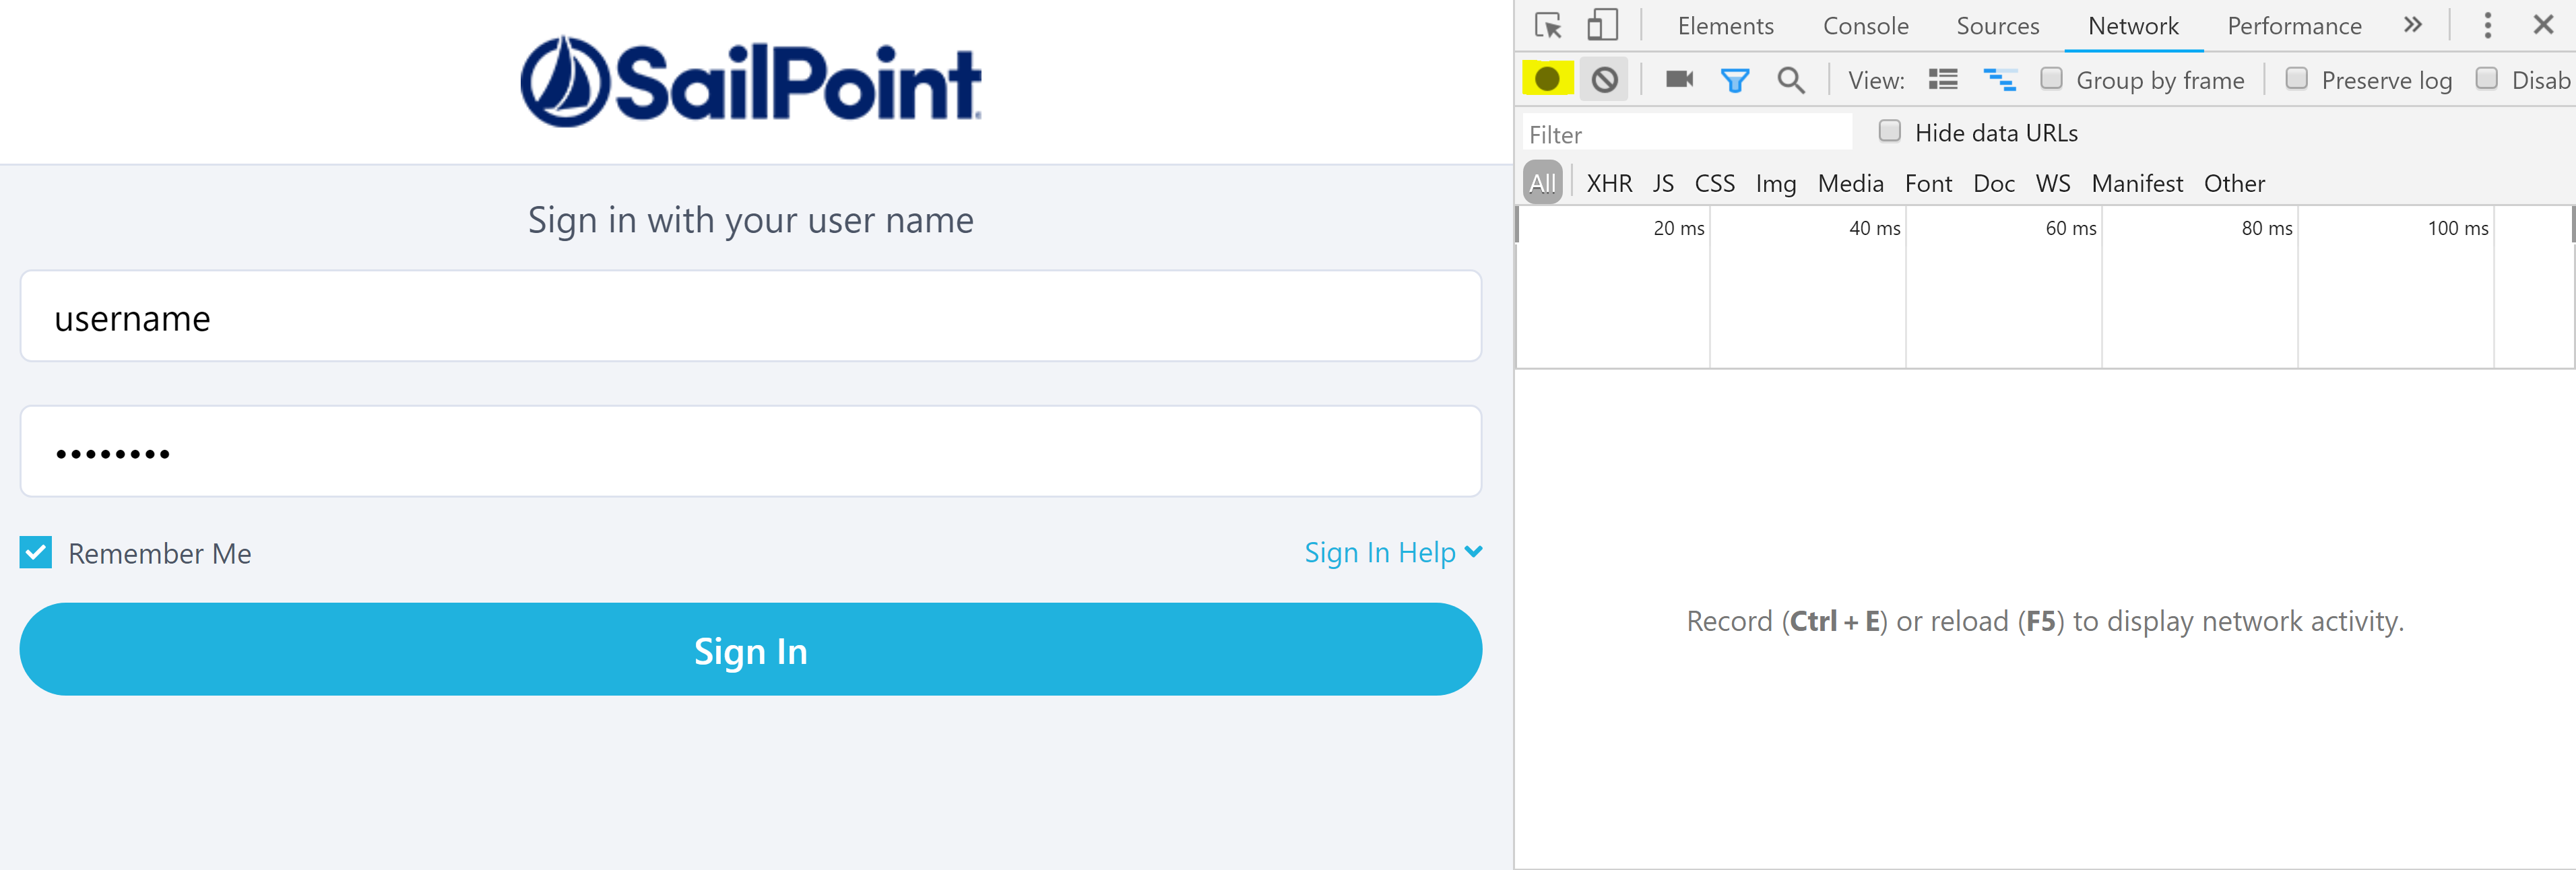
Using a Chrome Browser head to the IdentityNow Login screen for your Tenant. e.g. https://TENANT.identitynow.com. Press F12 for Developer Tools and then enter the Username and Password for an Admin account. Press the Record button (highlighted below, if it isn’t already red) to start recording and then press the Sign In button.
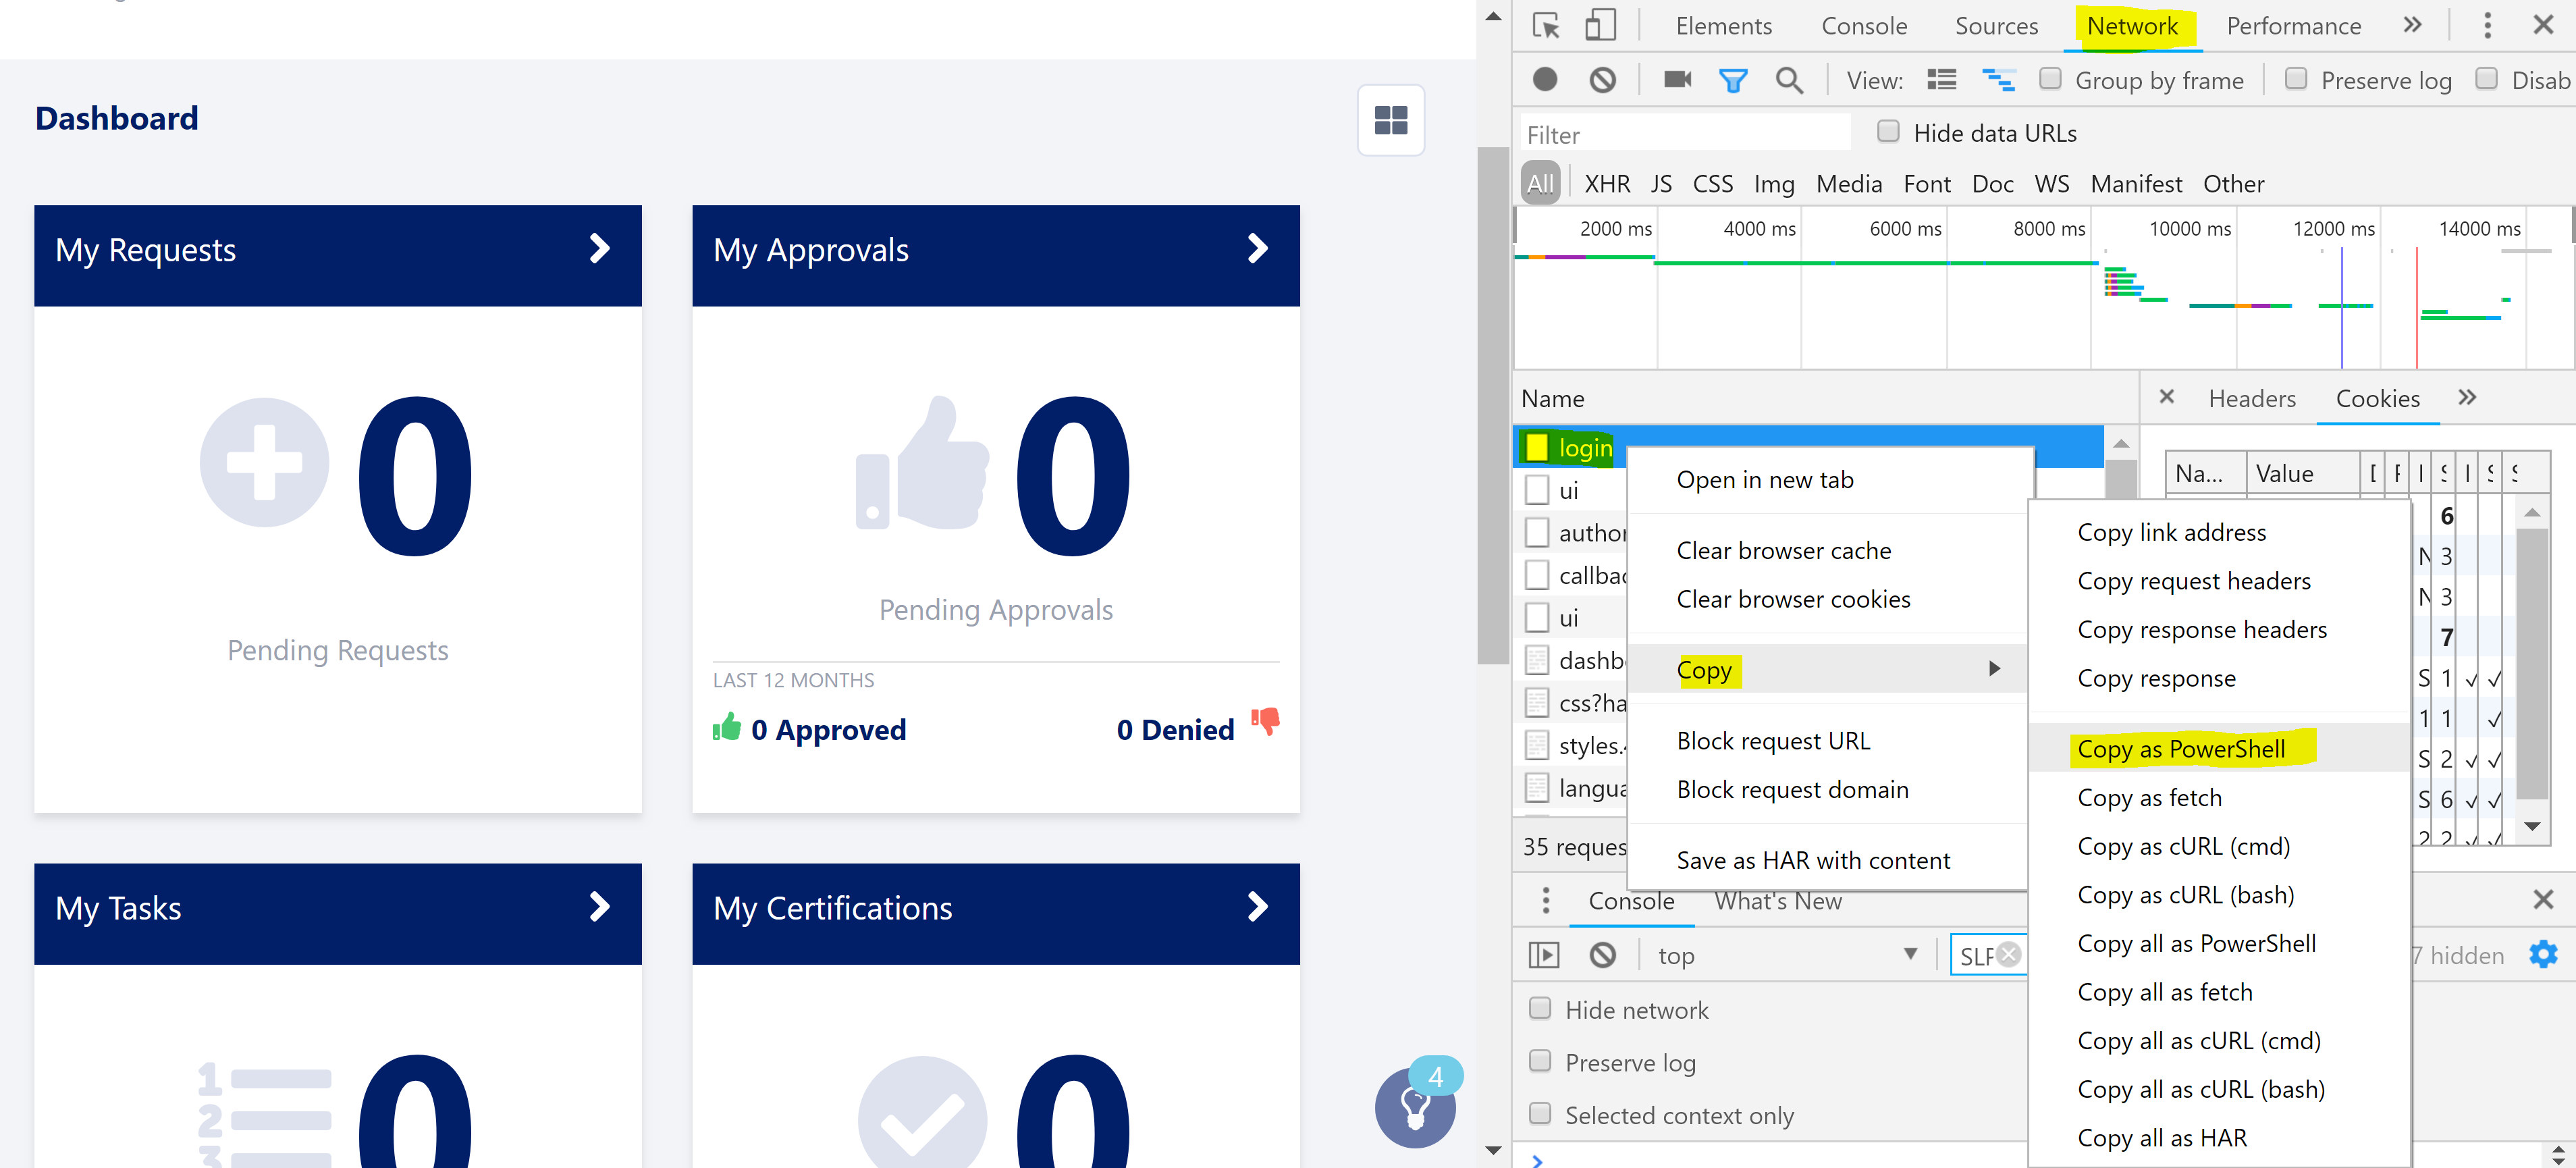
When the browser has logged you in, select the Network tab and then right-click on the ‘login’ entry in the trace. Select Copy and then Copy as PowerShell which will copy the webrequest that you just performed to login. Paste this into the script below on Line 25.
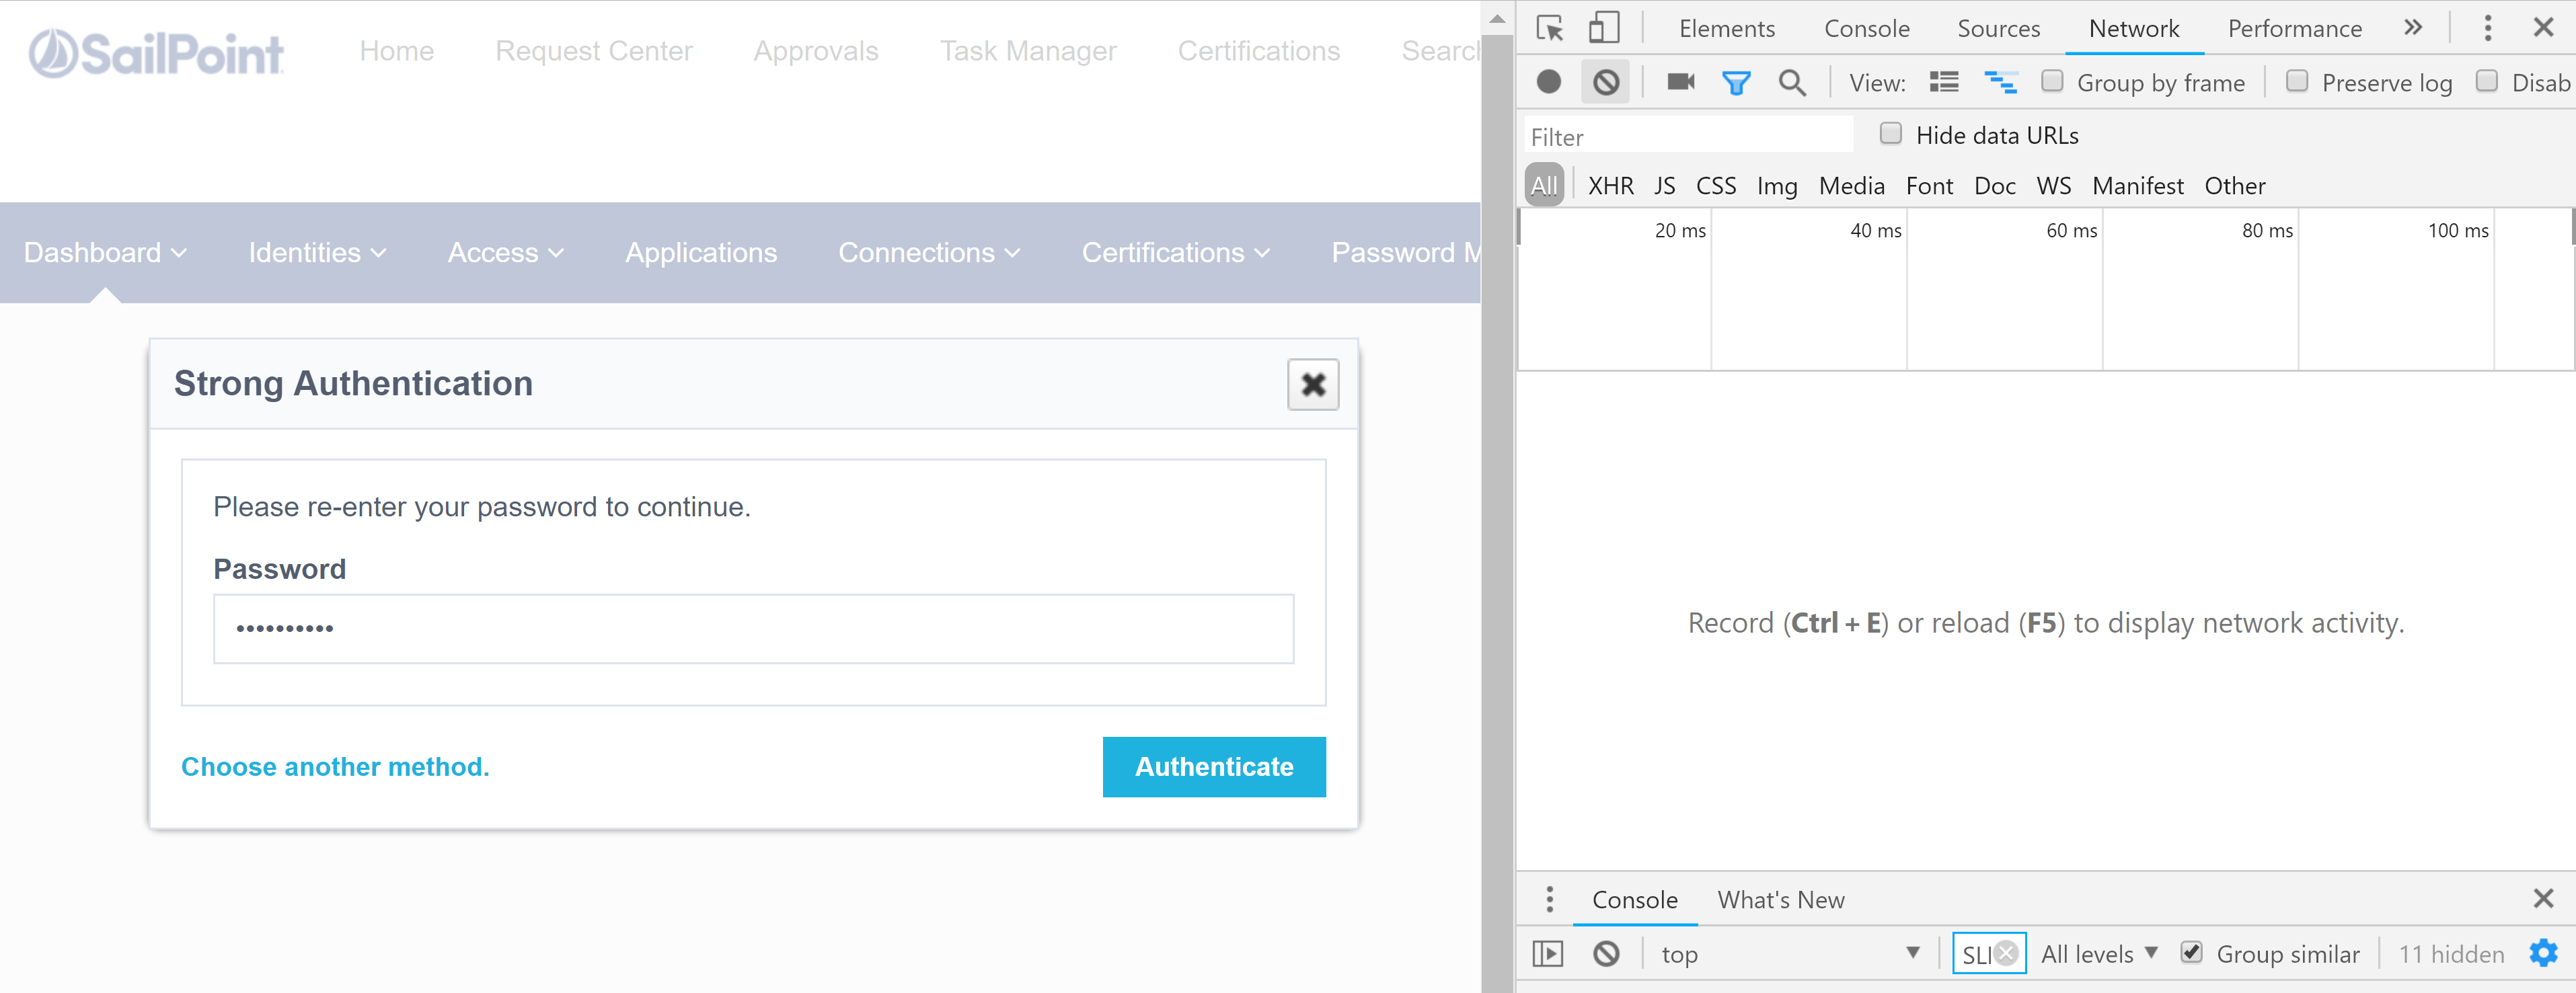
Next in the browser select Admin and then any of the Admin menu items. e.g. Dashboard => Overview. Select Enter password and check Remember my preference then Continue.

The next screen will give you the prompt to supply your password again. Enter the password and then clear the traces from the Developer Tools pane and then make sure Record is enabled, then press Authenticate.
Select the strongAuthn trace from the Network tab, right-click and select Copy and then Copy as PowerShell. Paste this into the script below on Line 43. Don’t forget to edit it for the CSRF Token variable.

The Script
Update the script below for your environment by:
- Line 3 with your IdentityNow Organisation name
- Line 9 with your IdentityNow API Client ID
- Line 11 with your IdentityNow API Client Secret
- Line 16 with your Admin login name for the IdentityNow Portal
- Line 25 with the first PowerShell Webrequest you copied above
- Line 43 update with the second PowerShell Webrequest you copied above. Make sure to go back and add in the variable for the CSRF Token as shown below. $($orgName) is optional.
-
example $admPortalAuthN = Invoke-WebRequest -Uri $adminStrongAuthURI -Method “POST” -Headers @{“Origin” = “https://$($orgName).identitynow.com”; “Accept-Encoding” = “gzip, deflate, br”; “X-CSRF-Token” = $($csrf); “Accept-Language” = “en-US,en;q=0.9”; “User-Agent” = “Mozilla/5.0 (Windows NT 10.0; Win64; x64) AppleWebKit/537.36 (KHTML, like Gecko) Chrome/69.0.3497.100 Safari/537.36”; “Accept” = “*/*”; “Referer” = “https://$($orgname).identitynow.com/ui/admin”; “X-Requested-With” = “XMLHttpRequest”} -ContentType “application/x-www-form-urlencoded; charset=UTF-8” -Body “password=f2dbeb5a897abeeecafc9deee5612345678903456789bdedf7d42” -WebSession $IDN
-
Output from the Script
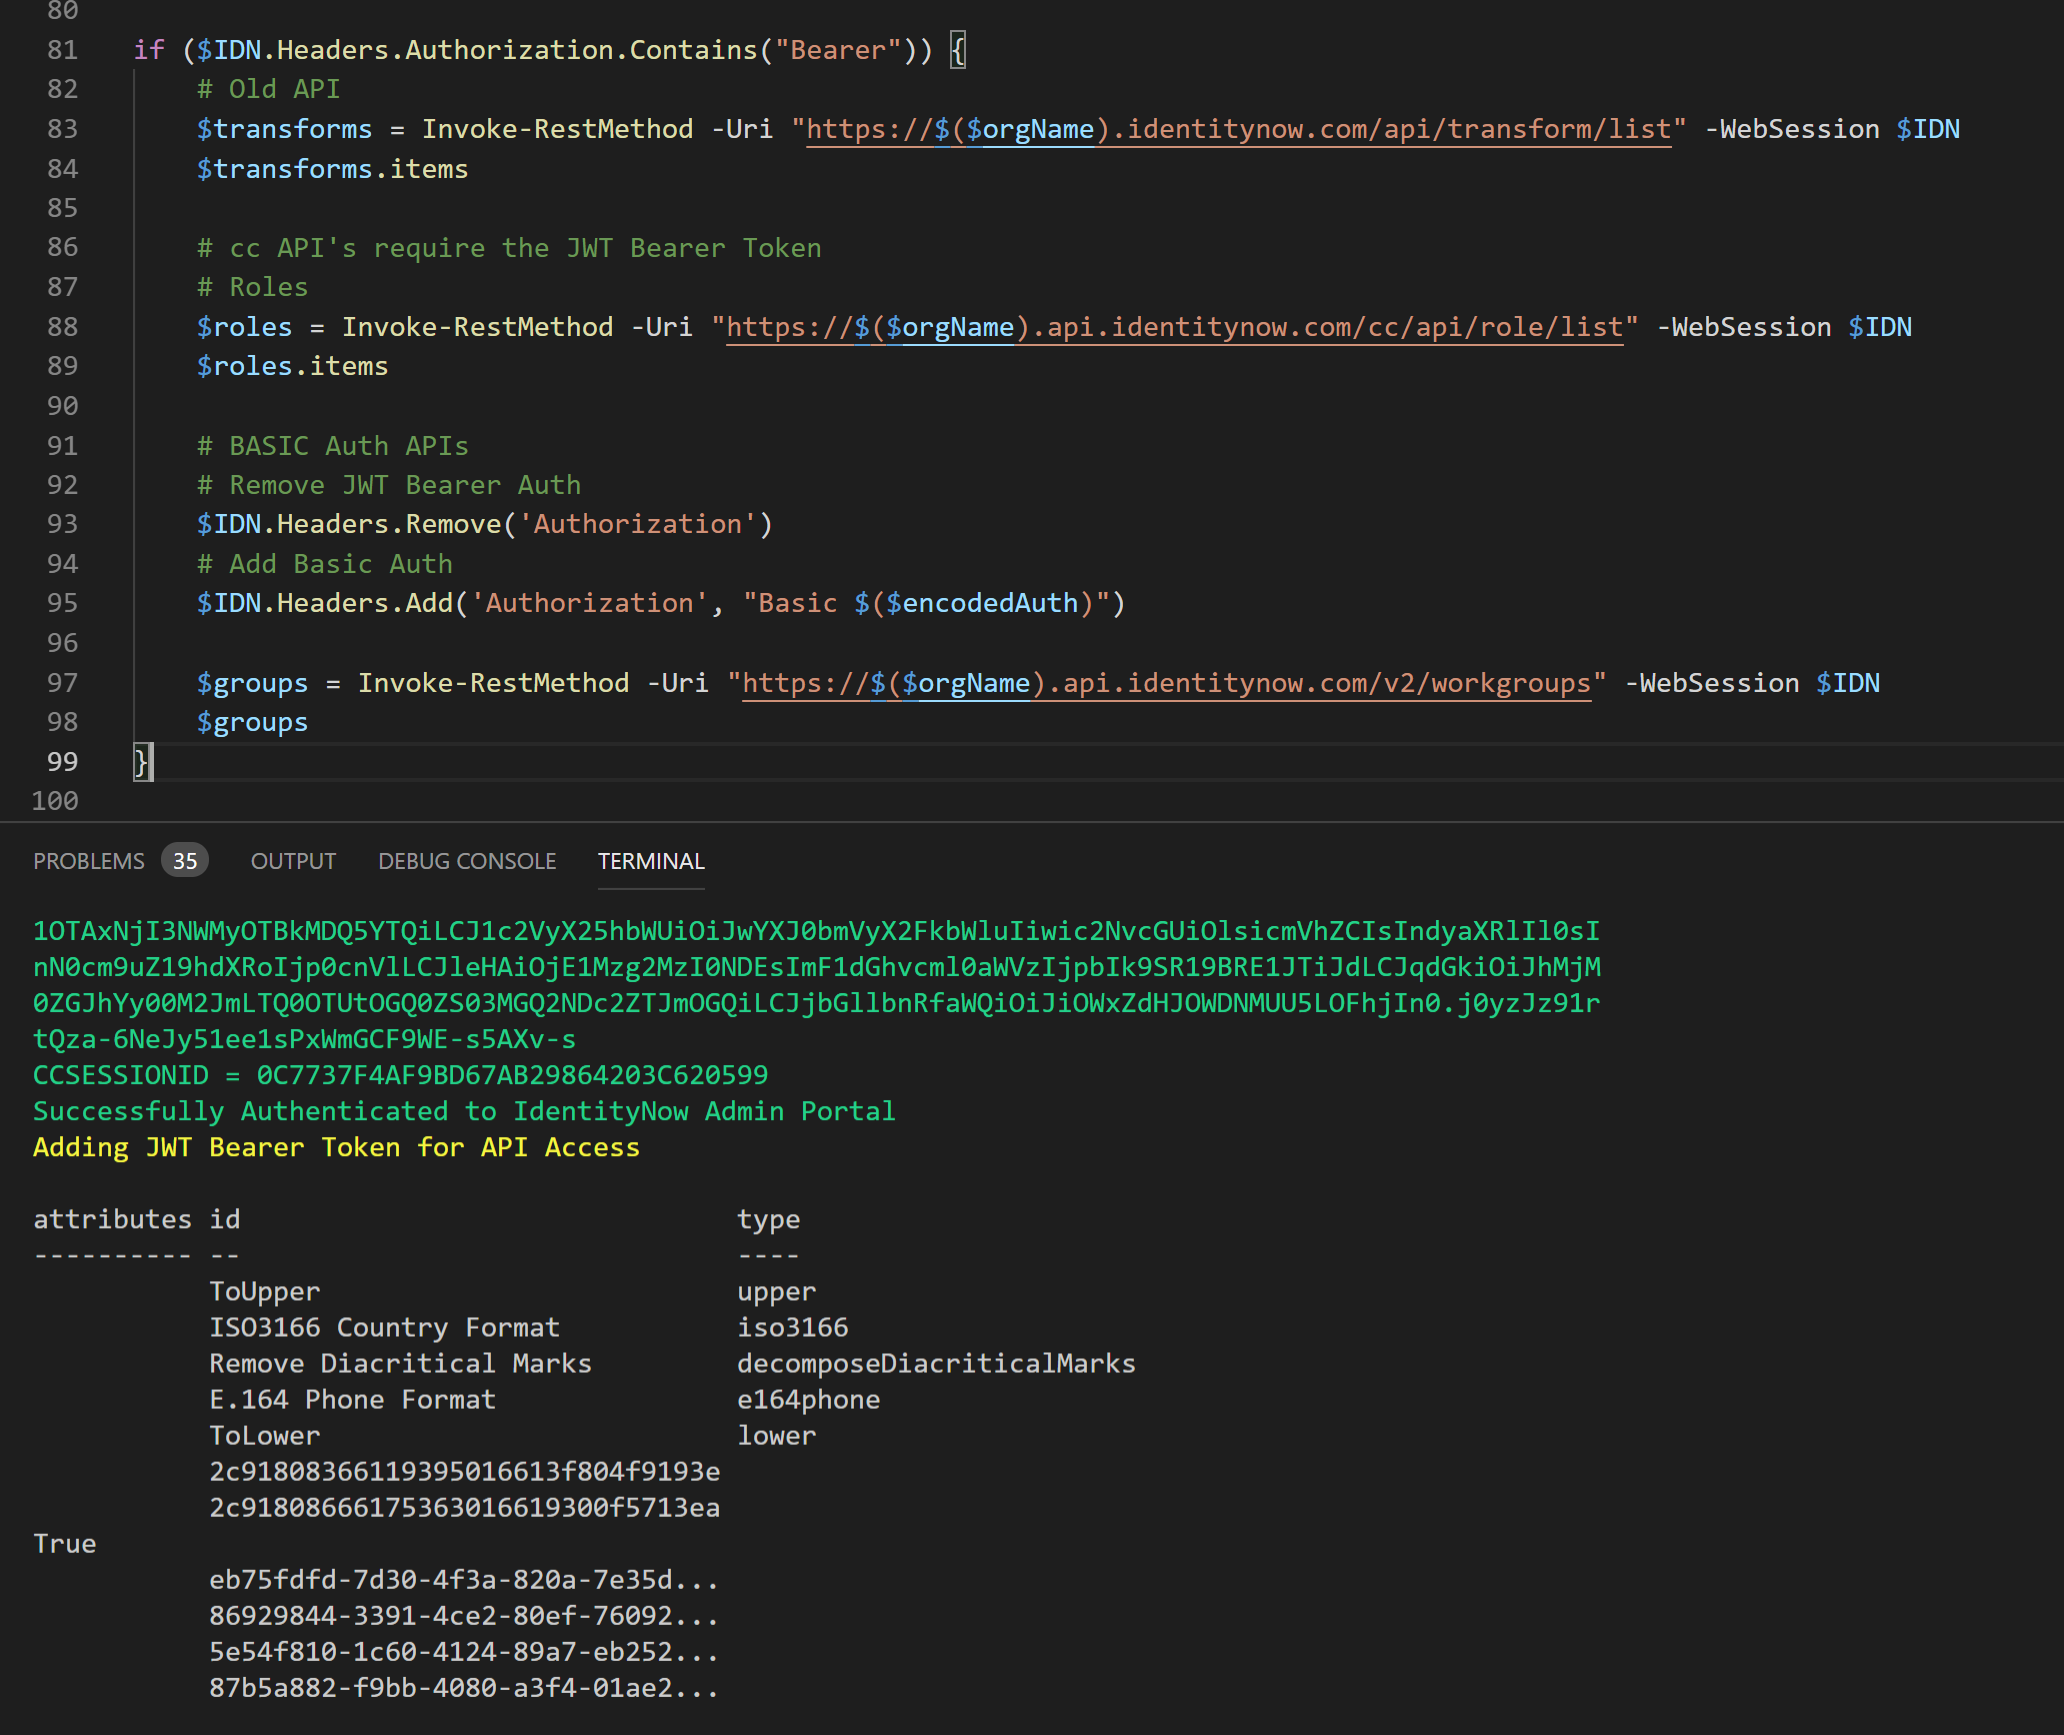
The screenshot below shows successfully making API calls to IdentityNow across the v1, v2 and the non versioned API’s after generating the necessary Authentication credentials.
Note that after calling the v1 and non versioned API’s I change the Headers to remove the Bearer Authorization Token and replace it with the Basic Authorization Token so that the v2 API’s can be called.
Optional: Obtaining the CSRF Token Manually
If you do want to obtain the CSRF Token manually then using a web browser.
- Login to IdentityNow Portal main Dashboard with an Admin account
- A direct URI looks like this;
https://TENANT.identitynow.com/login/login?goto=https%3A%2F%2FTENANT.identitynow.com%2Fui%2Fd%2Fdashboard
- Head to the Admin Dashboard and you will be prompted for Strong Authentication
https://TENANT.identitynow.com/ui/admin#admin:dashboard:overview
-
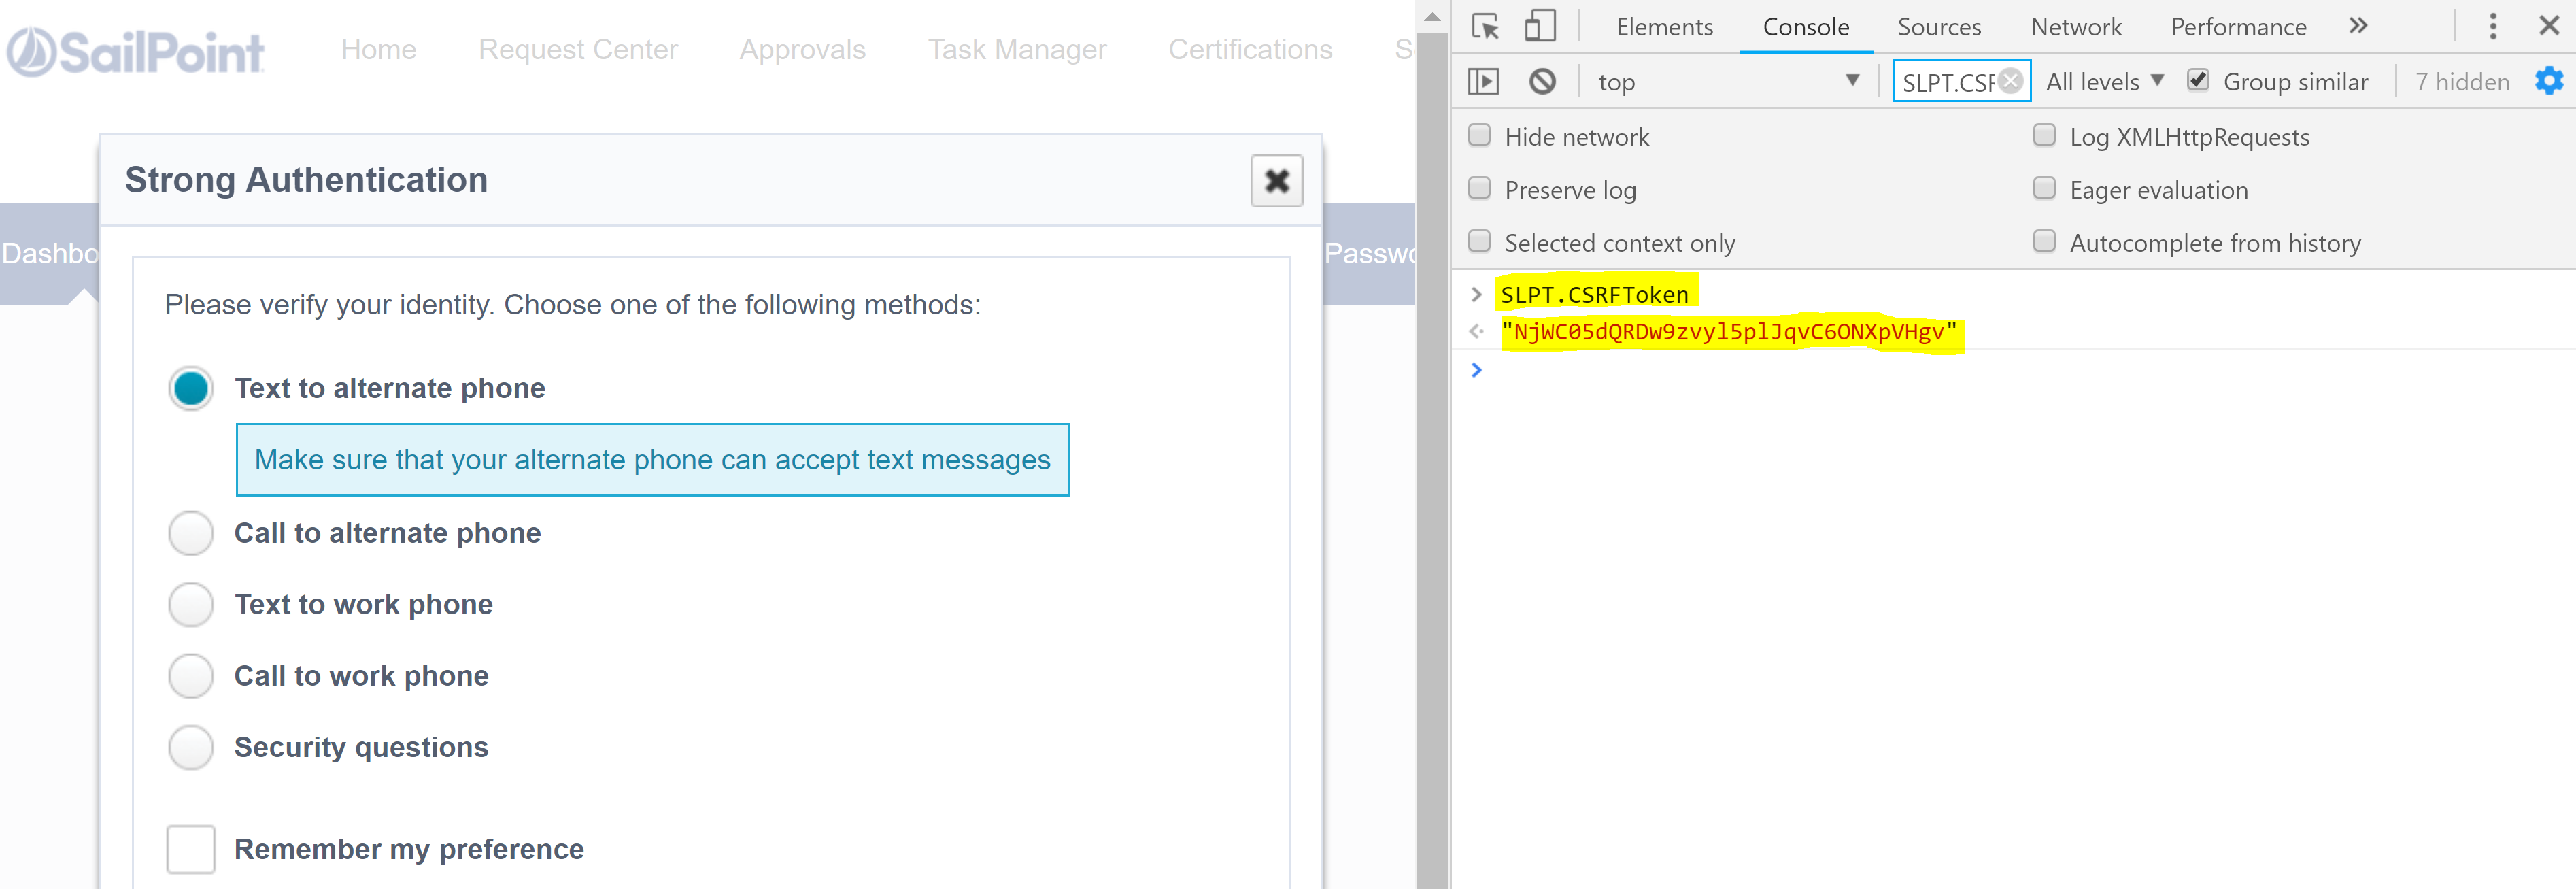
- At this point though you will also be able to retrieve the CSRF Token
Using the Chrome Developer Tools (e.g. pressing F12 in Chrome) select Console, then at the prompt type SLPT.CSRFToken You will then see your CSRF Token for that session.
Summary
With the ability to programatically generate the necessary Authorization tokens for IdentityNow we can interact with the documented API’s along with the API’s that are being leveraged by the IdentityNow Admin Portal itself.


