I started this post in 2019 when I was travelling a lot (domestic and internationally) and was trying to have a refined functional mobile remote working setup. A setup that was always ready to go and provided a balance between capability and lightweight mobility. Well, we all know what eventuated at the end of 2019 and I hadn’t fully refined the setup, so this post never got published.
Fast forward to 2022 and finally the world is starting to open up again. During the last ~3 years though I pivoted to full remote working. I updated my home office with a docking station, a large, curved monitor as my primary display, additional monitors, multiple cameras (for a balance of Windows Hello vs video image quality), speakers and the list goes on.
I had a long weekend away earlier this year with just a laptop and a mouse thinking that only working one day like that would be achievable. That was a mistake. After ~3 years of working from home with a large setup, your workflow is really reliant on that setup. Even though I’ve spent the better part of 30 years on the road as a consultant with a laptop (and limited access to external monitors etc.,) it is very difficult to revert back.
With an impending trip it was time to revisit and complete my mobile remote working setup.
The Requirements
Like any good consultant you start with requirements. Here are the requirements that influenced my decisions:
- lightweight and as compact as practical / possible to allow for it to be stored in carry-on luggage for airlines
- a travel router to bridge networks in hotels and similar scenarios
- minimise the number of cables, adaptors and wall warts
- as good of an ergonomic solution as practical
- external keyboard and mouse
The following hardware list is what my mobile remote working setup consists of. Numerous items on the list is gear I’ve had for years. Others are more recent with my evolving home remote working setup.
Hardware List
- Dell Latitude 7420
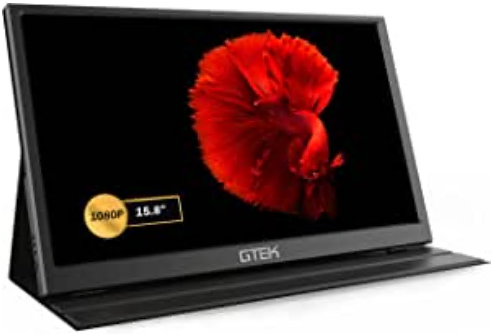
- 15.8″ Travel Monitor
- Foldable Tripod Laptop Stand
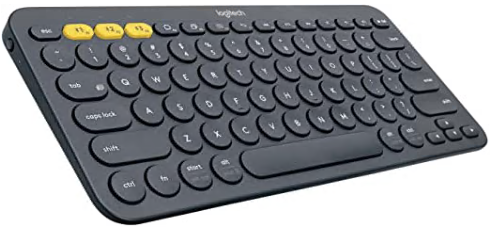
- Bluetooth Multi-Device Keyboard – Logitech K380
- Microsoft Surface Bluetooth Mouse
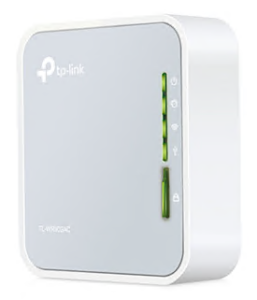
- TP Link Travel Router
- Raspberry Pi Zero 2 W
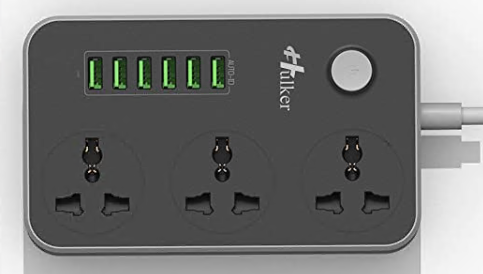
- Power Board with 6 x USB-A Ports
- Bose SoundSport Wireless Headphones
- Plantronics / Poly Calisto 620 Bluetooth Conference Speaker
- IPAD Air 4
- 20000mAh Power Bank with QC & QI Wireless
Laptop, Monitor, Keyboard and Mouse
The laptop is company issued. Having previously been in BYOD environments the Dell Latitude 7420 was a bit of a shock with the smaller screen size, and lesser spec that what I had bought for myself. But it is functional, and on the upside is quite compact.
The monitor is a special purchase especially for my mobile remote networking setup. I knew I needed more than just the laptop screen. I chose the 15.8″ Travel Monitor on a combination of online reviews, its size and cost. And it does exactly what you’d expect. But the bonus is it doesn’t require a power supply if you use USB-C to connect it to your laptop. This is great for traveling. If you do need to use the HDMI input, you will need to power the screen using USB-C. The other neat part of the monitor is that they cover doubles as a stand similar to an iPad smart cover.
For the laptop I use the Foldable Tripod Laptop Stand which I already had from my home office setup. This free’s up desk real estate and provides a better position for the screen for ease of use.
Surprisingly it was an effort to find a keyboard that met my requirements. I wanted a wireless one that didn’t have dongles, so it needed to be Bluetooth. And I wanted it to work across multiple devices. I settled on the Bluetooth Multi-Device Keyboard – Logitech K380 as it was a combination of those features but also had large enough keys whilst being compact. It could never be an everyday keyboard for me as I’m now so used to my Microsoft Sculpt ergonomic keyboard. The mouse I already had. The Microsoft Surface Bluetooth Mouse also being Bluetooth meant I wasn’t sacrificing a USB port.
Networking (Travel Router) and Raspberry Pi
On the networking side I had already done a lot of research years back and had the TP Link Travel Router which is just a fantastic piece of kit. It is compact, can be powered via a micro-USB port and is fully featured. In fact, more features than I’ll probably need, but there are a couple of key features. The ability to bridge / extend wireless networks is the key one. Essentially, I have my Wi-Fi networks (2.4Ghz & 5Ghz) configured on the TL-WR902AC. Each time I’m in a new location my laptop, phone and iPad are already configured for my Wi-Fi network so I can connect to it and configure the TL-WR902AC to bridge/extend to the local Wi-Fi network. That’s it. My devices are all talking to my TP Link Travel Router which then routes to the hotel / location Wi-Fi. If the location has ethernet, that is possible too. Just slide a switch on the side of the TP Link Travel Router.
You may be thinking, why do you need the Raspberry Pi? It is an item that is non-critical but running Pi-Hole and not having ads is something I’m used to, and it also assists with reducing bandwidth in situations where it isn’t abundant. For more information on Pi-Hole you can read my post here. The orange case I 3D printed using this design from Thingiverse. I created a DHCP reservation for the Raspberry Pi Zero 2 W so it always has the same IP which is then configured as the default DNS via DHCP in my TP Link configuration for the Wi-Fi network. This way all devices benefit from the Pi-Hole with no additional configuration.
Power
The Power Board with 6 x USB-A Ports is a key element of the setup. And again, something I’ve had for a few years and have multiple of. It has the necessary power delivery for my laptop as well as any other devices I may have with me, without needing a mains power supply adaptor. The 6 x USB-A ports are fantastic all providing consistent power to devices that can be powered with 5v. The TP Link Travel Router and Raspberry Pi are both powered off the USB ports. I used short 1 foot length USB to micro-USB cables similar to these. That reduces cable hassles too.
Miscellaneous
There is always the need to charge your iPhone, AirPods and Apple Watch. For that I use a 3-in-1 wireless charging stand that connects to the power board using USB-A. Again, no need for multiple cables and power adapters.
The iPad is for personal non-work access and allows you to keep an eye on non-work events without sacrificing screen real estate on the laptop and monitor.
Finally, the 20000mAh Power Bank with QC & QI Wireless is more for when I’m out and about with phones and tablets. The wireless charging for phones is fantastic. But being 20000mAh and having USB-A and USB-C means it could also provide limited power to the setup in an emergency assuming there was still some external network connectivity.
Testing the Setup
Wanting to be up and running without any hassle I decided to work from home using my remote working network setup for a couple of days before travelling internationally. I setup myself up on the dining table to give it a run with my normal workload over a few days.
What I did find, and something I expected, just not as fast, was the battery life of my Bose SoundSport wireless headphones. A morning of back-to-back meetings and they were flat. PC Speakers and Microphone was not a good solution. So that is why I dug out my Plantronics / Poly Calisto 620 Bluetooth Conference Speaker that I had used extensively on the road on consulting engagements. Great when you are in private environments and easy to communicate, mute etc. When in more public spaces the Bose SoundSport headphones work great too.
I also found interference on the 2.4Ghz frequencies with appliances such as microwaves, so using the 5Ghz band on the TP Link Wi-Fi network is my default.

Remote Working from New Zealand
With the proof of concept of the setup completed it was time to jump on a plane and head home to New Zealand. All the kit fit nicely in my carry-on luggage and with other carry-on items didn’t get too heavy or bulky.
The first use of the setup was in a hotel room in Wellington. And it was quick to configure the travel router to connect to the hotel Wi-Fi. Then my laptop, phone and tablet were all online as I’d previously configured them to join my wireless network associated with the TP Link travel router.
Next stop was the New Zealand South Island, and the following photo was taken from my mum’s place with the setup on her sewing table. This setup proved productive over a three-day period. It did everything I needed to achieve from individual work activities to collaborative online meetings.

What would I change?
Having built up the home office for remote working to have three screens an additional external screen on the mobile setup would be great. That though would need to be driven using the laptop HDMI port and powered by an external USB-C power source as the Dell laptop is out of USB-C ports.
It would also be nice to update my Plantronics conference speaker to a unit that doesn’t need the Bluetooth dongle. That would then free up the USB-A port on the Dell laptop.
What is your mobile remote working setup?


