During the development of an identity management solution I find myself with multiple PowerShell/RDP sessions connected to multiple environments using different credentials often to obtain trivial data/information. It is easy to trip yourself up as well with remote PowerShell sessions to differing environments. If only there was a simple UI that could front-end a set of PowerShell modules and make those simple queries quick and painless. Likewise to allow support staff to execute a canned set of queries without providing them elevated permissions.
I figured someone would have already solved this problem and after some searching with the right keywords I found the powershell-command-executor-ui from bitsofinfo . Looking into it he had solved a lot of the issues with building a UI front-end for PowerShell with the powershell-command-executor and the stateful-process-command-proxy. That solution provided the framework for what I was thinking. The ability to provide a UI for PowerShell using powershell modules including remote PowerShell was exactly what I was after. And it was built on NodeJS and AngularJS so simple enough for some customization.
Introduction
In this blog post I’ll detail how I’ve leveraged the projects listed above for integration with;
- Azure Active Directory (using the AzureADPreview PowerShell Module)
- Microsoft Identity Manager Synchronization Service (using the Lithnet MIIS Automation PowerShell Module via Remote PowerShell)
- Microsoft Identity Manager Service (using the Lithnet Resource Management PowerShell Module)
Initially I had a vision of serving up the UI from an Azure WebApp. NodeJS on Azure WebApp’s is supported, however with all the solution dependencies I just couldn’t get it working.
My fall-back was to then look to serve up the UI from a Windows Server 2016 Nano Server. I learnt from my efforts that a number of the PowerShell modules I was looking to provide a UI for, have .NET Framework dependencies. Nano Server does not have full .NET Framework support. Microsoft state to do so would mean the server would no longer be Nano.
For now I’ve deployed an Azure Windows Server 2016 Server secured by an Azure NSG to only allow my machine to access it. More on security later.
Overview
Simply, put the details in Github for the powershell-command-executor provide the architecture and integration. What I will detail is the modifications I’ve made to utilize the more recent AzureADPreview PowerShell Module over the MSOL PowerShell Module. I also updated the dependencies of the solution for the latest versions and hooked it into Microsoft Identity Manager. I also made a few changes to allow different credentials to be used for Azure and Microsoft Identity Manager.
Getting Started
I highly recommend you start with your implementation on a local development workstation/development virtual machine. When you have a working version you’re happy with you can then look at other ways of presenting and securing it.
NodeJS
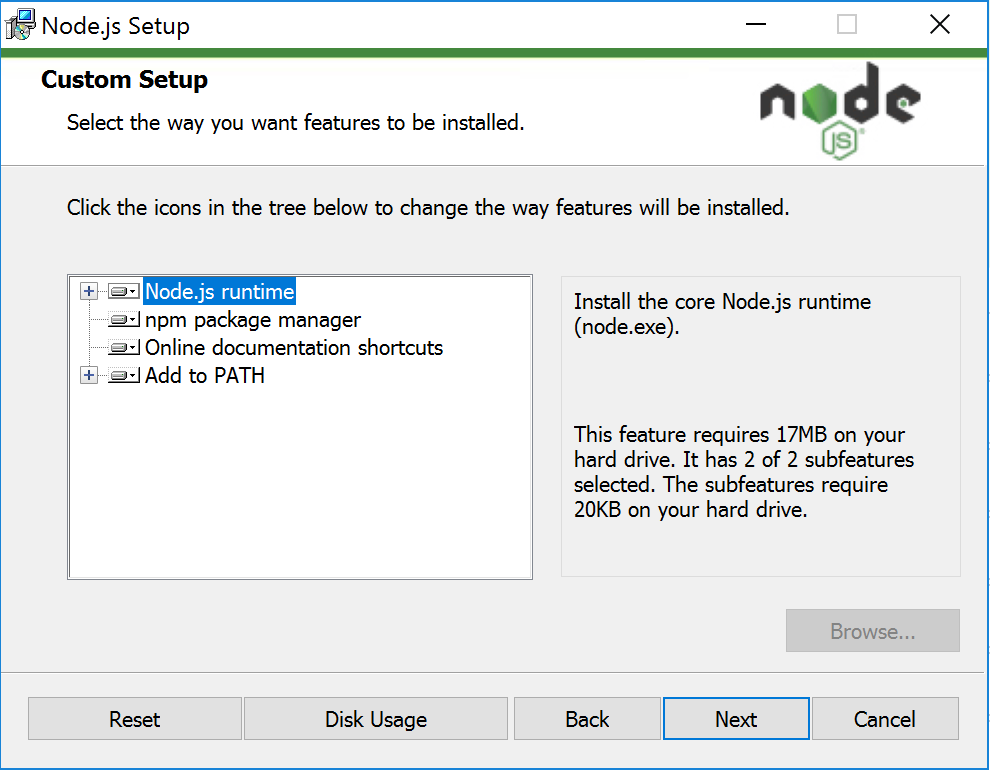
NodeJS is the webserver for this solution. Download NodeJS for your Windows host here. I’m using the 64-bit version, but have also implemented the solution on 32-bit. Install NodeJS on your local development workstation/development virtual machine.
You can accept all the defaults.
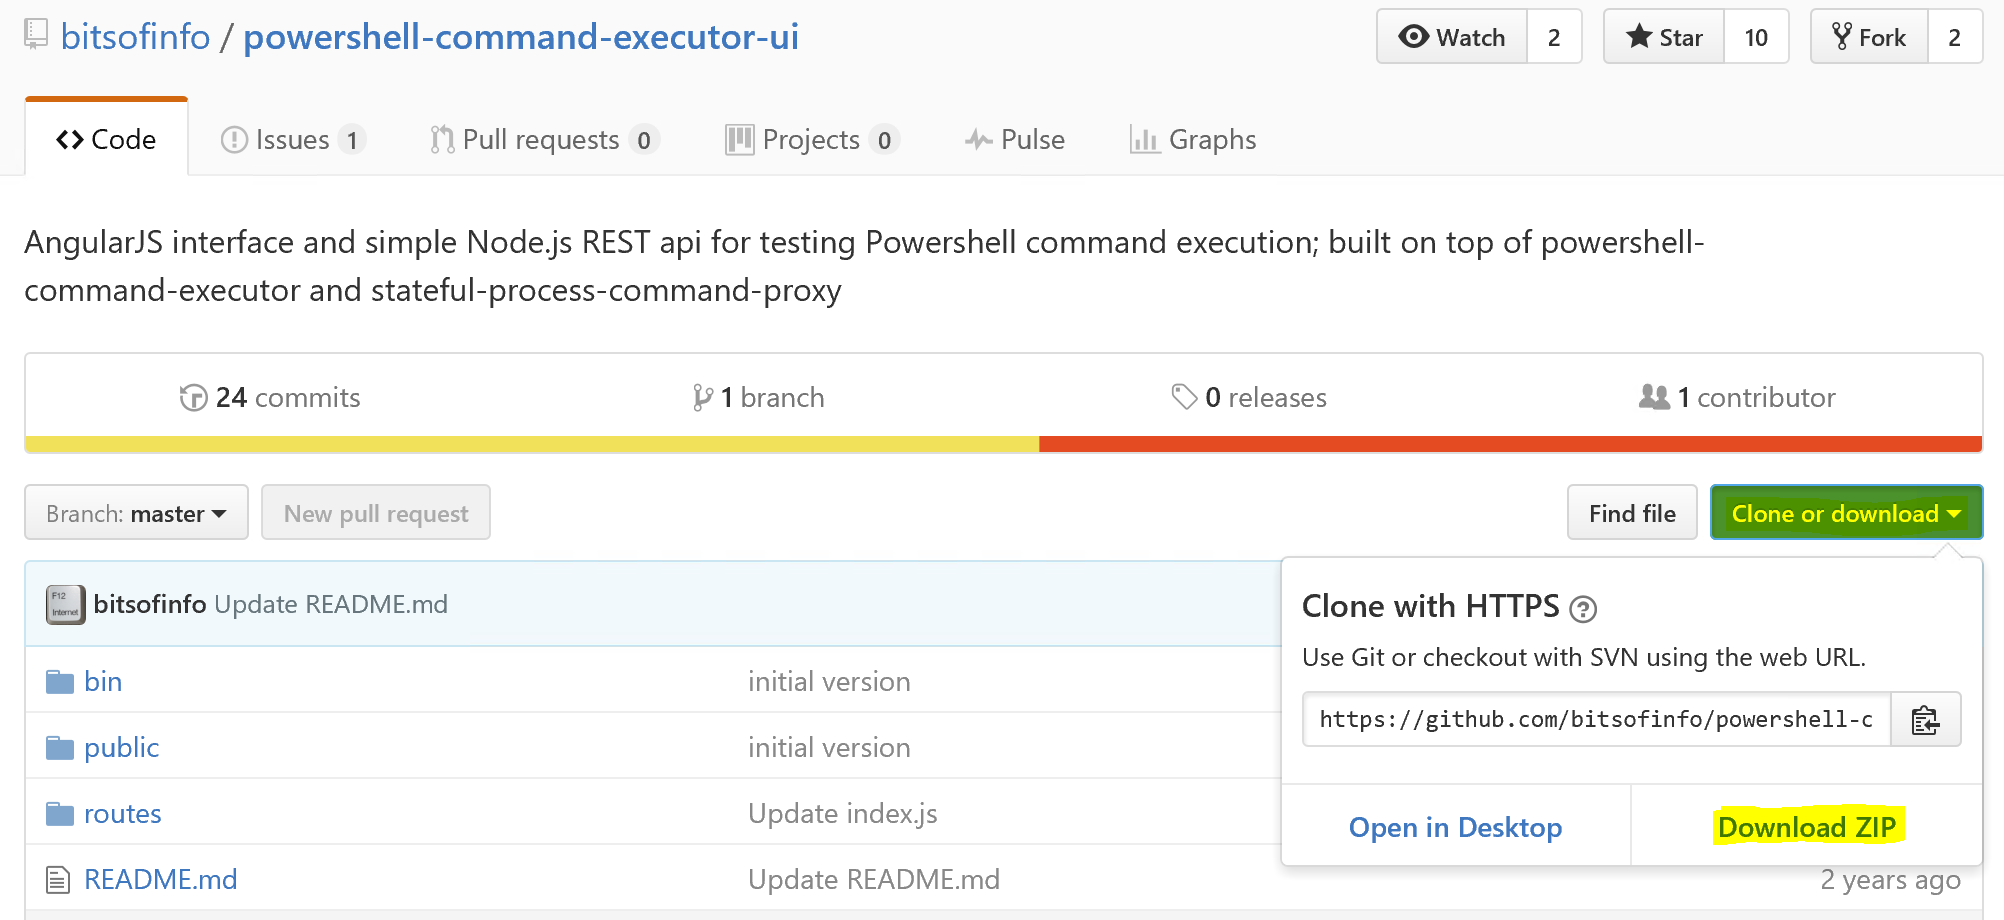
Following the installation of NodeJS download the powershell-command-executor-ui from GitHub. Select Clone 0r Download, Download ZIP and save it to your machine.
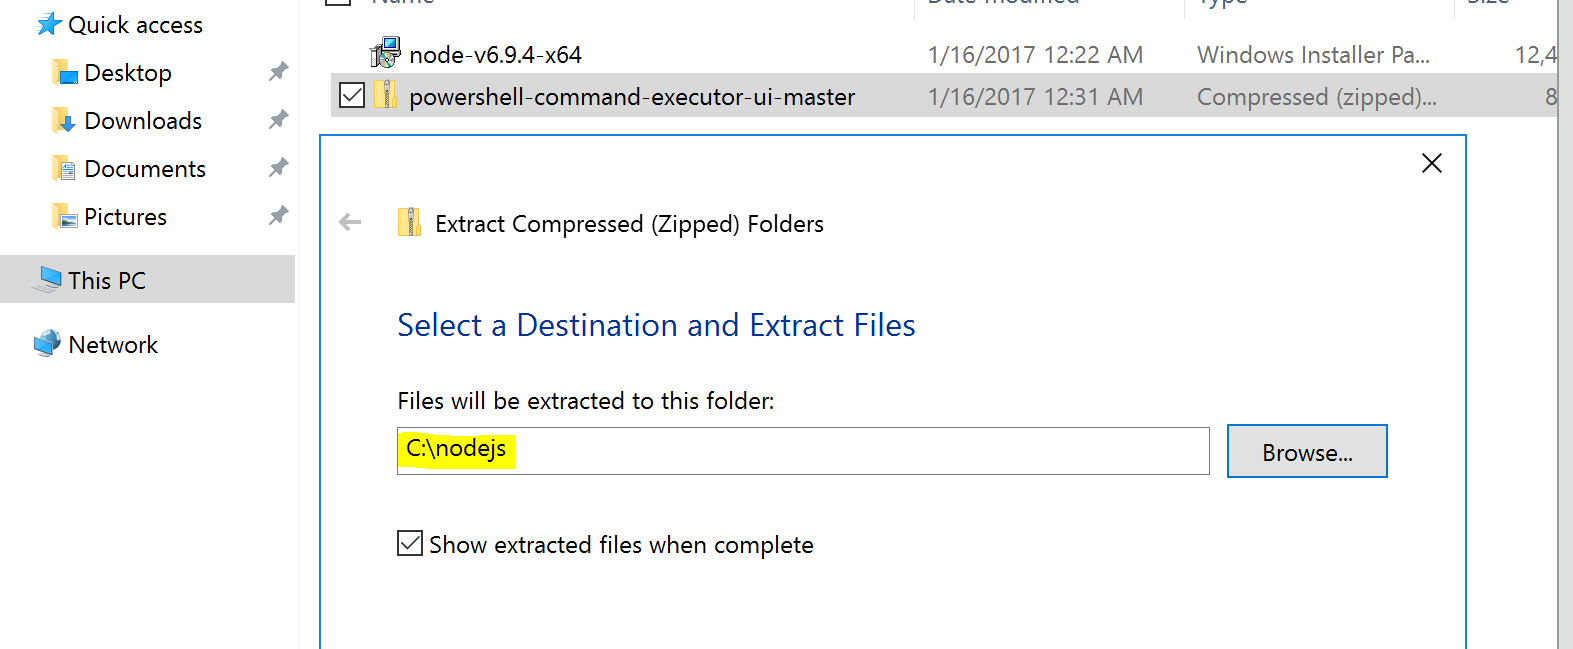
Right click the download when it has finished and select Extract All. Select Browse and create a folder at the root of C:\ named nodejs. Extract powershell-command-executor-ui.
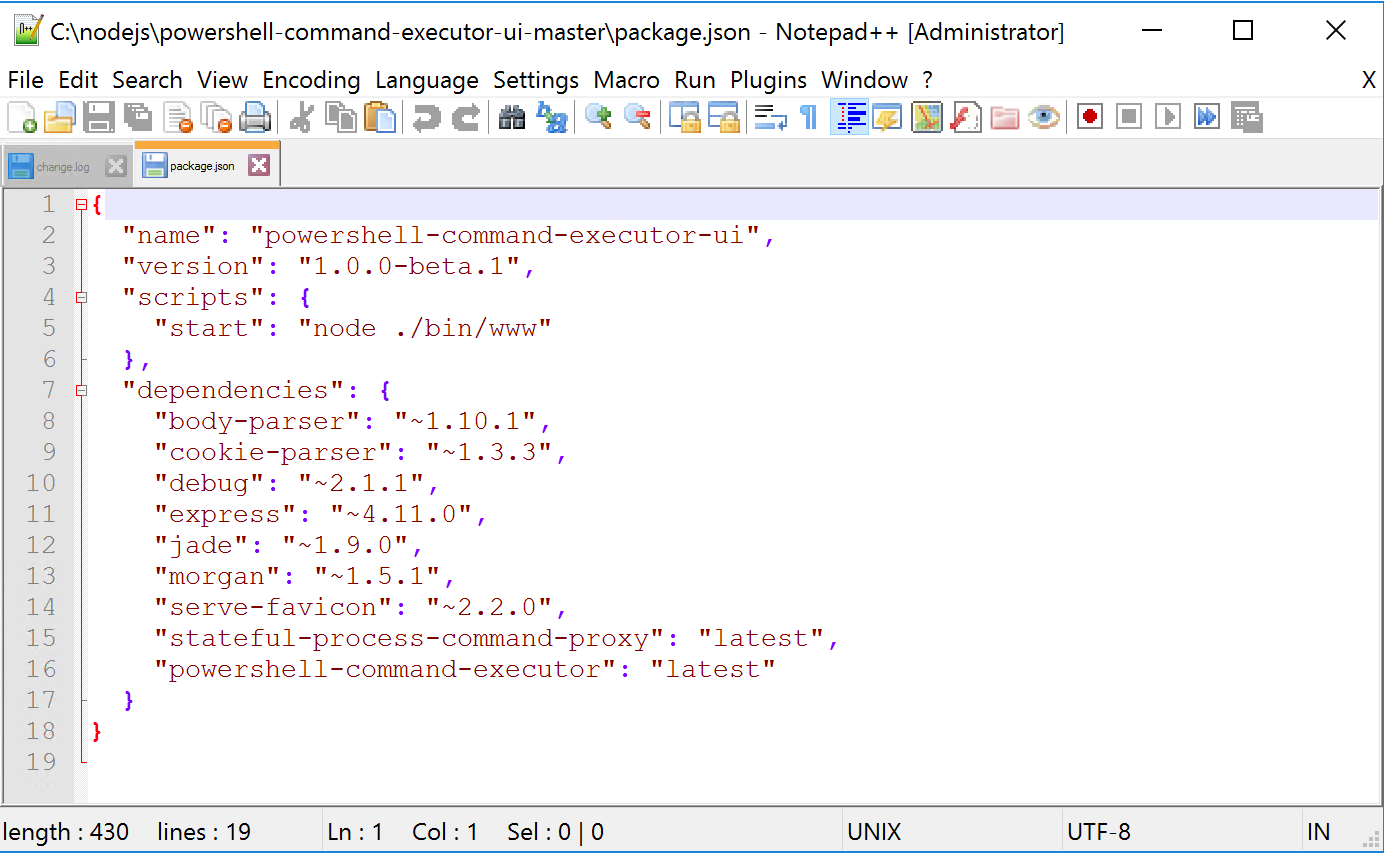
Locate the c:\nodejs\powershell-command-executor-ui-master\package.json file.
Using an editor such as Notepad++ update the package.json file ……
…… so that it looks like the following. This will utilise the latest versions of the dependencies for the solution.
From an elevated (Administrator) command prompt in the c:\nodejs\powershell-command-executor-ui-master directory run “c:\program files\nodejs npm” install. This will read the package.json file you edited and download the dependencies for the solution.
You can see in the screenshot below NodeJS has downloaded all the items in package.json including the powershell-command-executor and stateful-process-command-proxy.
When you now list the directories under C:\nodejs\powershell-command-executor-ui-master\node_modules you will see those packages and all their dependencies.
We can now test that we have a working PowerShell UI NodeJS website. From an elevated command prompt whilst still in the c:\nodejs\powershell-command-executor-ui-master directory run “c:\Program Files\nodejs\node.exe” bin\www
Open a browser on the same host and go to “http://localhost:3000”. You should see the default UI.
Configuration and Customization
Now it is time to configure and customize the PowerShell UI for our needs.
The files we are going to edit are:
- C:\nodejs\powershell-command-executor-ui-master\routes\index.js
- Update Paths to the encrypted credentials files used to connect to Azure, MIM. We’ll create the encrypted credentials files soon.
- C:\nodejs\powershell-command-executor-ui-master\public\console.html
- Update for your customizations for CSS etc.
- C:\nodejs\powershell-command-executor-ui-master\node_modules\powershell-command-executor\O365Utils.js
- Update for PowerShell Modules to Import
- Update for Commands to make available in the UI
We also need to get a couple of PowerShell Modules installed on the host so they are available to the site. The two I’m using I’ve mentioned earlier. With WMF5 installed using PowerShell we can simply install them as per the commands below.
Install-Module AzureADPreview
Install-Module LithnetRMA
In order to connect to our Microsoft Identity Manager Synchronization Server we are going to need to enable Remote PowerShell on our Microsoft Identity Manager Synchronization Server. This post I wrote here details all the setup tasks to make that work. Test that you can connect via RPS to your MIM Sync Server before updating the scripts below.
Likewise for the Microsoft Identity Manager Service Server. Make sure after installing the LithnetRMA Powershell Module you can connect to the MIM Service using something similar to:
# Import LithnetRMA PS Module
import-module lithnetrma

# MIM AD User Admin
$username = "mimadmin@mim.mydomain.com"
# Password
$password = "Secr3tSq1rr3l!" | convertto-securestring -AsPlainText -Force
# PS Creds
$credentials = New-Object System.Management.Automation.PSCredential $Username,$password

# Connect to the FIM service instance
# Will require an inbound rule for TCP 5725 (or your MIM Service Server Port) in you Resource Group Network Security Group Config
Set-ResourceManagementClient -BaseAddress http://mymimportalserver.:5725 -Credentials $credentials
\routes\index.js
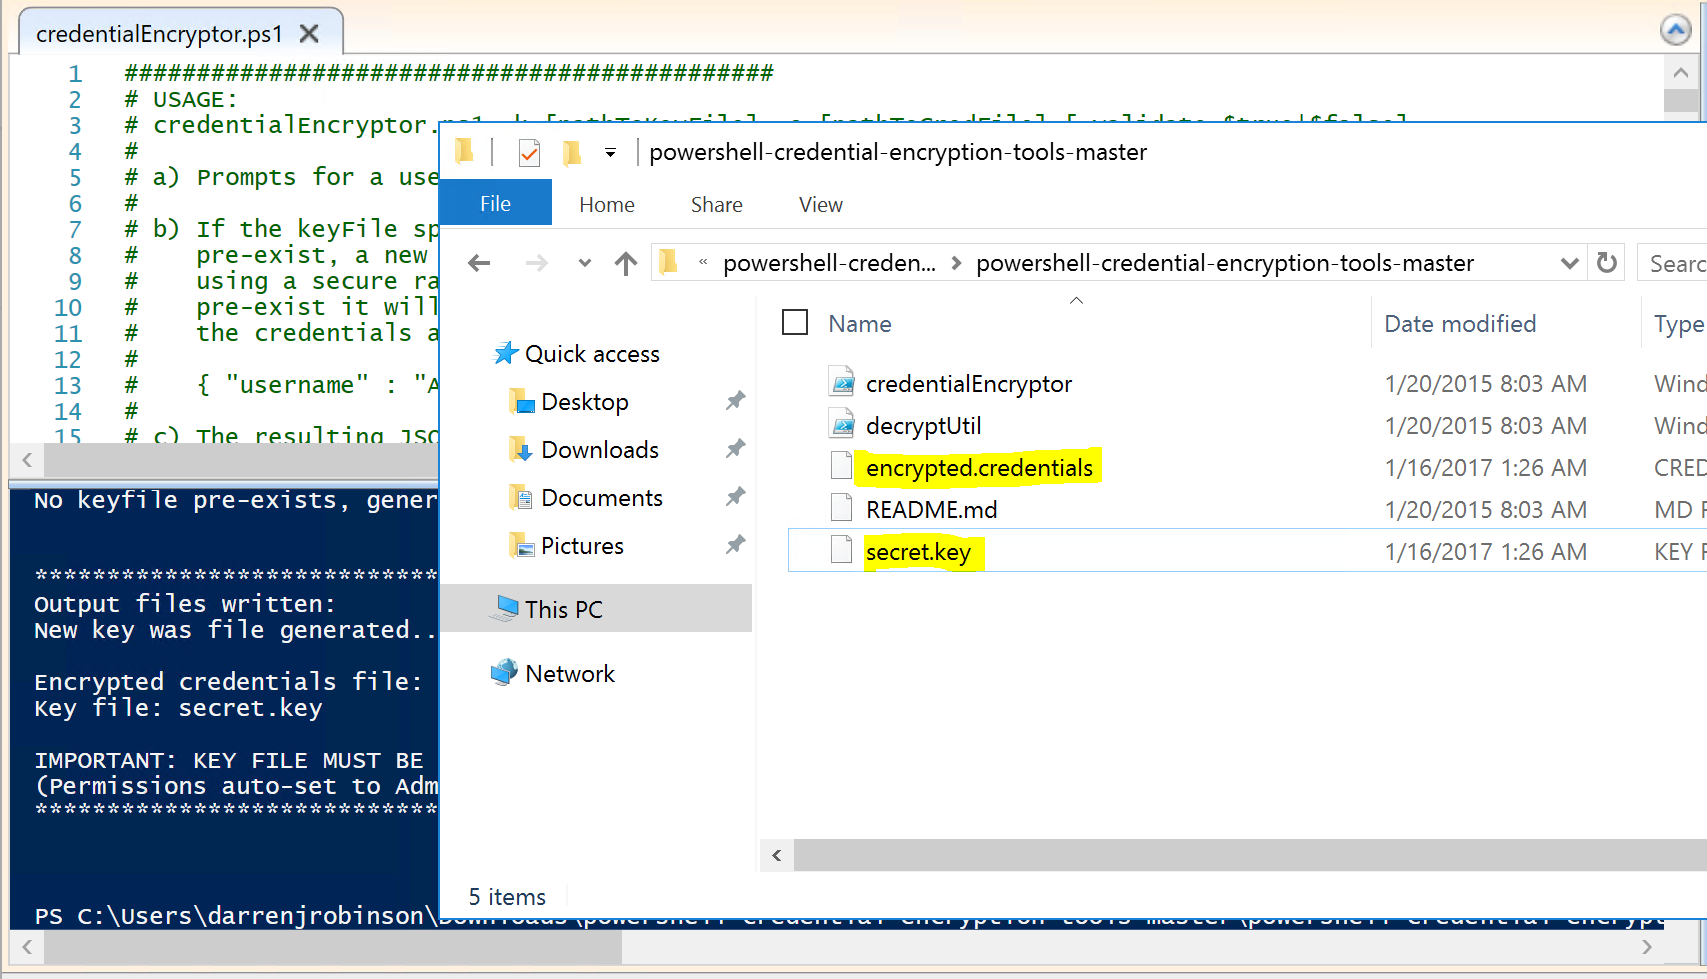
This file details the encrypted credentials the site uses. You will need to generate the encrypted credentials for your environment. You can do this using the powershell-credentials-encryption-tools. Download that script to your workstation and unzip it. Open the credentialEncryptor.ps1 script using an Administrator PowerShell ISE session.
I’ve changed the index.js to accept two sets of credentials. This is because your Azure Admin Credentials are going to be different from your MIM Administrator Credentials (both in name and password). The username for my Azure account looks something like myname@mycompany.com whereas for MIM it is Domainname\Username.
Provide an account name for your Azure environment and the associated password.
The tool will create the encrypted credential files.
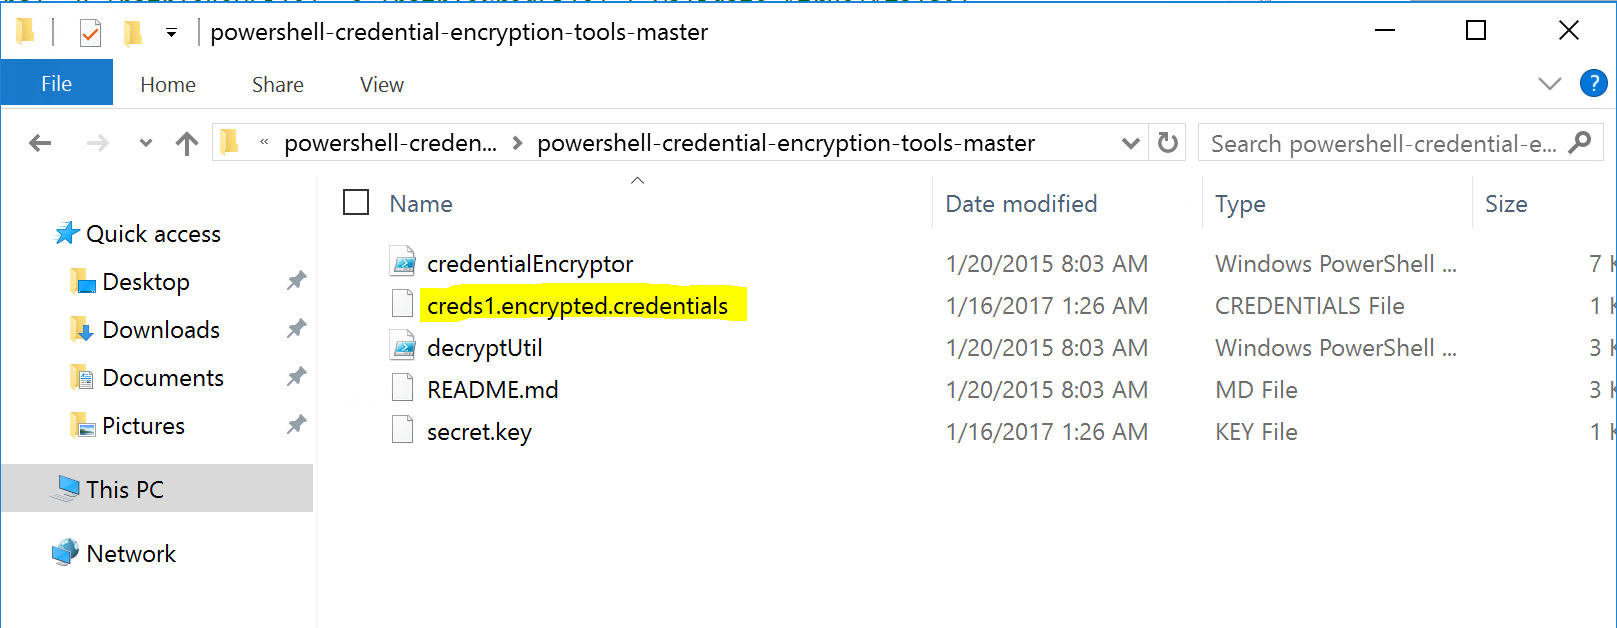
Rename the encrypted.credentials file to whatever makes sense for your environment. I’ve renamed it creds1.encrypted.credentials.
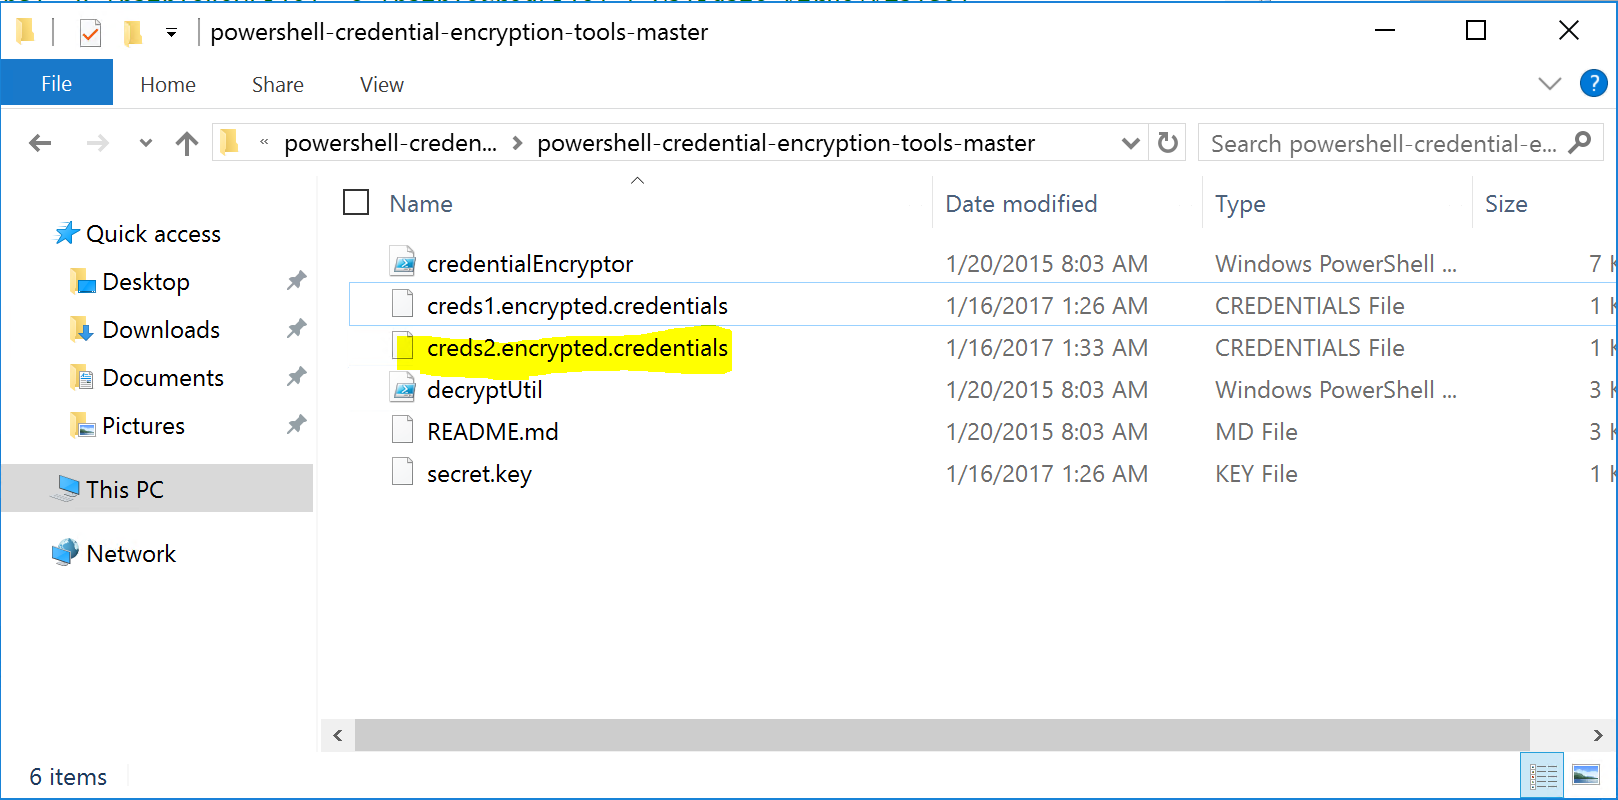
Now we re-run the script to create another set of encrypted credentials. This time for Microsoft Identity Manager. Once created, rename the encrypted.credentials file to something that makes sense in your environment. I’ve renamed the second set to creds2.encrypted.credentials.
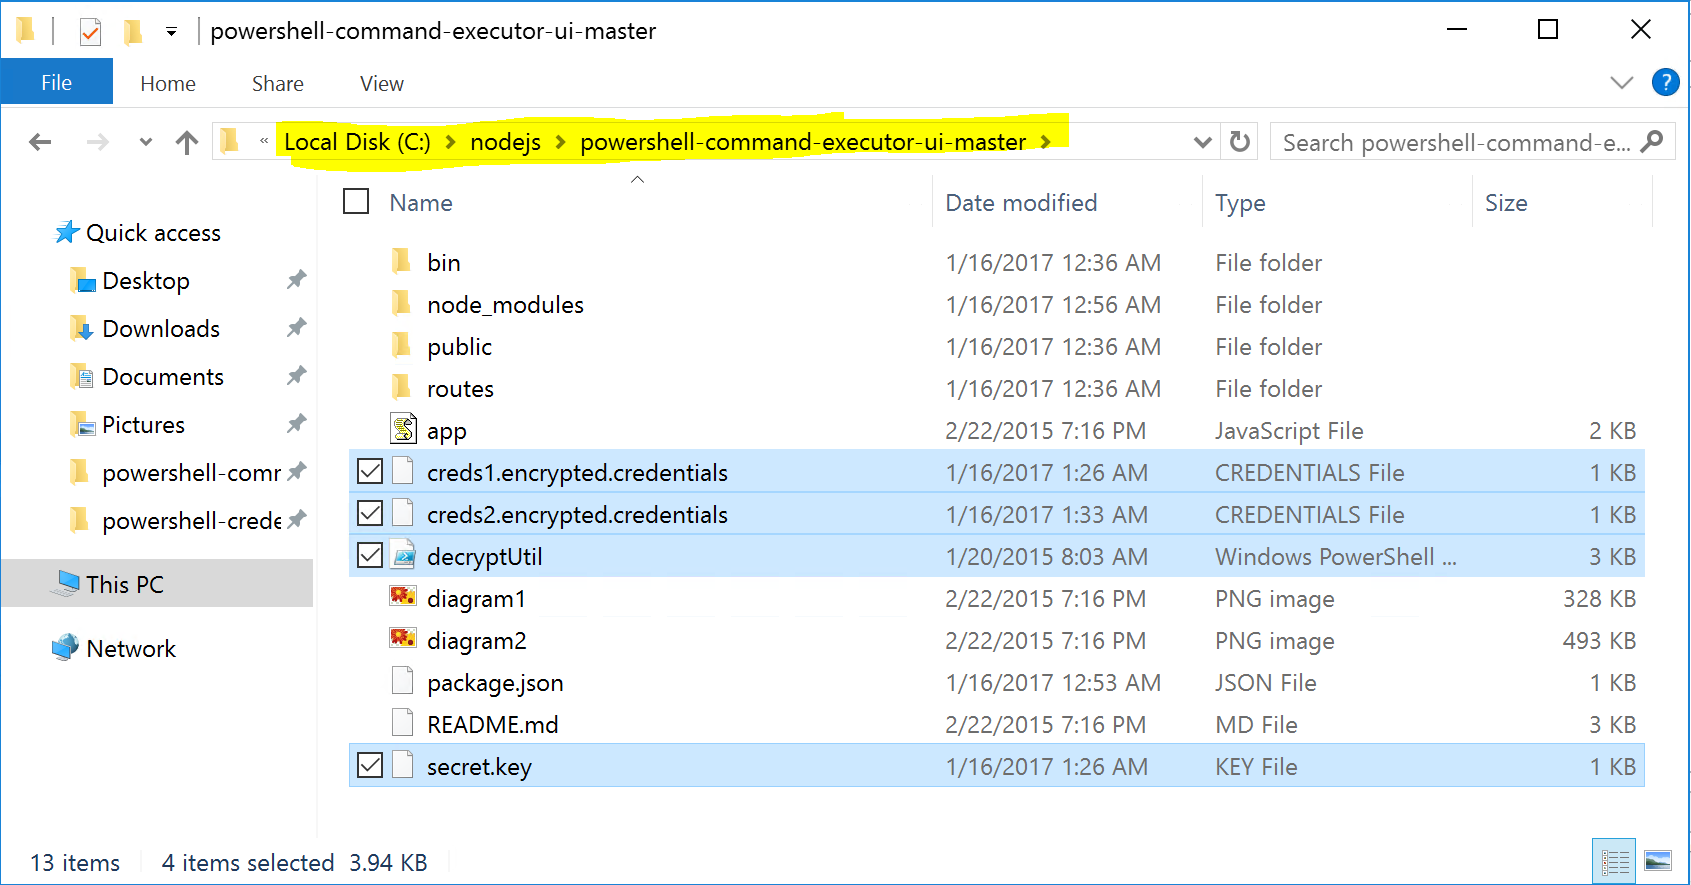
We now need to copy the following files to your UI Website C:\nodejs\powershell-command-executor-ui-master directory:
- creds1.encrypted.credentials
- creds2.encrypted.credentials
- decryptUtil.ps1
- secret.key
Navigate back to Routes.js and open the file in an editor such as Notepad++
Update the index.js file for the path to your credentials files. We also need to add in the additional credentials file.
The changes to the file are, the paths to the files we just copied above along with the addition var PATH_TO_ENCRYPTED_RPSCREDENTIALS_FILE for the second set of credentials used for Microsoft Identity Manager.
var PATH_TO_DECRYPT_UTILS_SCRIPT = "C:\\nodejs\\powershell-command-executor-ui-master\\decryptUtil.ps1";
var PATH_TO_ENCRYPTED_CREDENTIALS_FILE = "C:\\nodejs\\powershell-command-executor-ui-master\\creds1.encrypted.credentials";
var PATH_TO_ENCRYPTED_RPSCREDENTIALS_FILE = "C:\\nodejs\\powershell-command-executor-ui-master\\creds2-encrypted.credentials";
var PATH_TO_SECRET_KEY = "C:\\nodejs\\powershell-command-executor-ui-master\\secret.key";
Also to initCommands to pass through the additional credentials file
initCommands: o365Utils.getO365PSInitCommands(
 PATH_TO_DECRYPT_UTILS_SCRIPT,
 PATH_TO_ENCRYPTED_CREDENTIALS_FILE,
 PATH_TO_ENCRYPTED_RPSCREDENTIALS_FILE,
 PATH_TO_SECRET_KEY,
 10000,30000,3600000),
Here is the full index.js file for reference.
public/console.html
The public/console.html file is for formatting and associated UI components. The key things I’ve updated are the Bootstrap and AngularJS versions. Those are contained in the top of the html document. A summary is below.
https://ajax.googleapis.com/ajax/libs/angularjs/1.6.1/angular.min.js
https://cdnjs.cloudflare.com/ajax/libs/angular.js/1.6.1/angular-resource.min.js
http://javascripts/ui-bootstrap-tpls-2.4.0.min.js
http://javascripts/console.js
<link rel="stylesheet" href="https://maxcdn.bootstrapcdn.com/bootstrap/3.3.7/css/bootstrap.min.css">
<link rel="stylesheet" href="https://maxcdn.bootstrapcdn.com/bootstrap/3.3.7/css/bootstrap-theme.min.css">
You will also need to download the updated Bootstrap UI (ui-bootstrap-tpls-2.4.0.min.js). I’m using v2.4.0 which you can download from here. Copy it to the javascripts directory.
I’ve also updated the table types, buttons, colours, header, logo etc in the appropriate locations (CSS, Tables, Div’s etc). Here is my full file for reference. You’ll need to update for your colours, branding etc.
powershell-command-executor\O365Utils.js
Finally the O365Utils.js file. This contains the commands that will be displayed along with their options, as well as the connection information for your Microsoft Identity Manager environment.
You will need to change:
- Line 52 for the address of your MIM Sync Server
- Line 55 for the addresses of your MIM Service Server
- Line 141 on-wards for what commands and parameters for those commands you want to make available in the UI
Here is an example with a couple of AzureAD commands, a MIM Sync and a MIM Service command.
Show me my PowerShell UI Website
Now that we have everything configured let’s start the site and browse to it. If you haven’t stopped the NodeJS site from earlier go to the command window and press Cntrl+C a couple of times. Run “c:\Program Files\nodejs\node.exe” bin\www again from the C:\nodejs\powershell-command-executor-ui-master directory unless you have restarted the host and now have NodeJS in your environment path.
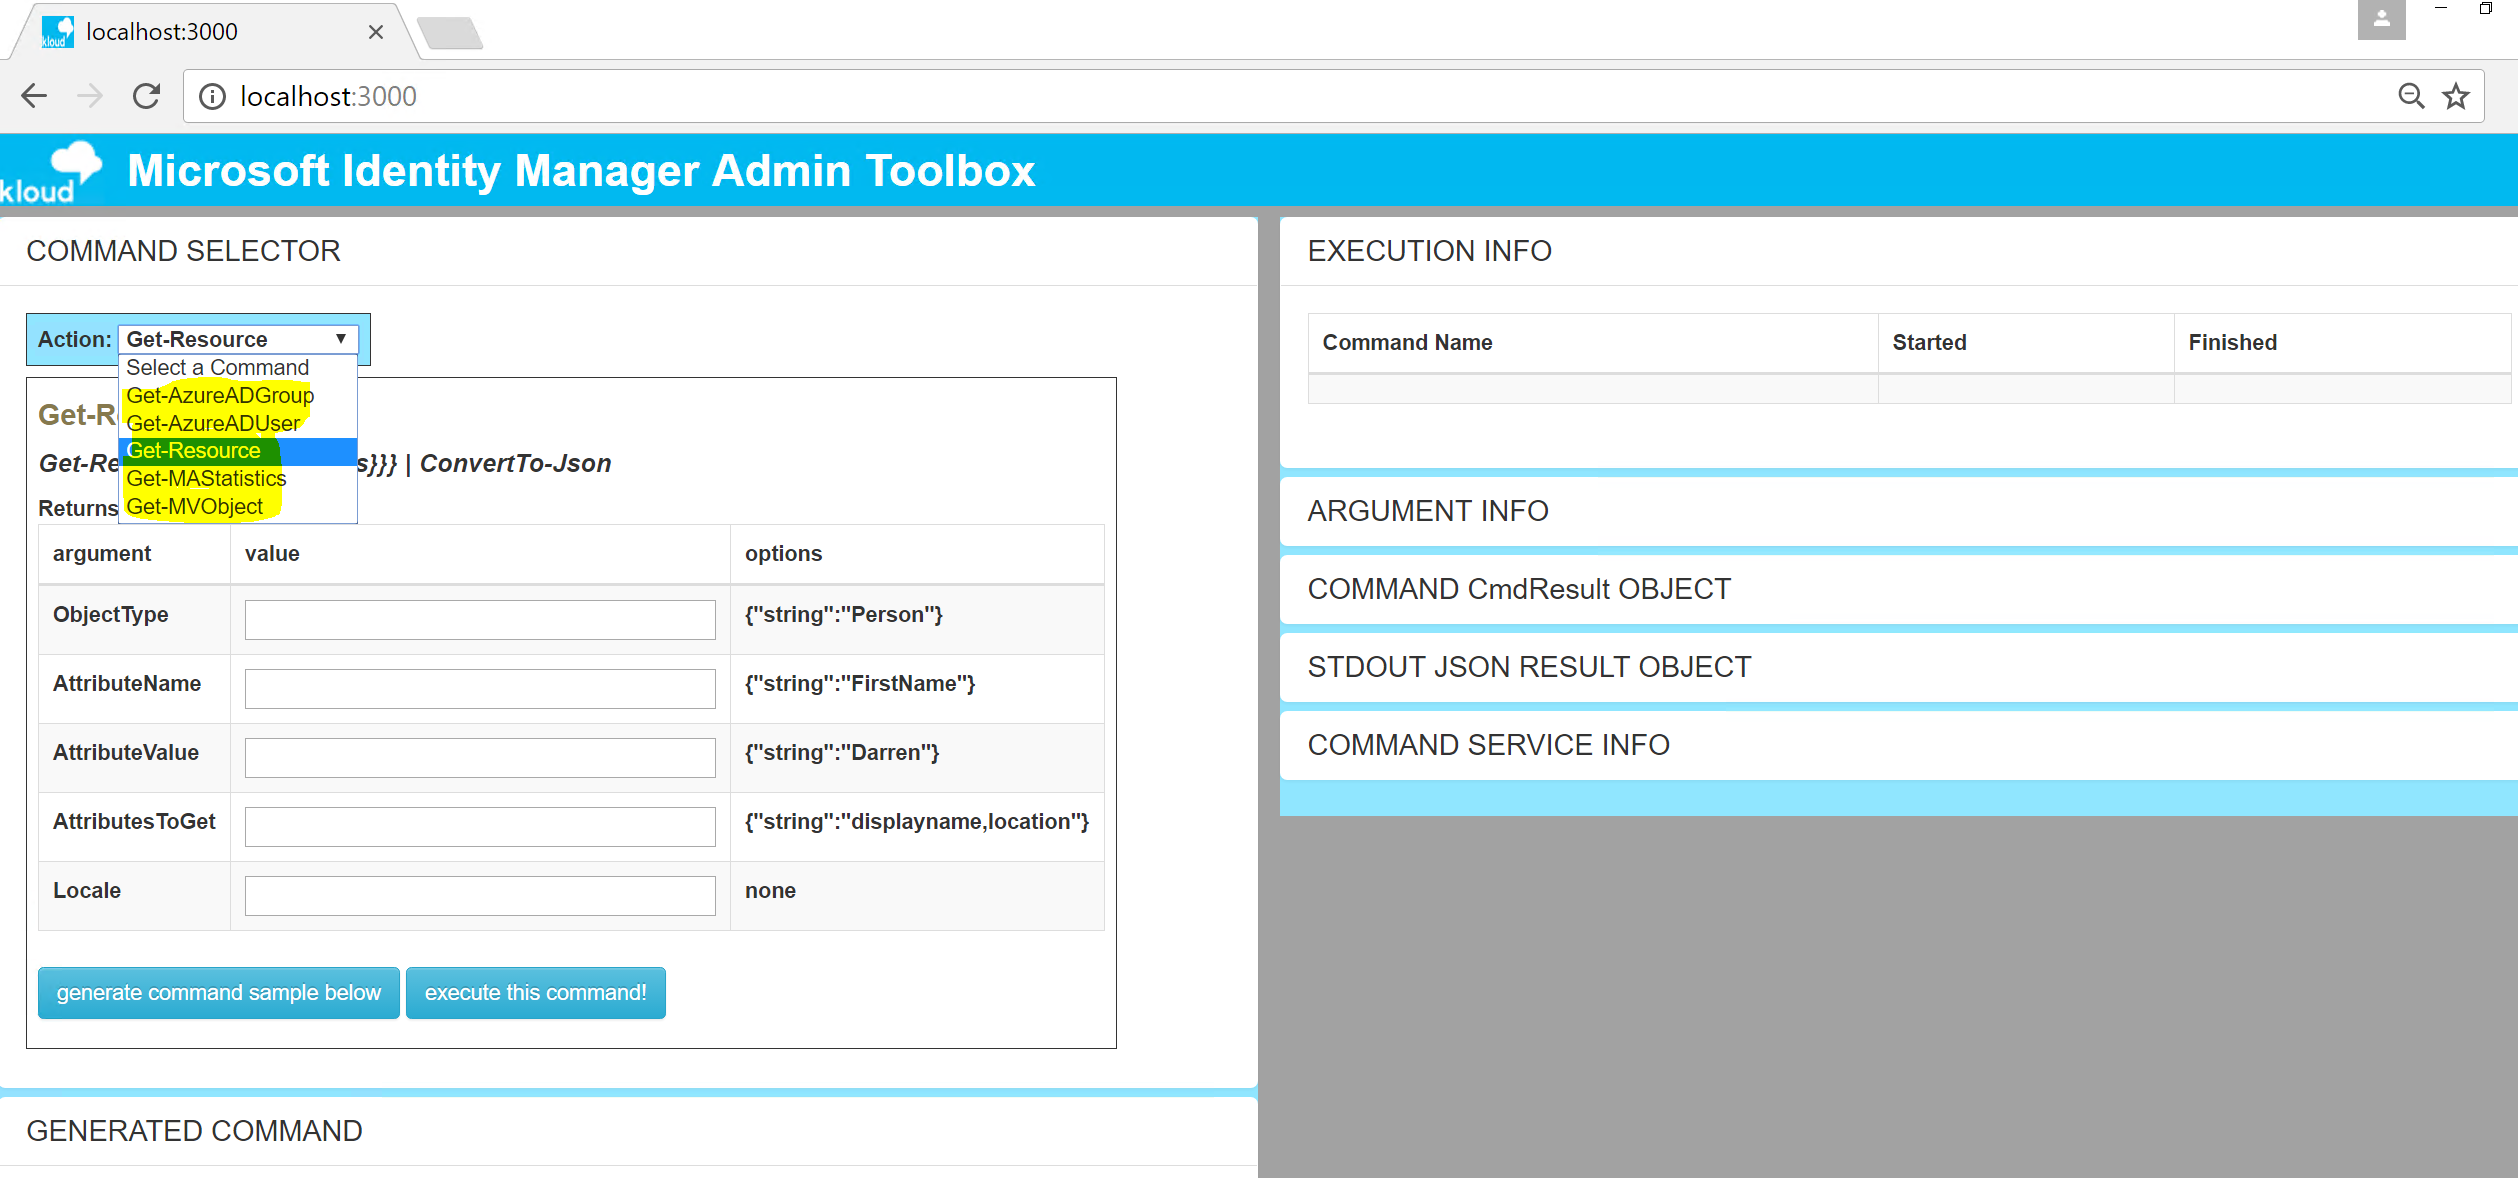
In a browser on the same host go to http://localhost:3000 again and you should see the site as it is below.
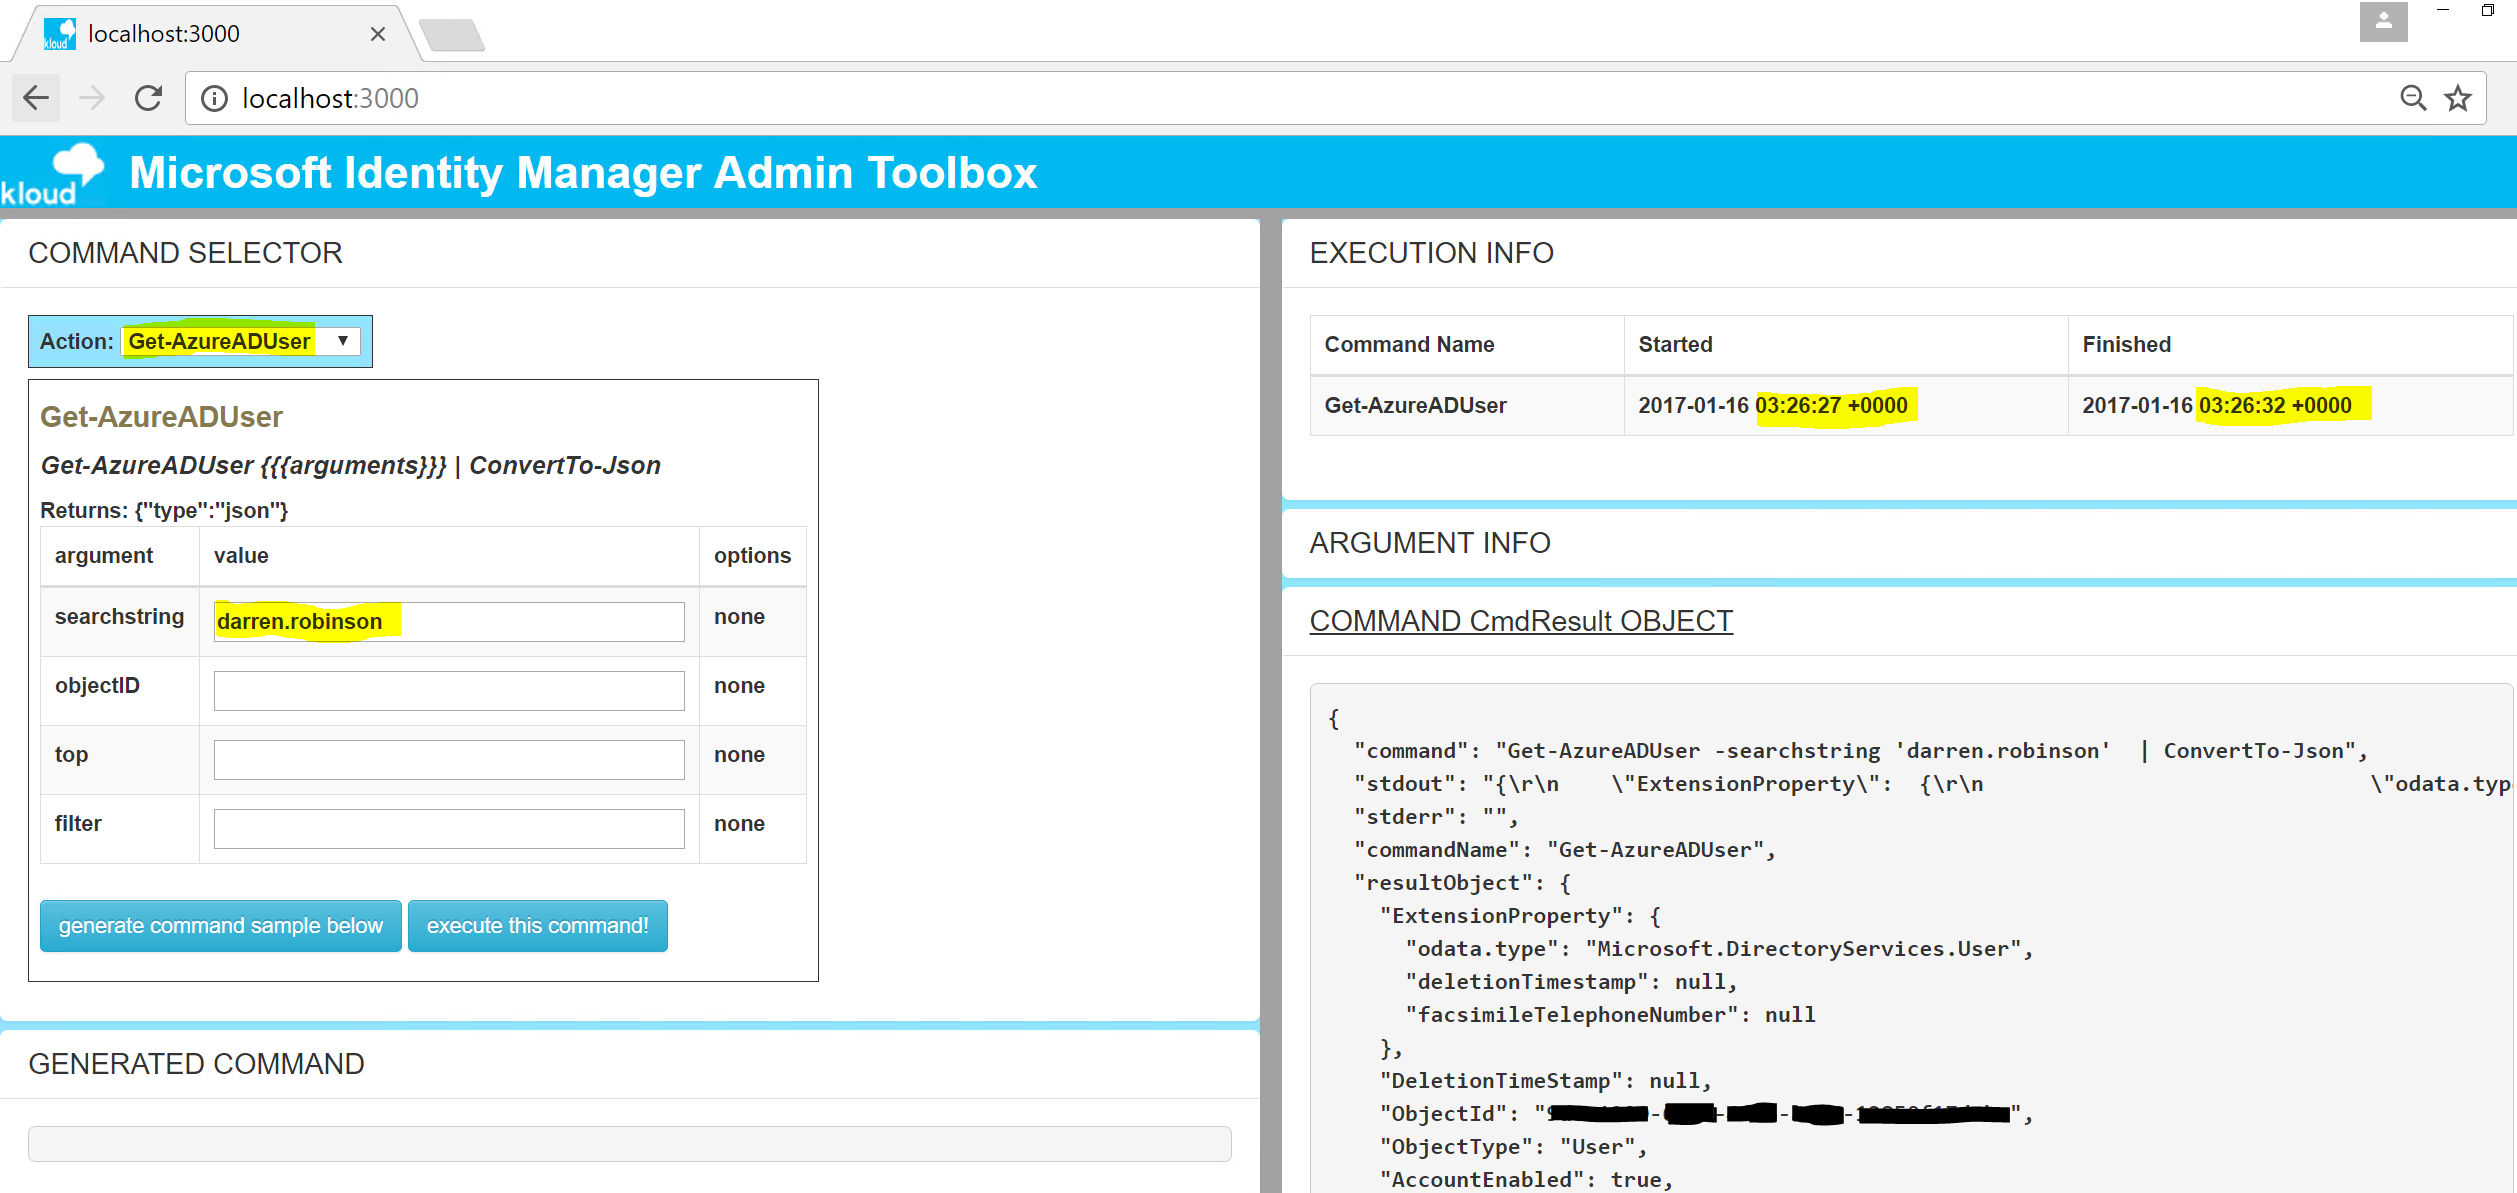
Branding and styling from the console.html, menu options from the o365Utils.js and when you select a command and execute it data from the associated service …….
… you can see results. From the screenshot below a Get-AzureADUser command for the associated search string executed in milliseconds.
Summary
The powershell-command-executor-ui from bitsofinfo is a very extensible and powerful NodeJS website as a front-end to PowerShell.
With a few tweaks and updates the look and feel can be easily changed along with the addition of any PowerShell commands that you wish to have a UI for.
As it sits though keep in mind you have a UI with hard-coded credentials that can do whatever commands you expose.
Personally I am running one for my use only and I have it hosted in Azure in its own Resource Group with an NSG allowing outgoing traffic to Azure and my MIM environment. Incoming traffic is only allowed from my personal management workstations IP address. I also needed to allow port 3000 into the server on the NSG as well as the firewall on the host. I did that quickly using the command below.
# Enable the WebPort NodeJS is using on the firewall
netsh advfirewall firewall add rule name="NodeJS WebPort 3000" dir=in action=allow protocol=TCP localport=3000
Follow Darren on Twitter @darrenjrobinson


