Way back in the 2000’s I got pulled into the commercial side of the Craft Beer Industry. I’d spent the previous 10+ years perfecting some eclectic beer styles and my professional brewing mates figured it was time to unleash them on the unsuspecting public. With any enterprising venture (but especially beer) you need a website to get the message out. I had a brand new 27″ iMac so I hacked together a simple one page website using the now defunct Apple iWeb. I hosted the page on GoDaddy WebHosting, the registrar of the domain name I purchased. It was 2009, it was easy and it worked. Over the years my brewing company got bigger and the website got more content. The traffic and the hosting plan grew with it to where we are today.
After a solid 10 years and some crazy adventures brewing tasty crafty beers around the world, I’ve pulled back on the beer production. I still entertain a few collaborations here and there, but this week when the hosting for my website became due I figured there had to be a more economical way of hosting a static iWeb website in 2019. Enter Azure Static Website. Static Webhosting in Azure Storage has been available for a while and we’ve used it for some simple Single Paged Websites. I wanted to see if I could cancel my Webhosting, save some beer money and use Azure.
This is the process I performed to migrate my iWeb website to an Azure Static Website. The first thing I did was turn off auto-renewal on my GoDaddy WebHosting Plan. After that the high level process was;
- Update the iWeb Configuration (on my Mac) for my website to publish to a local folder
- Published my iWeb website to a local folder. I compressed the website into a zip archive and copied it to my cloud drive.
- In my Azure Subscription I created a Storage Account in a new Resource Group
- Enabled the Storage Account for Azure Static Website
- Uploaded my iWeb website using Azure Storage Explorer
- Tested the website
- Redirected my domain name to the Azure Static Website
- Had a celebratory beer
Creating an Azure Static Website
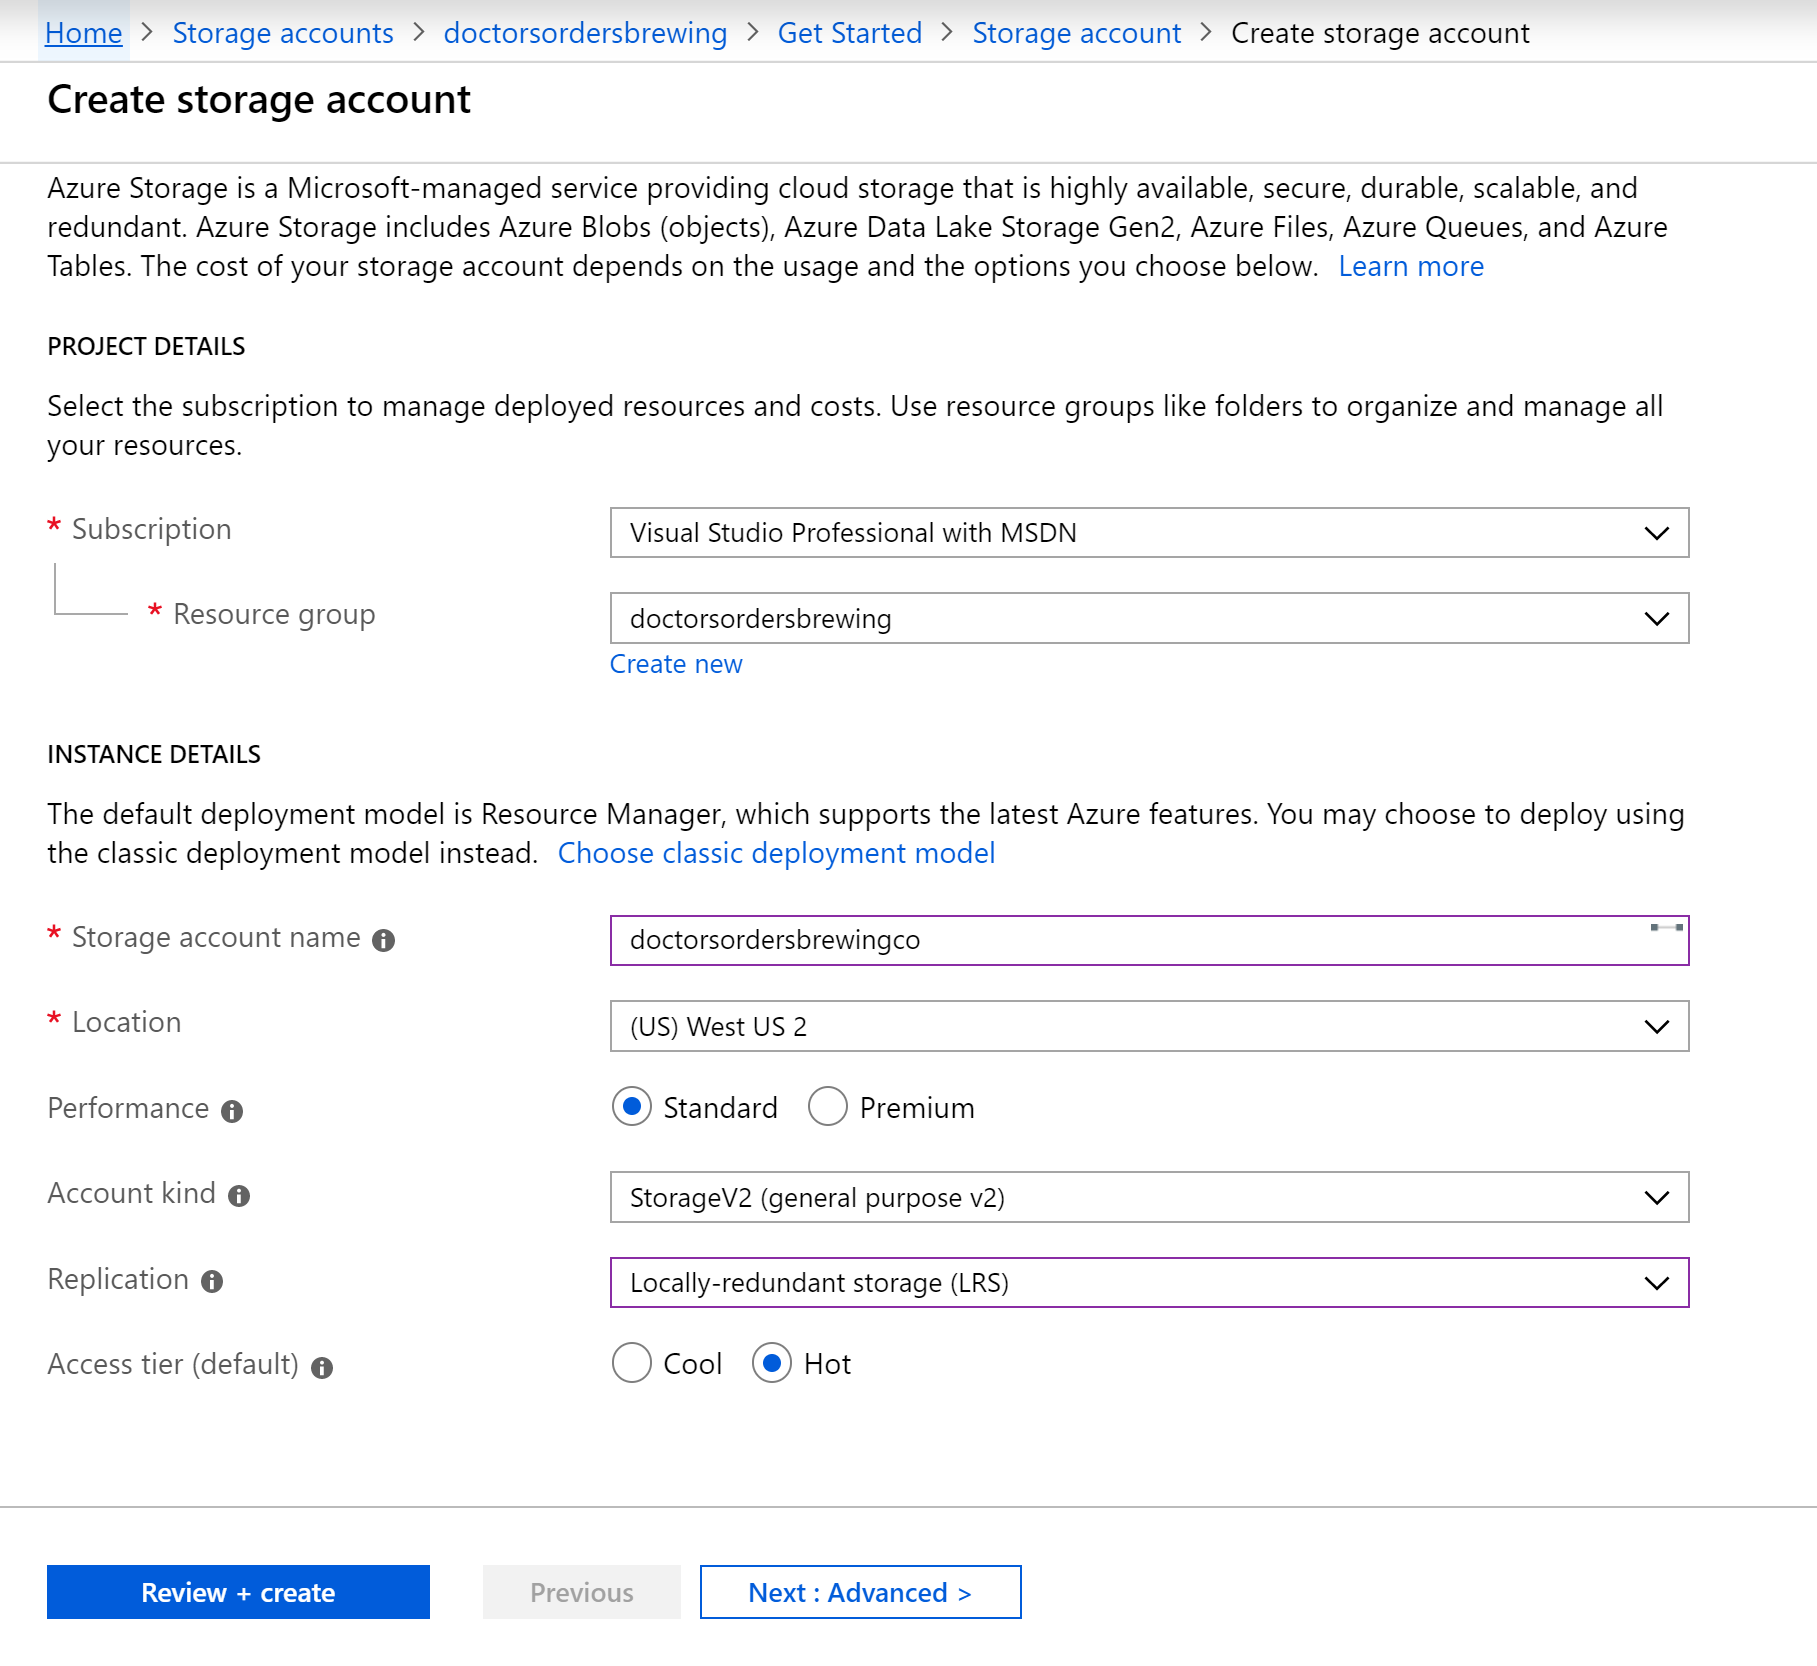
In the Azure Portal I then created a new Storage Account in a new Resource Group. A key option is to
do NOT choose Premium for the Performance option
as this will then not provide the option for a Static Website in on your new Storage Account. The Account Type must also be StorageV2

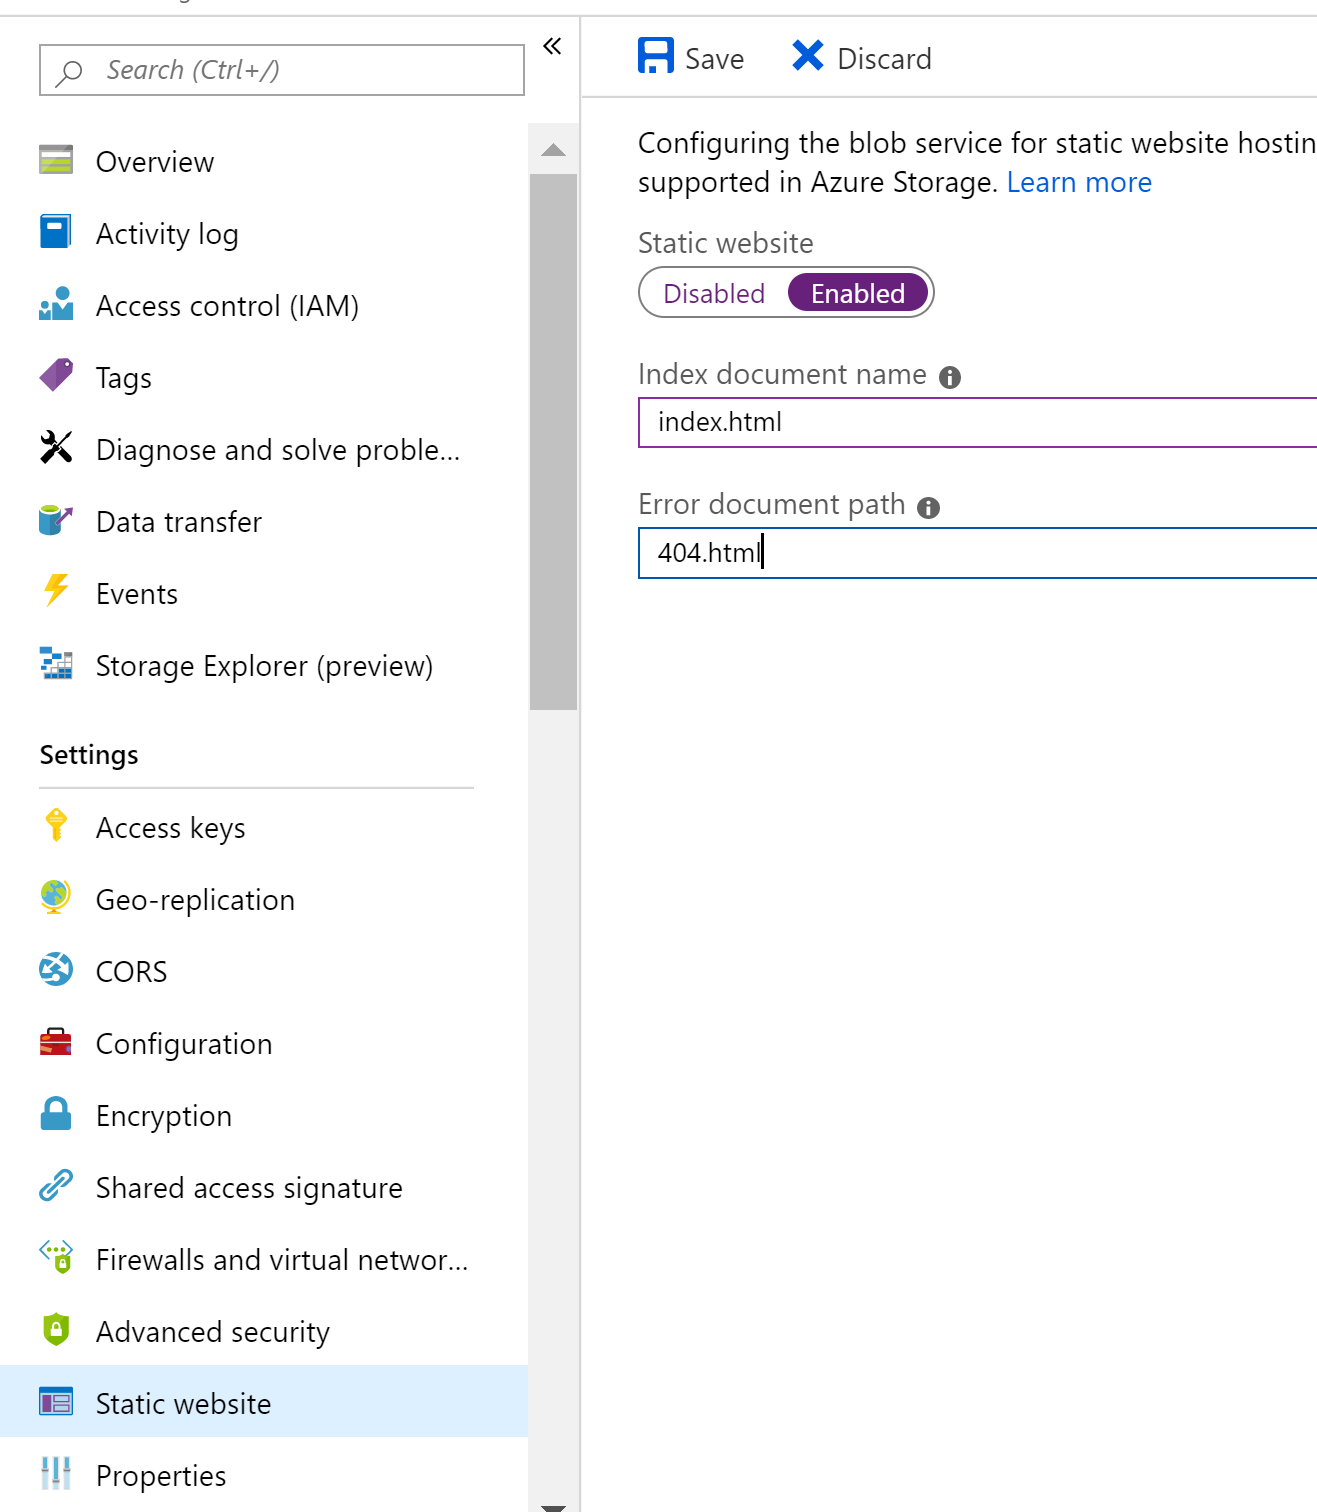
With the Resource Group and Storage Account created, on the configuration of the Storage Account I selected Static website and selected Enabled. I gave the name of the default file for my iWeb website (index.html) which is case-sensitive. Also the name of an error html file (404.html) and selected Save.

This then created the necessary dependencies on the Storage Account for a Static website. On my Windows laptop I uncompressed the Apple iWeb website to a folder and using Azure Storage Explorer uploaded my iWeb website folder.

I repeated this for my index.html and 404.html files. The 404.html file I created specifically for the Azure Static website.

On the properties of the Azure Static Website in the Azure Portal you can get the primary URI which will be something like https://yourStorageAccount.Zone.web.core.windows.net
I tested mine out and boom, there was my website.
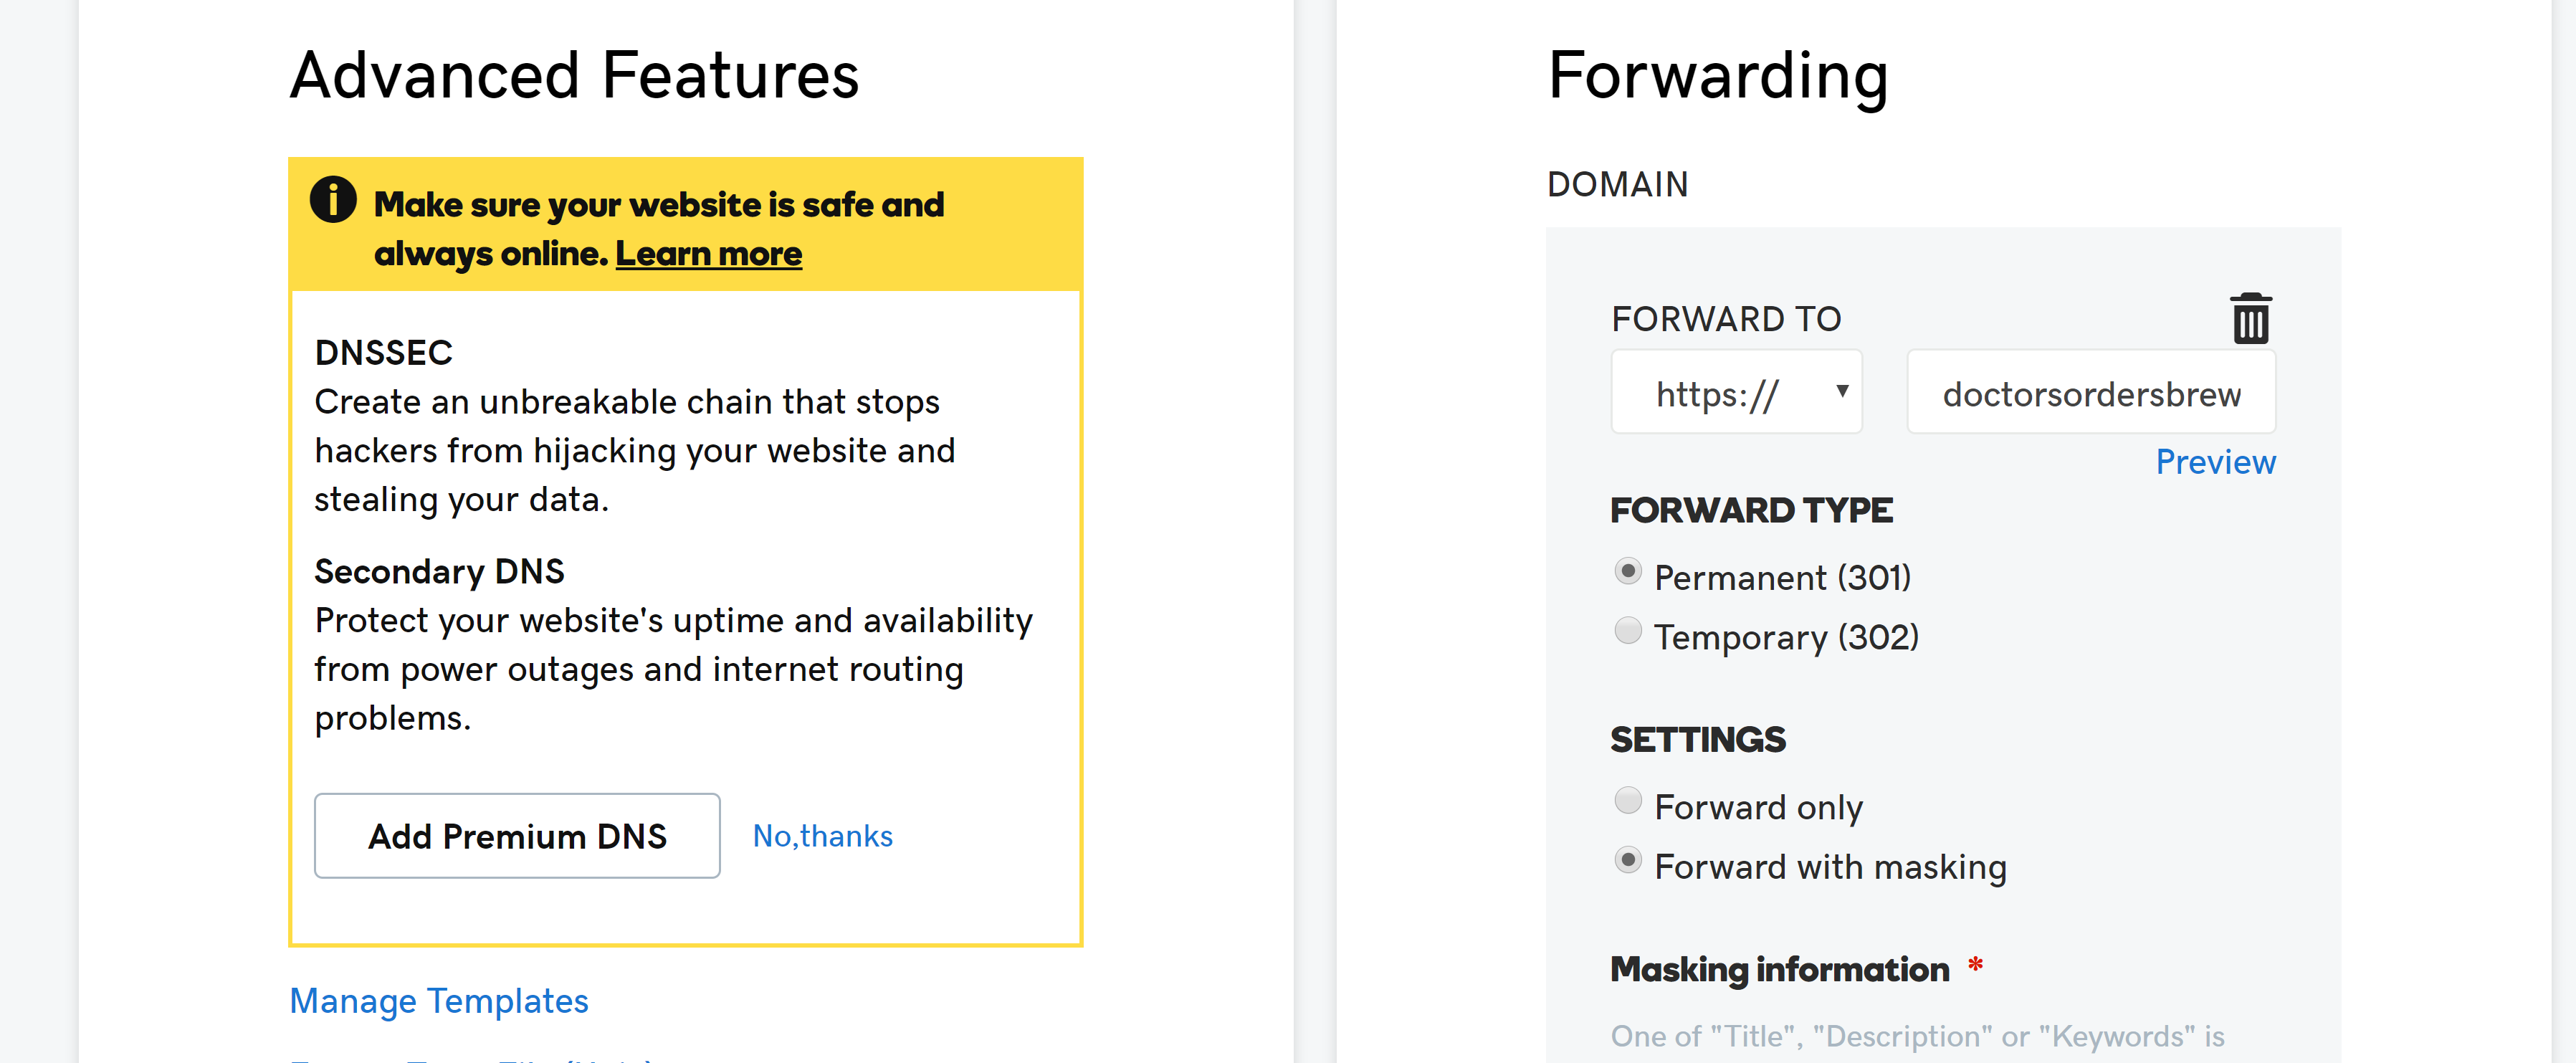
Finally in my DNS Settings for my brewing company domain name back at GoDaddy where the domain name is registered, I configured forwarding (with masking) to the Azure Static Website address.

Summary
In the space of an hour I was able to export my 10+ year old Apple iWeb website, create a new Azure Storage Account and upload my web content and redirect my domain name to the new location of my website. Using Metrics on my Storage Account I will keep an eye on how much traffic is being served for my web content.


