


During a cleanup over the weekend I found a Raspberry Pi that wasn’t doing anything. I figured now that PowerShell Core had got to version 6.2.1 I should power it up and have a play around with maybe some sensors and outputs using PowerShell IoT. I ran into a couple of gotcha’s that took me some searching and head scratching to figure out, so I’m documenting them here for next time.
Installing PowerShell Core was straight forward. I followed the Microsoft Guide here and pretty quickly I was up and running with PowerShell Core 6.2.1.

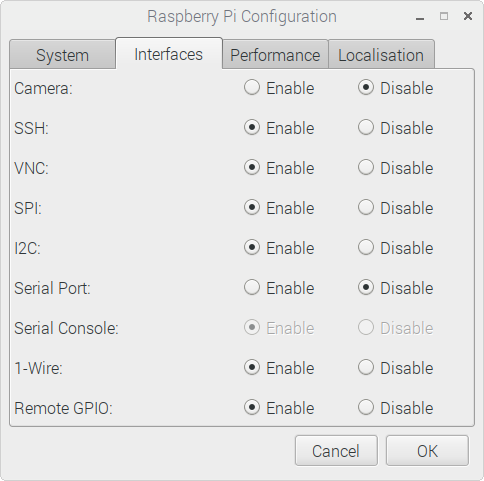
Enabling SPI and I2C Pins
By default on the latest Raspbian Stretch Lite build (that I installed – April 2019) you have to go into Preferences => Raspberry Pi Configuration and enable SPI and I2C if you are using displays etc.
GPIO Pins
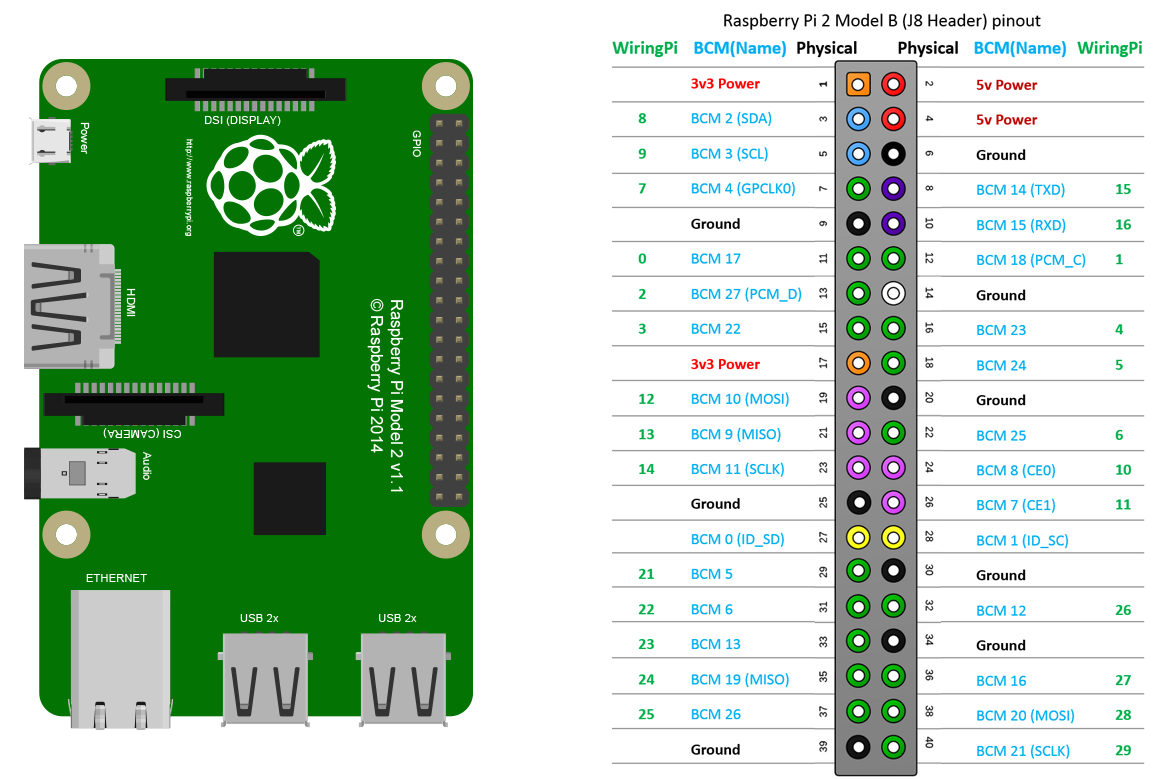
Having built a number of projects with IoT Devices I thought I knew what GPIO Pins were and how to interact with them. However I quickly failed when trying to flip the outputs on GPIO pins using the Set-GPIOPin cmdlet from the Microsoft.PowerShell.IoT PowerShell Module. It turns out that the Microsoft PowerShell IoT Module utilises the Wiring Pi scheme for Pin numbering. Obviously having not done any IoT with a Raspberry Pi before I was not familiar with this underlying C Library. Therefore whilst I was trying to use the GPIO number 8 for example, what I really needed to be addressing was Pin 10.
The schematic below shows the 40 Pin GPIO connector with the WiringPi Pin numbers.
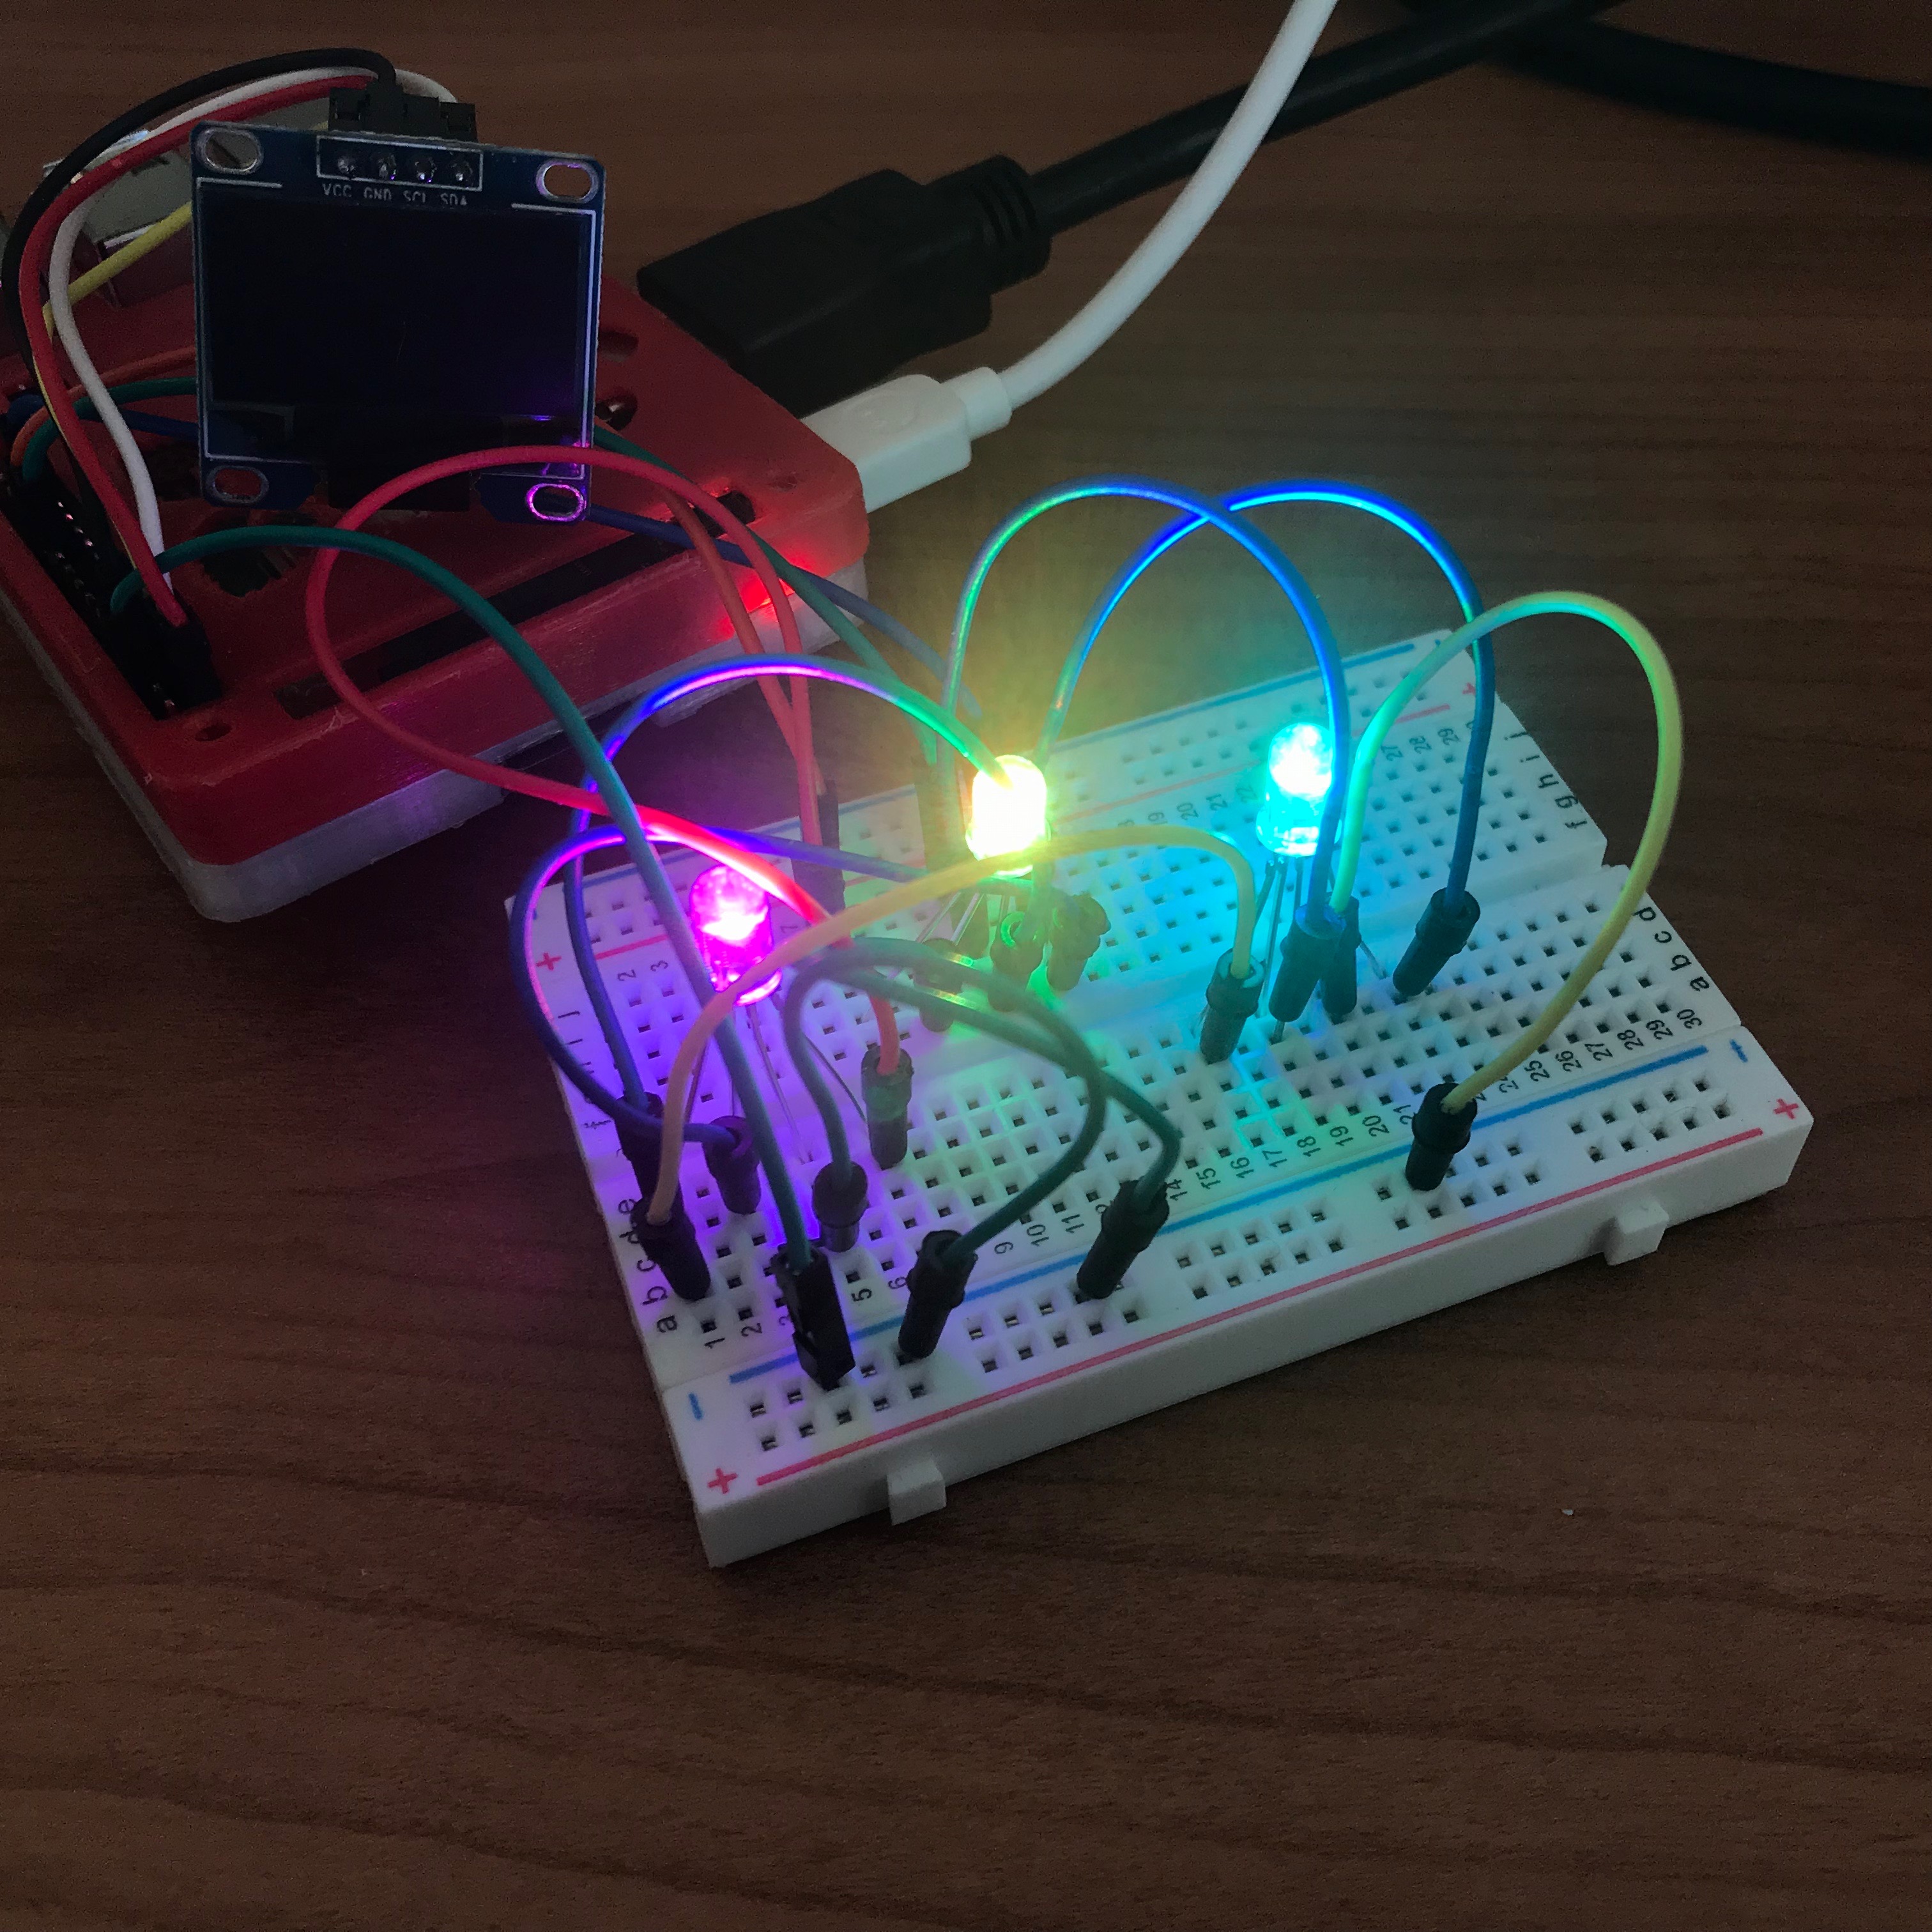
With that knowledge and a few Red Green Blue (RGB) LED’s wired to multiple GPIO outputs held high you can quickly get some nice colours.
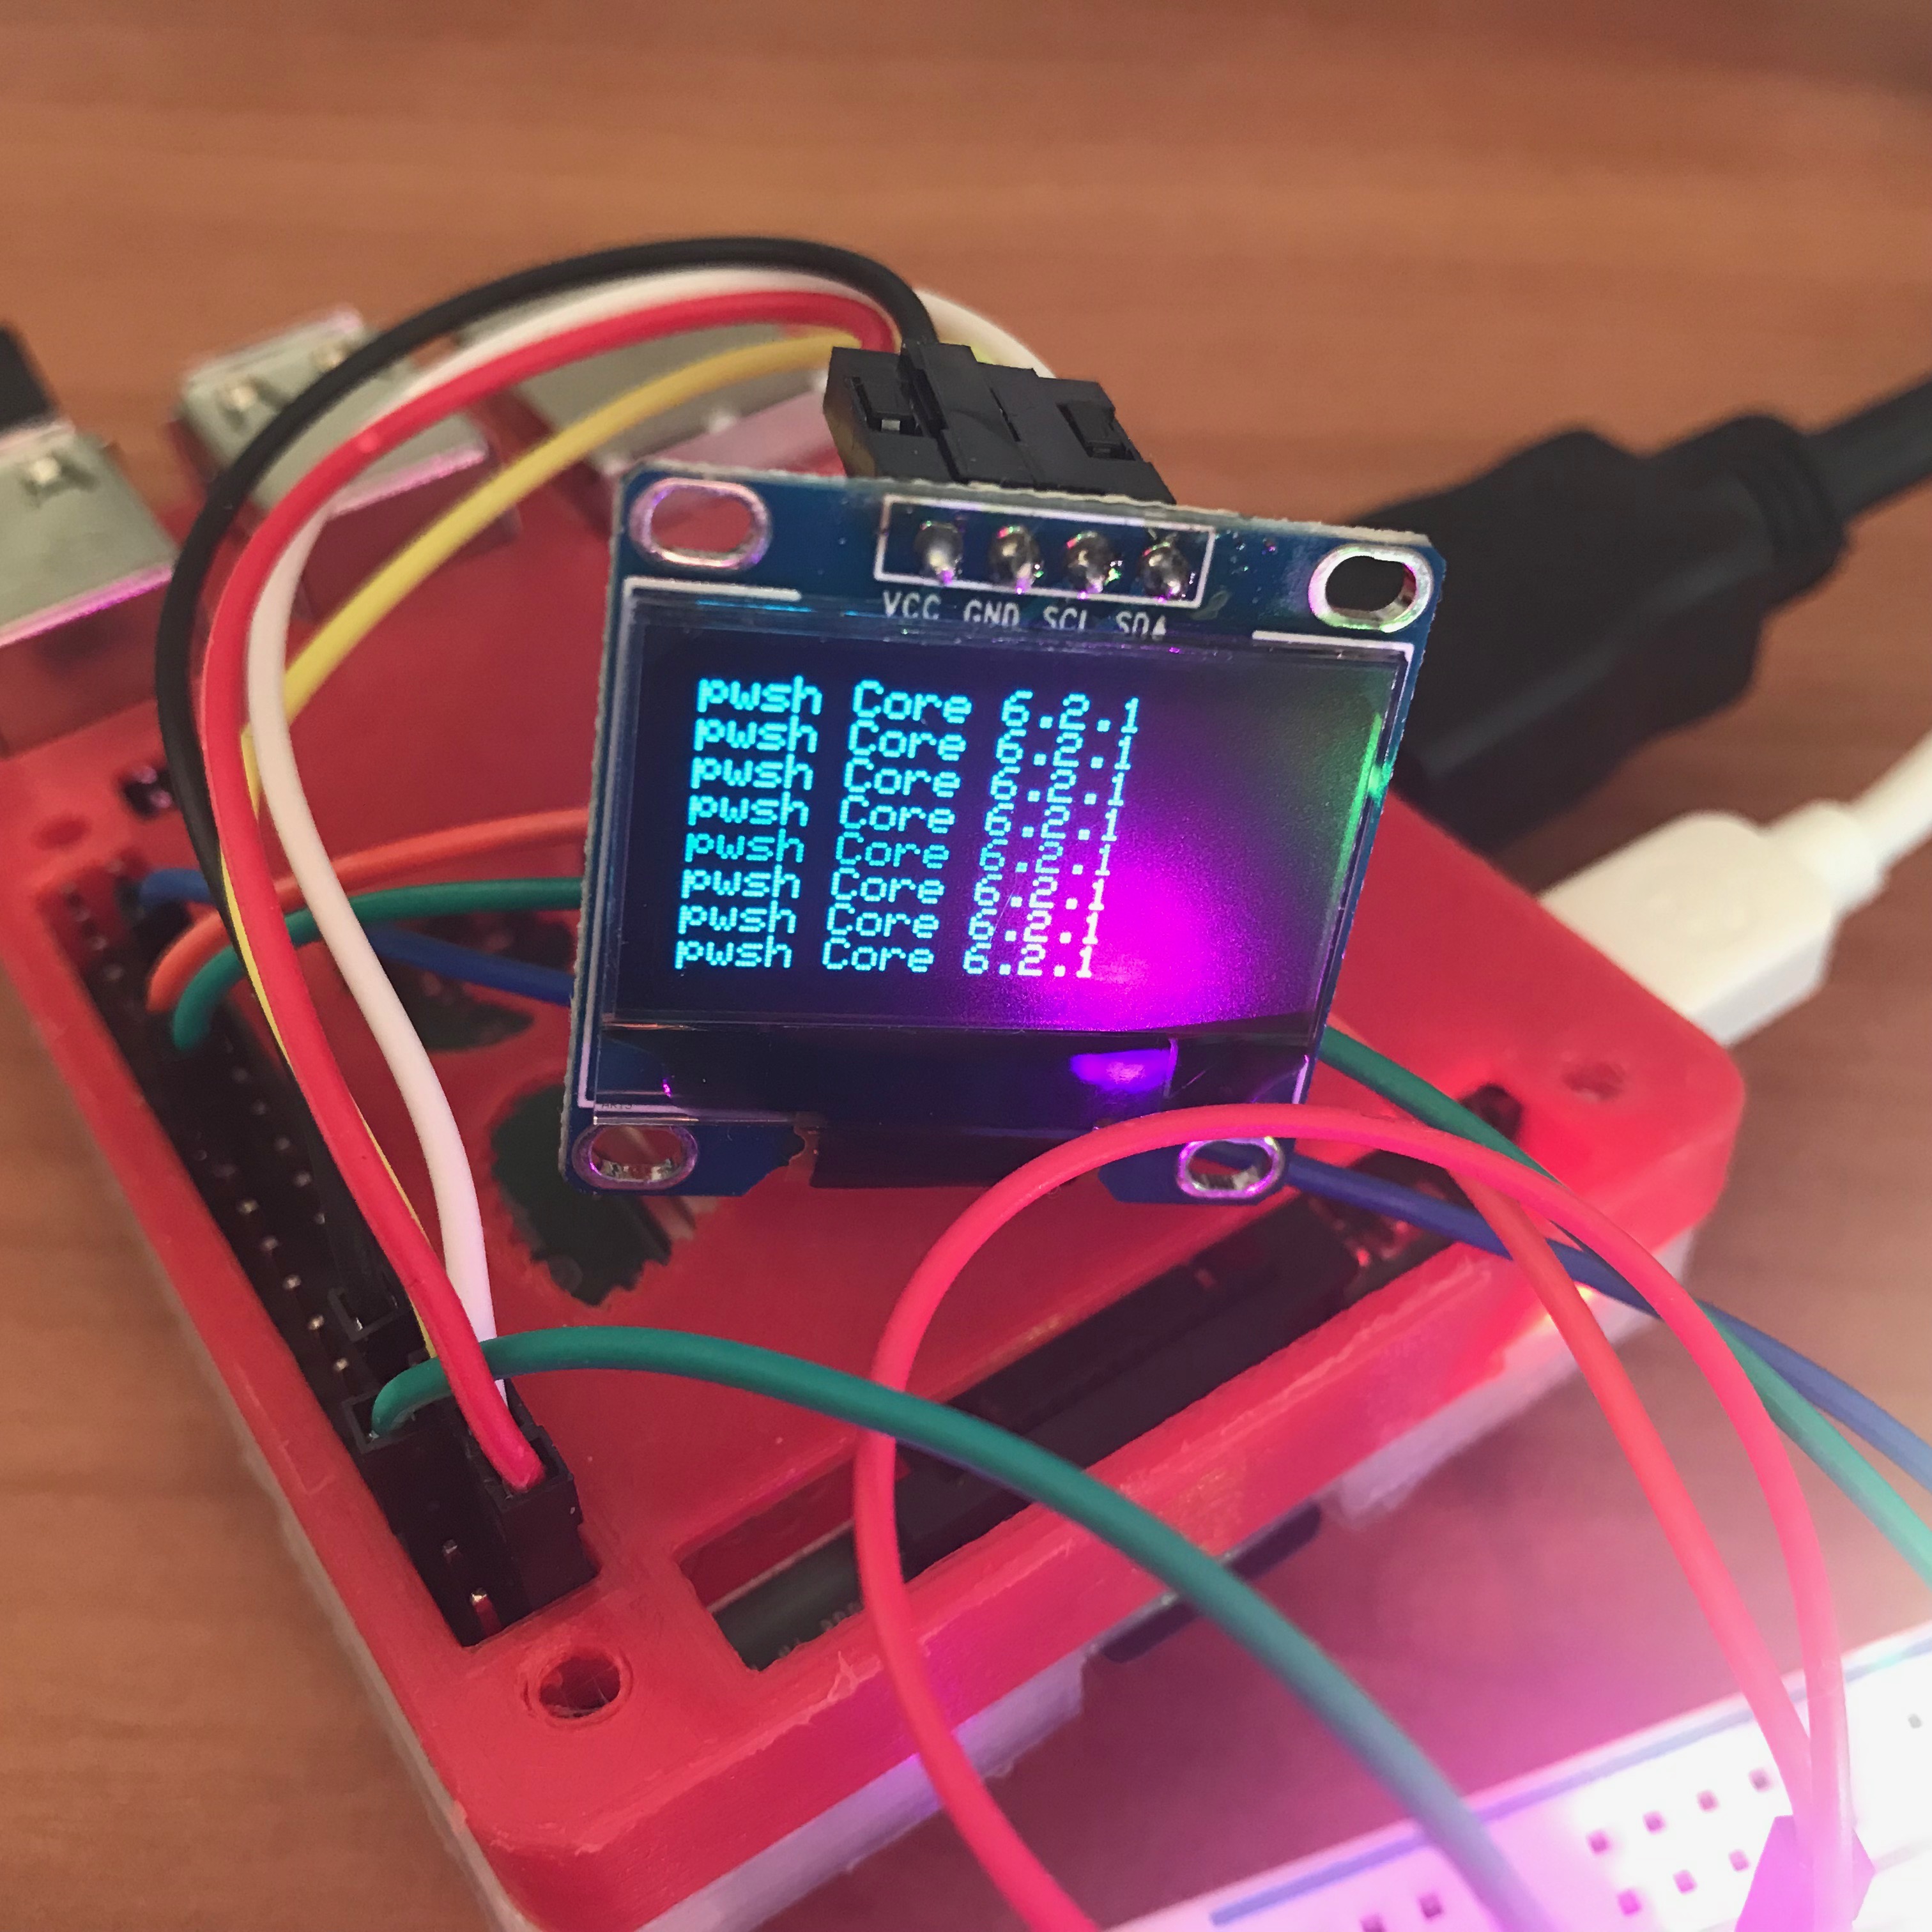
With the SSD1306 library you can quickly and easily output some text to an OLED display.
Note: After connecting the display you will need to reboot your Raspberry Pi to get the display showing your text. I didn’t spend too much time on it but I did notice that it didn’t have many capabilities like the SSD1306 library from Adafruit does for Python like fonts, text size, text position etc.
New-OledDisplay | Set-OledText -Value "pwsh Core 6.2.1 pwsh Core 6.2.1 pwsh Core 6.2.1 pwsh Core 6.2.1 pwsh Core 6.2.1 pwsh Core 6.2.1 pwsh Core 6.2.1 pwsh Core 6.2.1"
Summary
The basics are there to set GPIO pins high and low which in turn could then trigger a relay that activates something else. The available libraries and examples only extend to a few other sensors and output devices. It was fun to have a quick mess around and understand the capabilities, and I’m sure it would be possible to develop some interesting projects with it. With Winter now here, maybe there will be a rainy weekend soon and I’ll be inspired to build something.