


By default the AzureML environment provides the Python and R kernels. The reason you’re here though will be because, like me you want PowerShell. This post details the steps to enable the .NET Interactive (C#, F# & PowerShell) kernels in AzureML.

Installation Process
The process is very similar to what I detailed in my Docker PowerShell Jupyter Notebook Environments post earlier this year. Essentially install PowerShell, .NET Core SDK and .NET Interactive and register the kernels.
Prerequisites
The prerequisites naturally are an AzureML environment with an attached compute instance. If you don’t already have one, navigate to the Azure Machine Learning Studio Portal and create a workspace and provision an AzureML compute instance.
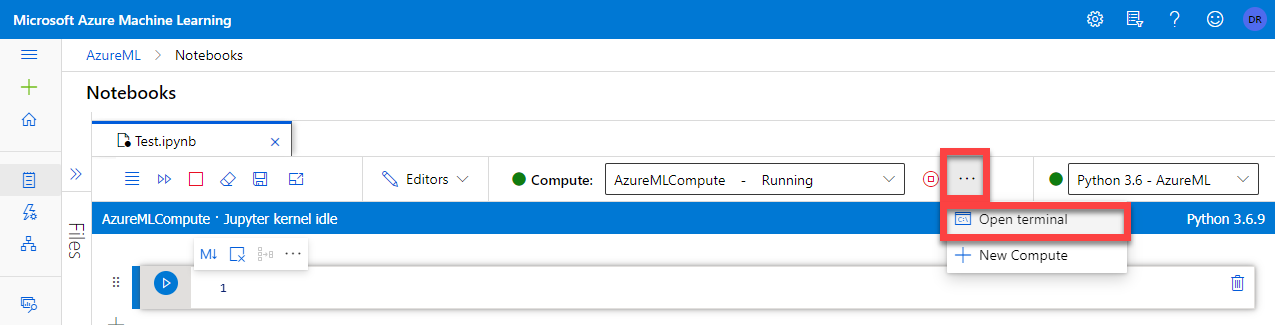
Open AzureML Terminal
From your AzureML Workspace with Compute attached, open a terminal.
AzureML Compute Environment
Check the version of the AzureML Compute host. The AzureML Compute instance I just created is Ubuntu 16.04 as verified using uname -a

Add Microsoft Source for Ubuntu
Now that we know the version of the underlying operating system of the AzureML compute environment we can add the associated Microsoft source. Update the following URL if your environment isn’t Ubuntu 16.04 for the version you have.
wget -q https://packages.microsoft.com/config/ubuntu/16.04/packages-microsoft-prod.deb
sudo dpkg -i packages-microsoft-prod.deb
With the Microsoft package source added we can update the package list so that we can install our Microsoft dependencies.
sudo apt-get update
Install PowerShell
Now, we can install PowerShell onto our compute host using the following command.
sudo apt-get install -y powershell
Install the .NET Core SDK
As of writing the version of .NET Core SDK supported on Ubuntu 16.04 for .NET Interactive is 3.1. We can install that using the following command.
Note: In my environment, the .NET Core 3.1 SDK was already present. I’ll leave this here just in case it’s not always there by default.
Update April 2021
The .NET 5 SDK is required for the latest version of .NET Interactive and PowerShell 7.1+ support.
sudo apt-get install -y apt-transport-https && sudo apt-get install -y dotnet-sdk-3.1
sudo apt-get install -y dotnet-sdk-5.0
Install .NET Interactive
Update: April 2021
The myget dotnet repo (detailed below) is now deprecated.
The latest versions of dotnet-interactive can now be obtained from Nuget.
Omit the –add-source and –version switches to obtain the latest package from Nuget.
As of writing the latest version of .dotnet-interactive is 1.0.155302. It can be installed using the following command.
dotnet tool install -g Microsoft.dotnet-interactive --version 1.0.155302 --add-source "https://dotnet.myget.org/F/dotnet-try/api/v3/index.json"
Install .NET Interactive Kernels for Jupyter
With .NET Interactive installed we can now register the additional kernels.
dotnet interactive jupyter install 
We can then verify our new .NET Interactive kernels are present.
jupyter kernelspec list
Update the Environment Path
We need to add the path to .dotnet/tools to the environment path. We can view our paths in /etc/environment using
cat /etc/environmentEdit the environment configuration file using Nano.
sudo nano /etc/environment
Add the following path to the end of the PATH line then use Cntrl + X to exit accepting Y to overwrite the file.
/home/azureuser/.dotnet/tools
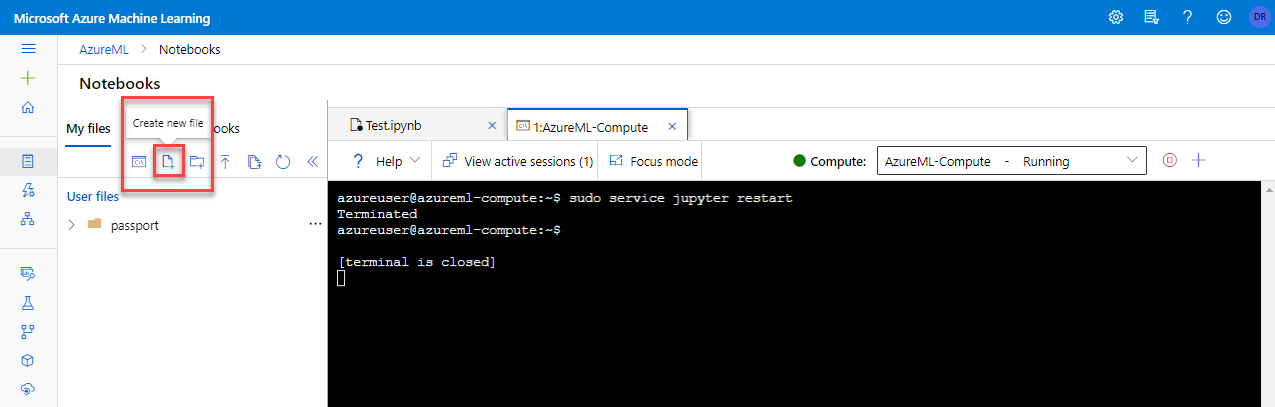
Restart Jupyter
Finally we can restart Jupyter to get our new kernels to be loaded and visible in AzureML Studio.
sudo service jupyter restart
New PowerShell AzureML Jupyter Notebook
We can now create ourselves a new PowerShell Jupyter Notebook in AzureML.

Switch the kernel to PowerShell, for our new Jupyter Notebook.

Finally, we can now test our PowerShell Jupyter Notebook environment out.

Summary
Enabling .NET Interactive Kernels in AzureML is very similar to any other Ubuntu environment. Hopefully in the near future it will be there by default.