Recently I needed to enable a SailPoint IdentityNow Active Directory Source to use TLS. Looking for information on how to complete this saw me read many articles in SailPoint Compass. However, none of them were written specifically for IdentityNow Active Directory Source TLS Configuration. Mostly they were for the IQService and Identity IQ. Putting pieces of this information together I got an existing Source (even though it is mentioned this shouldn’t work) updated and working for TLS.
I’m documenting this so the next time I need to do it and I find the process quickly, get it done and move on.
The high level process is;
- Logon to a Domain Controller in the Active Directory Domain you will be connecting to as a Source for IdentityNow
- Use Internet Explorer to export the Active Directory Trusted Root Cert
- Copy the certificate to all IdentityNow Virtual Appliances
- Restart the CCG Process
- Configure your Active Directory Source TLS Configuration settings
- Test the connection and perform Aggregations
Active Directory Trusted Root Cert
Logon to a Domain Controller using an Admin account in the Active Directory Domain you will be connecting to as a Source for IdentityNow and;
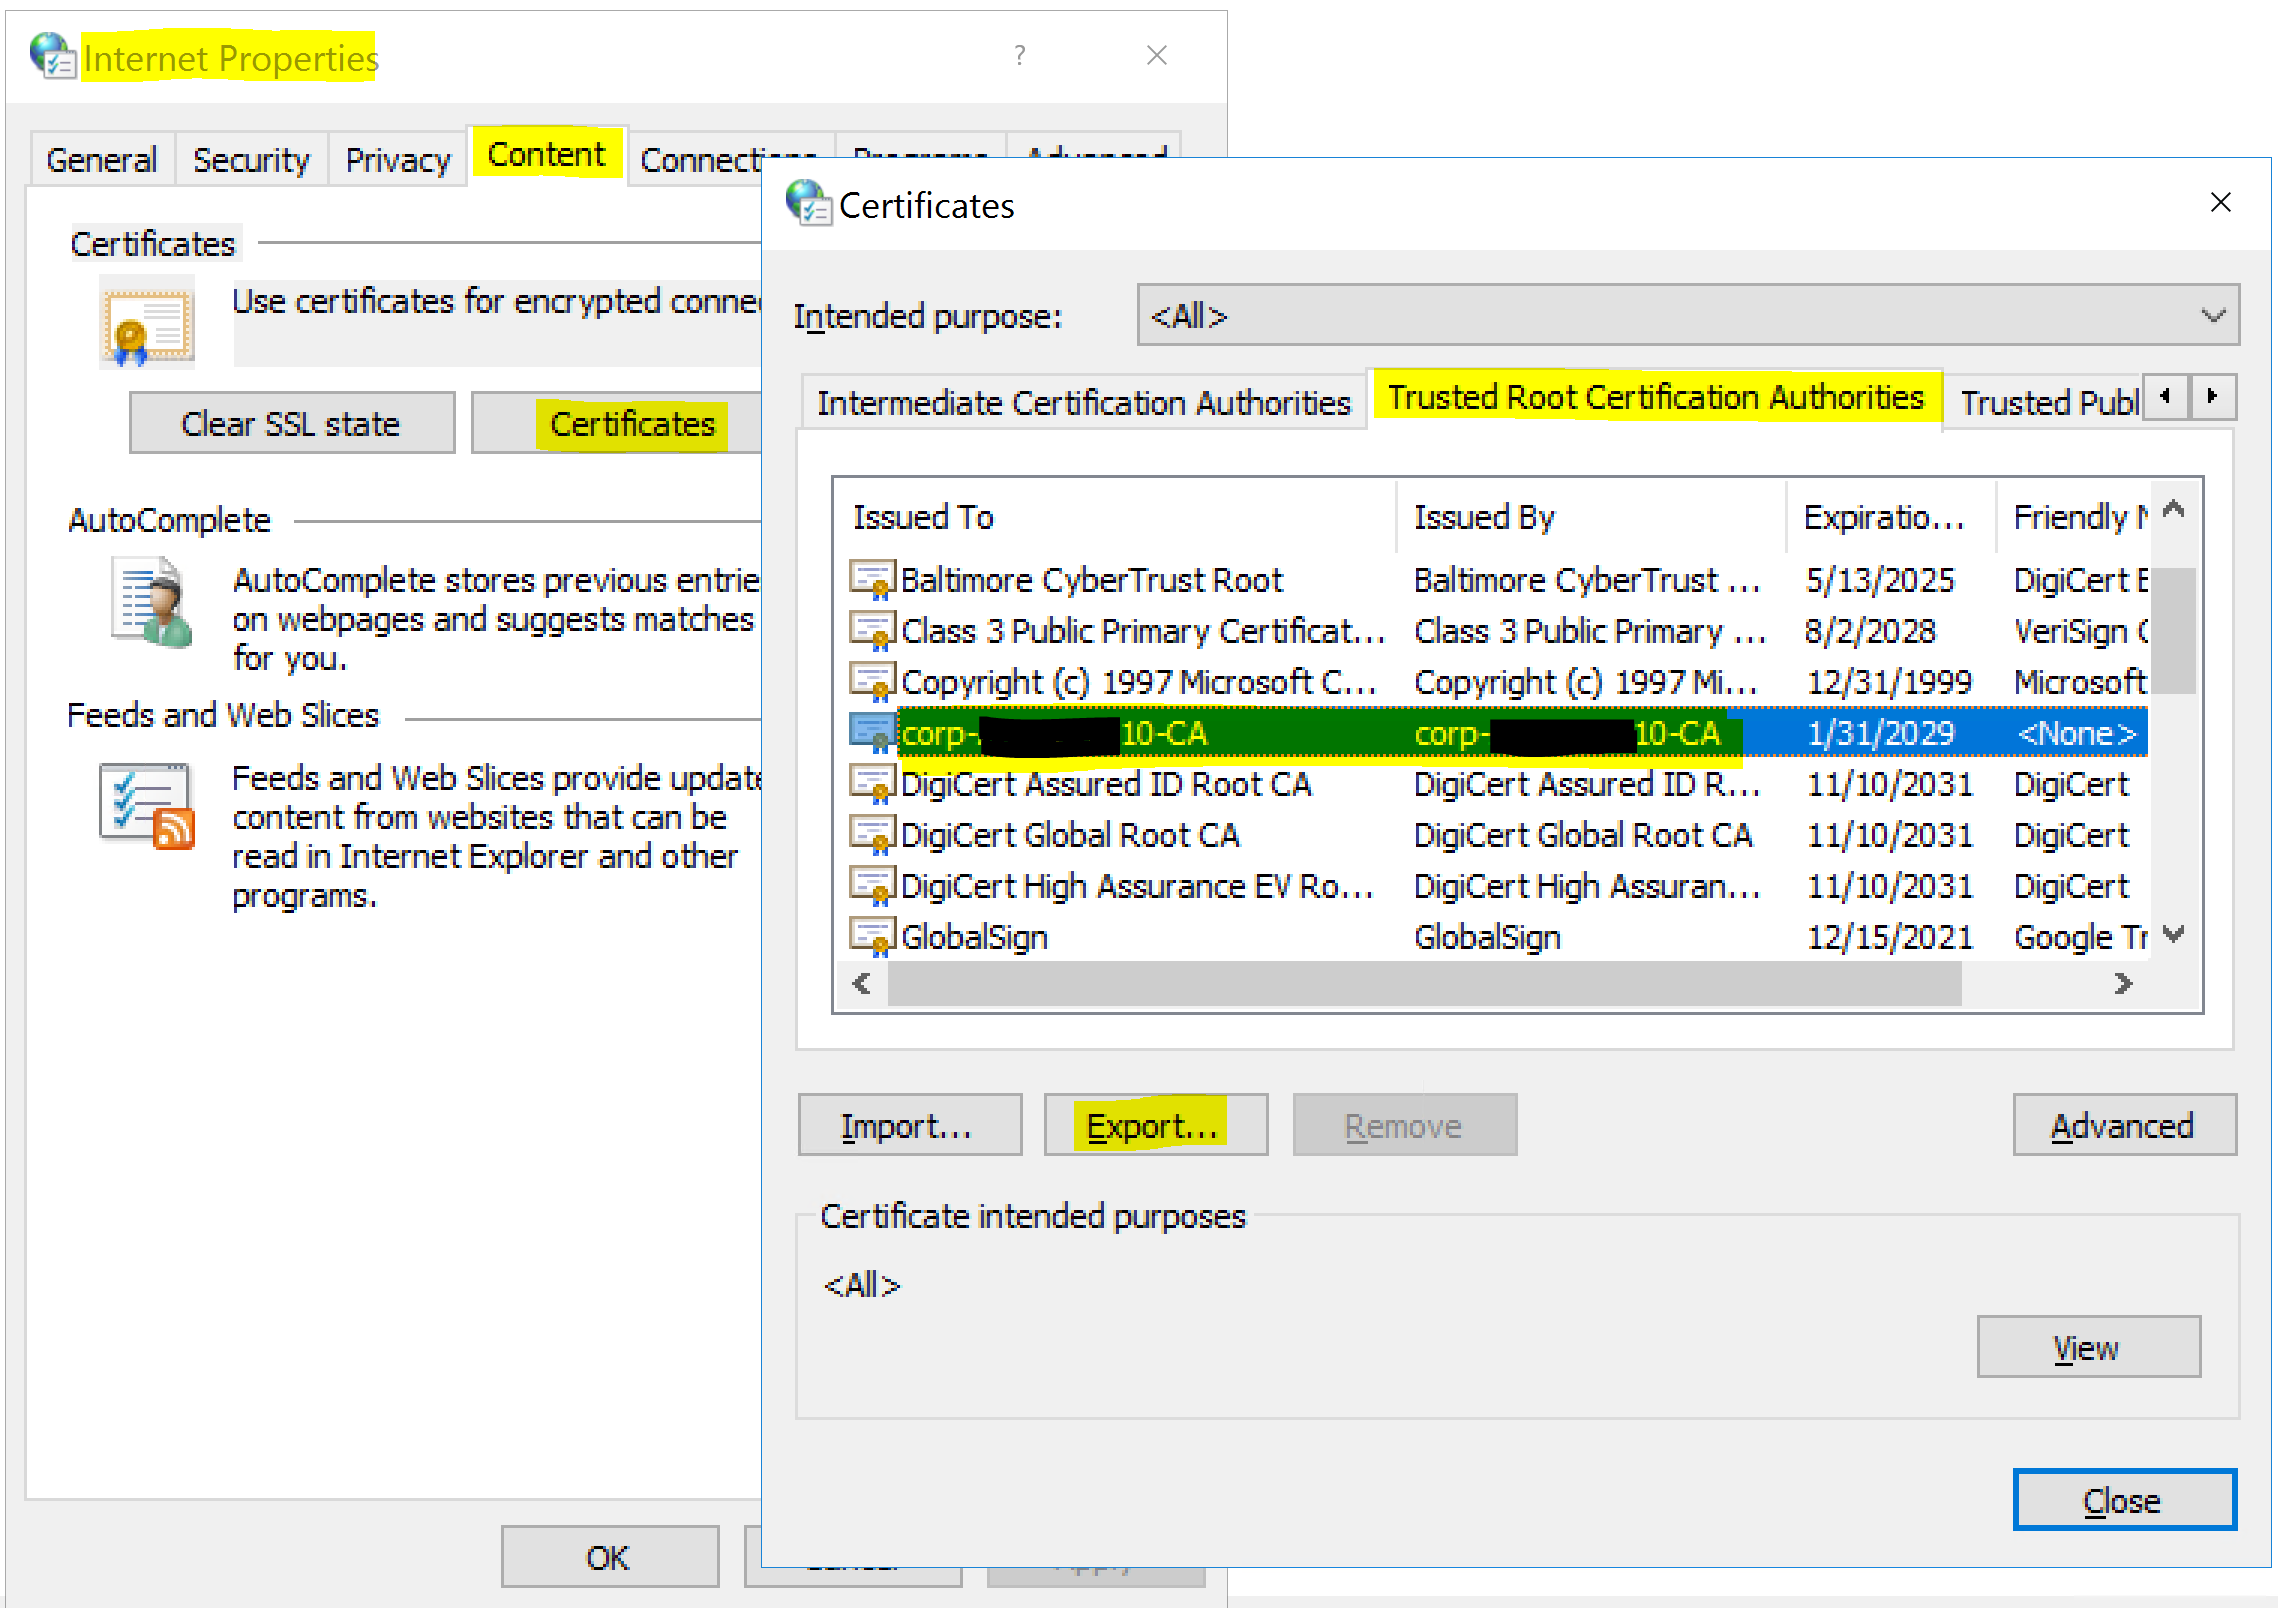
- from the Control Panel select Network and Internet => Internet Options
- on the Content tab select Certificates
- select the Trusted Root Certification Authorities tab
- locate the certificate associated with the Active Directory you will be connecting to as an IdentityNow Source
- select Export
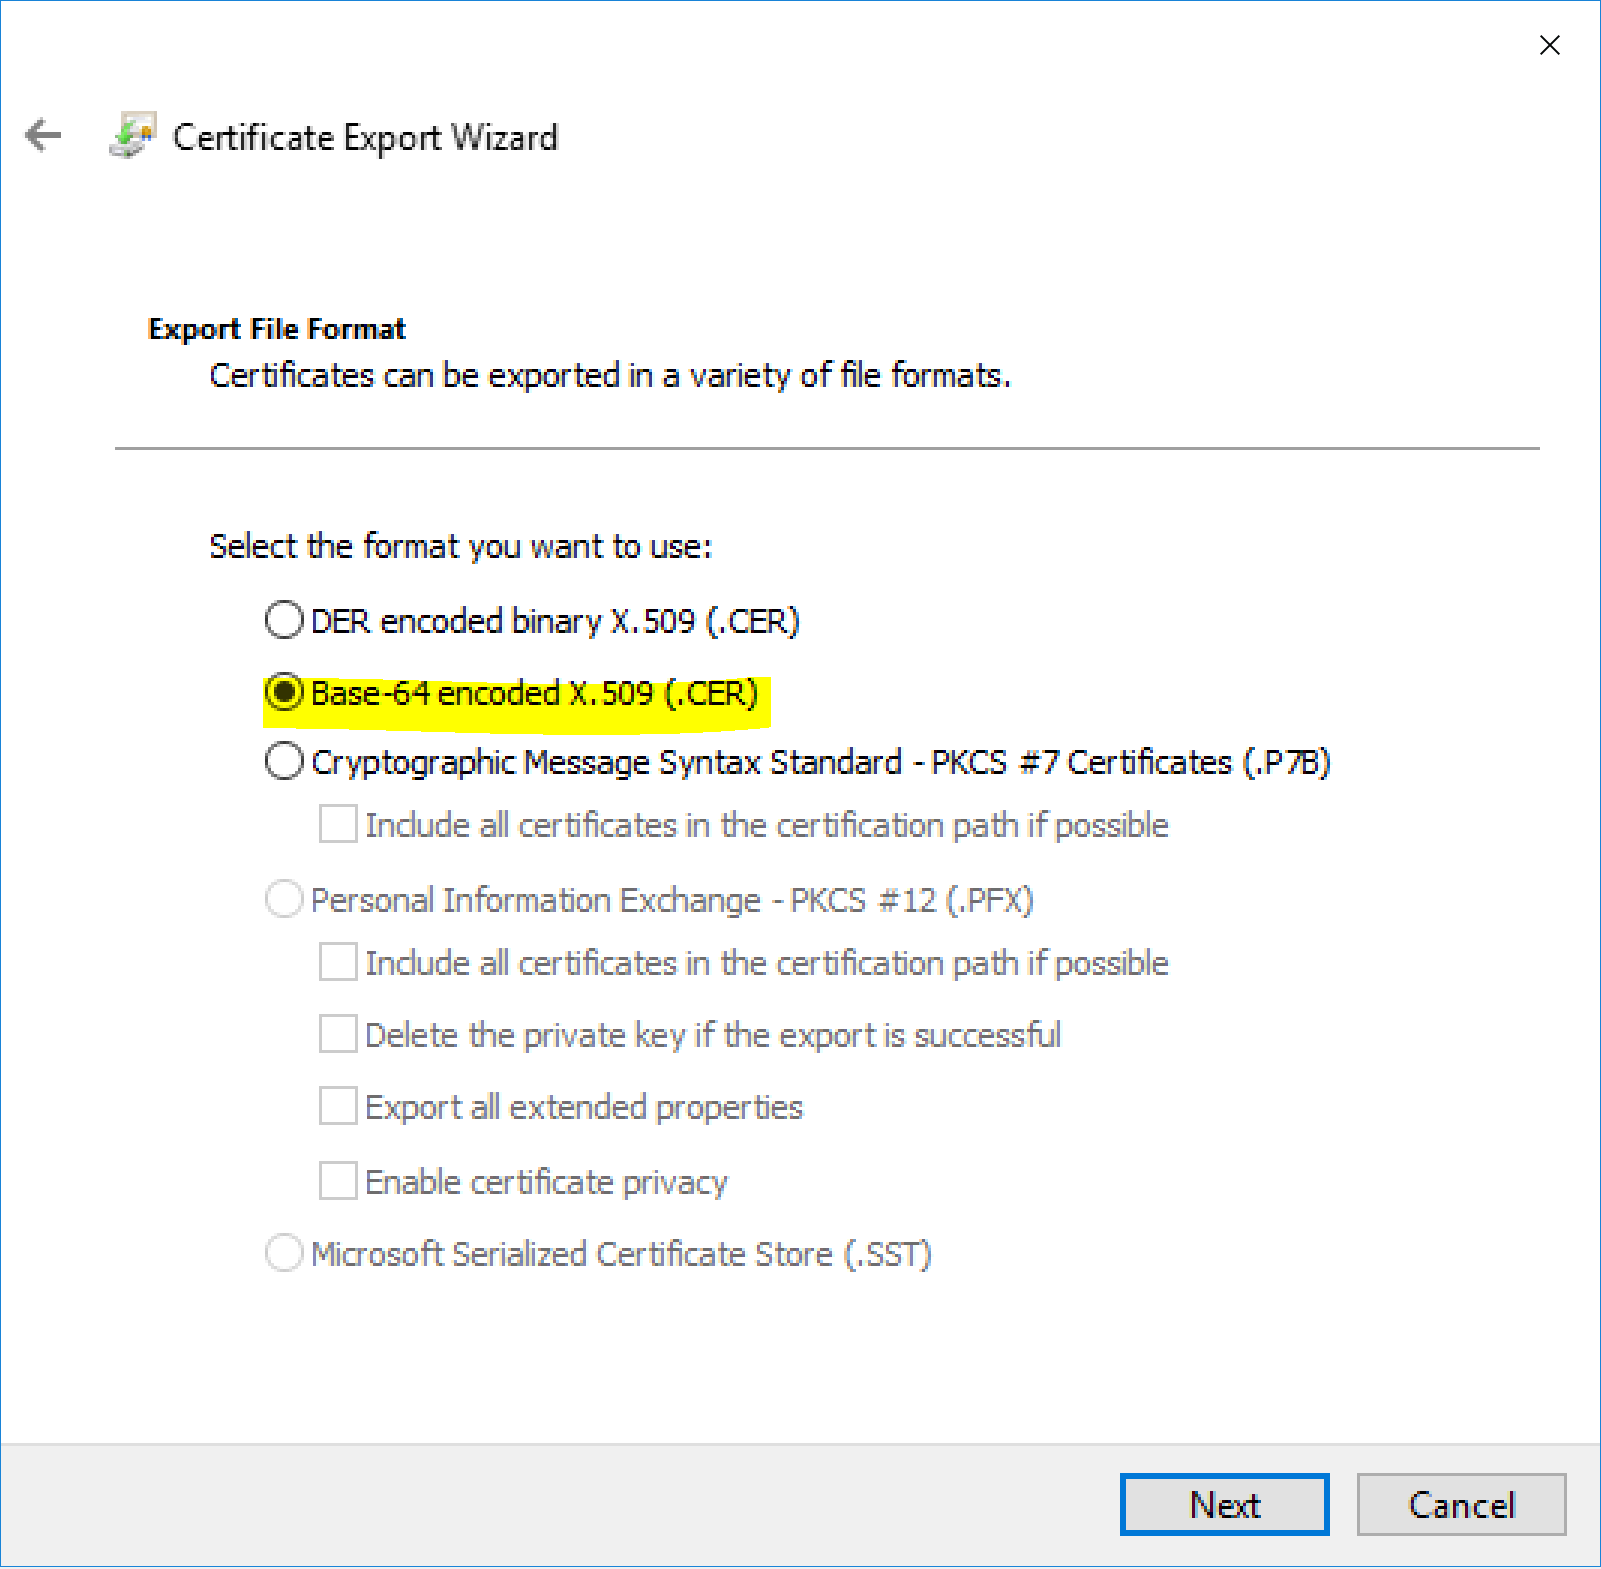
- export the certificate in Base-64 encoded format
Import the Certificate to all Virtual Appliances
The certificate needs to be put on each Virtual Appliance in the ~/sailpoint/certificates directory. On each VA;
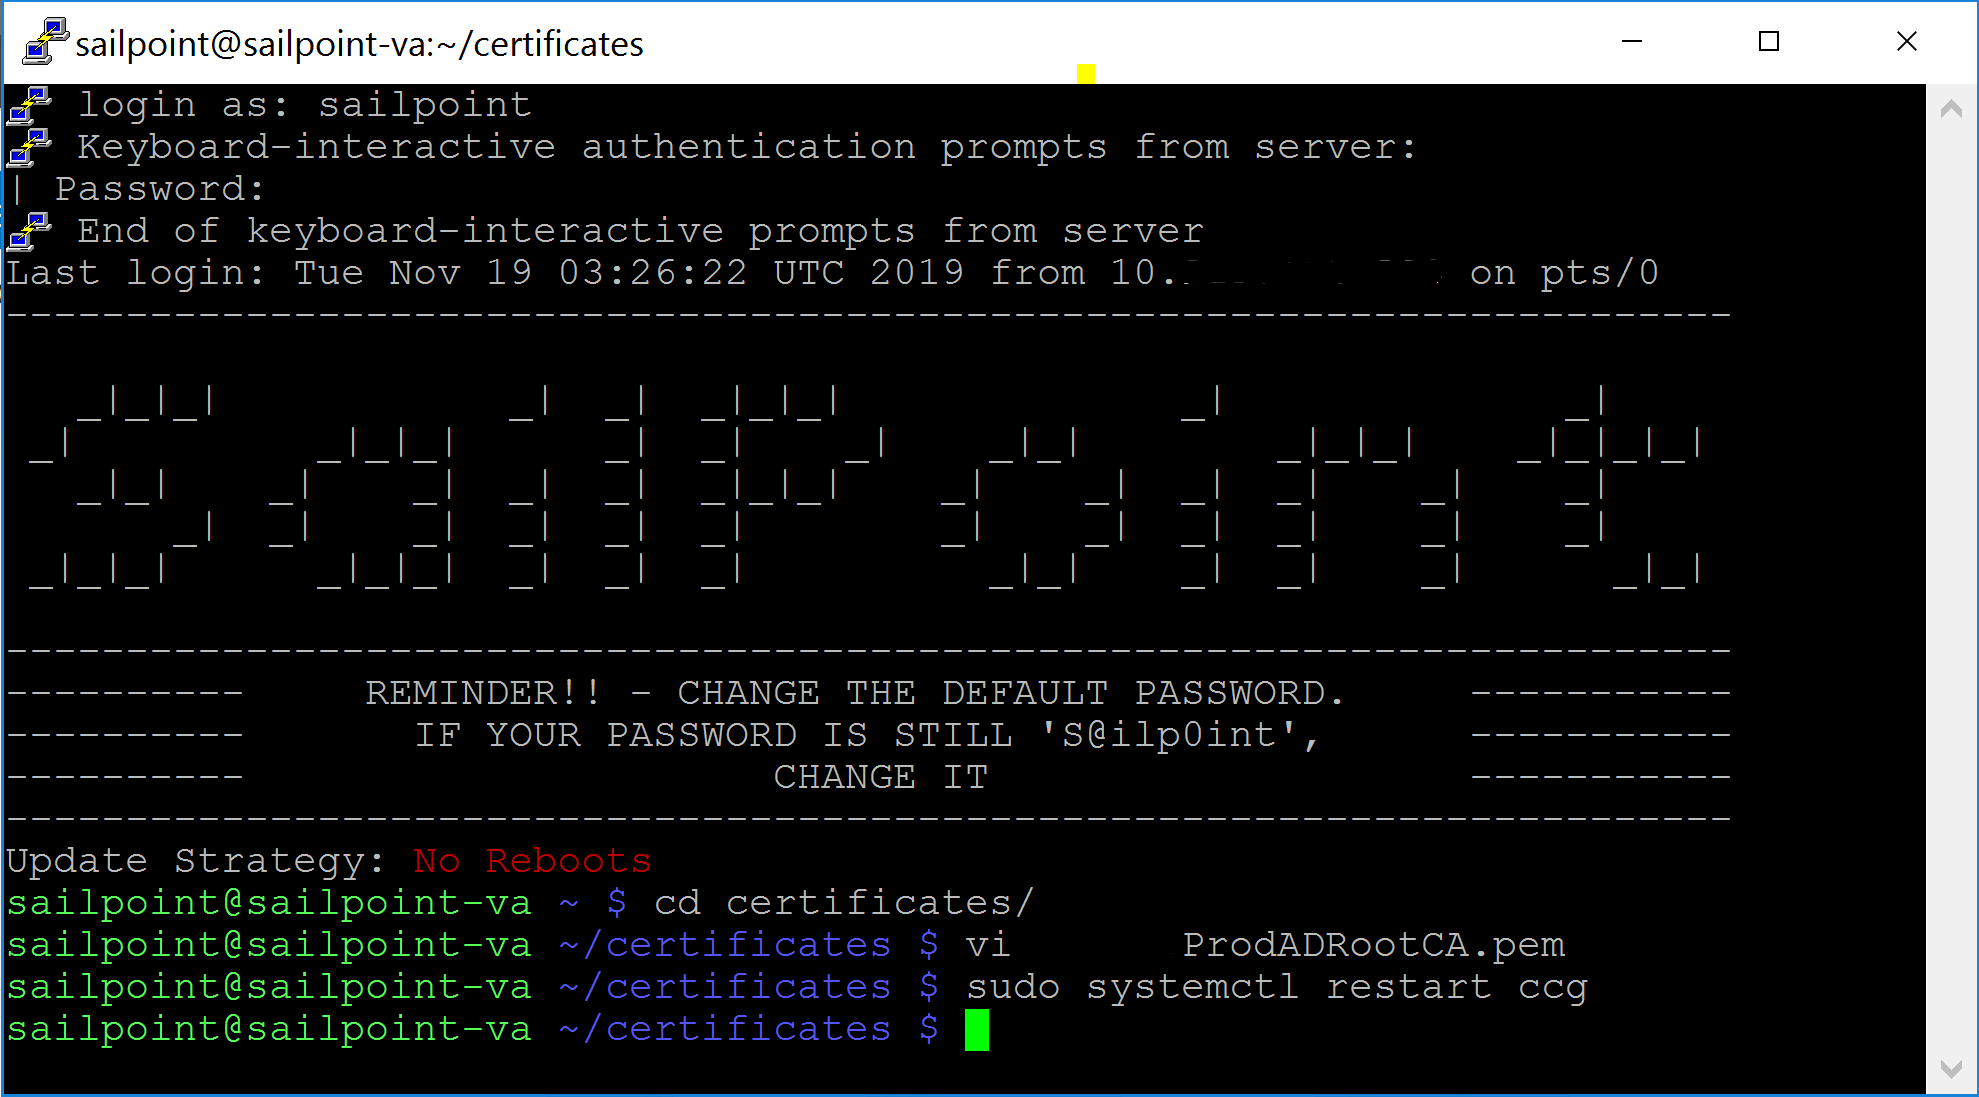
- SSH into the Virtual Appliance Server
- change to the certificates directory
- open VI with the name that you want to give the certificate
- vi ADProdTrustedRootCert.pem
- press insert
- paste in your certificate (right click if using Putty) that you exported from the AD DC (open it in Notepad or similar on your host machine to copy the contents)
- press escape to exit insert mode
- enter :wq to write and quit vi
- restart the CCG process
- sudo systemctl restart ccg
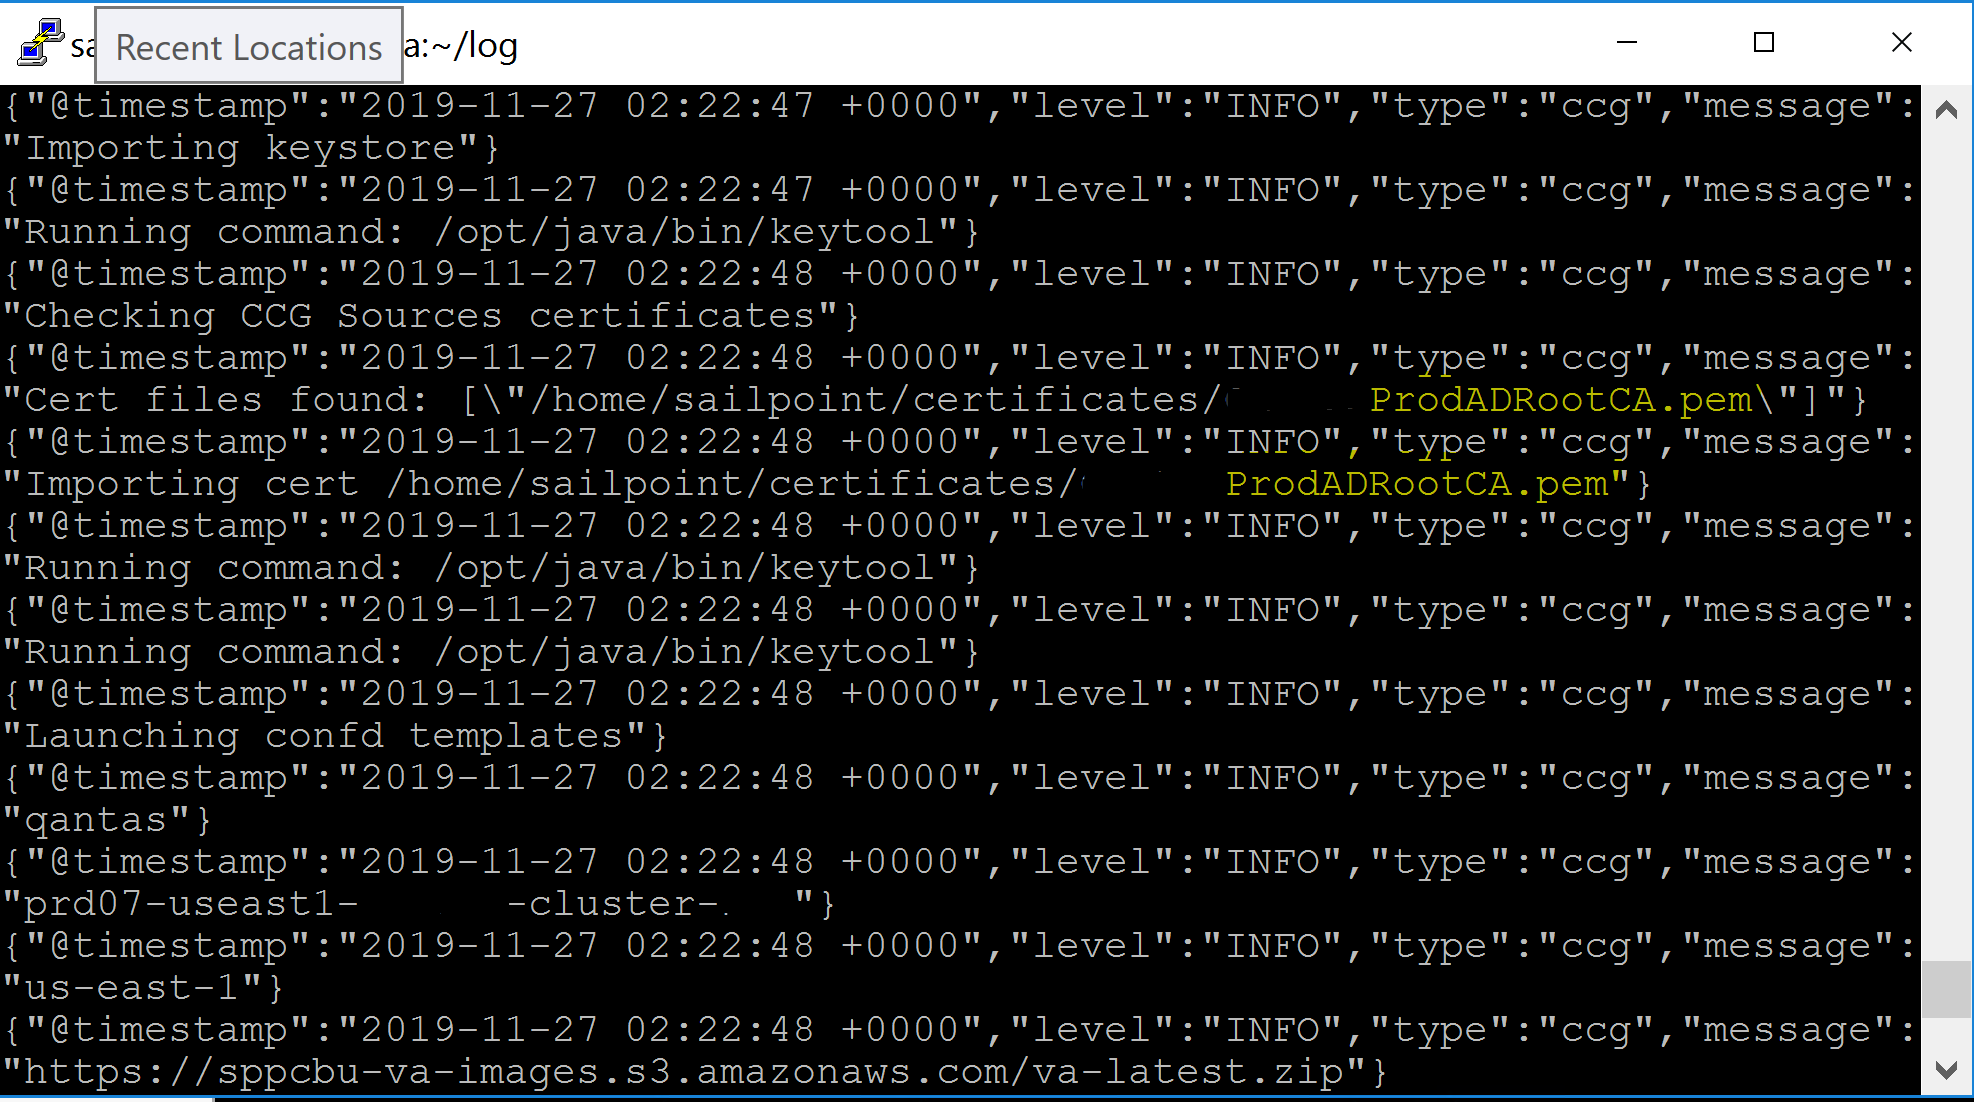
- inspect the ccg-start.log to make sure the certificate was picked up and imported
- cat /home/sailpoint/log/ccg-start.log
IdentityNow Active Directory Source TLS Configuration
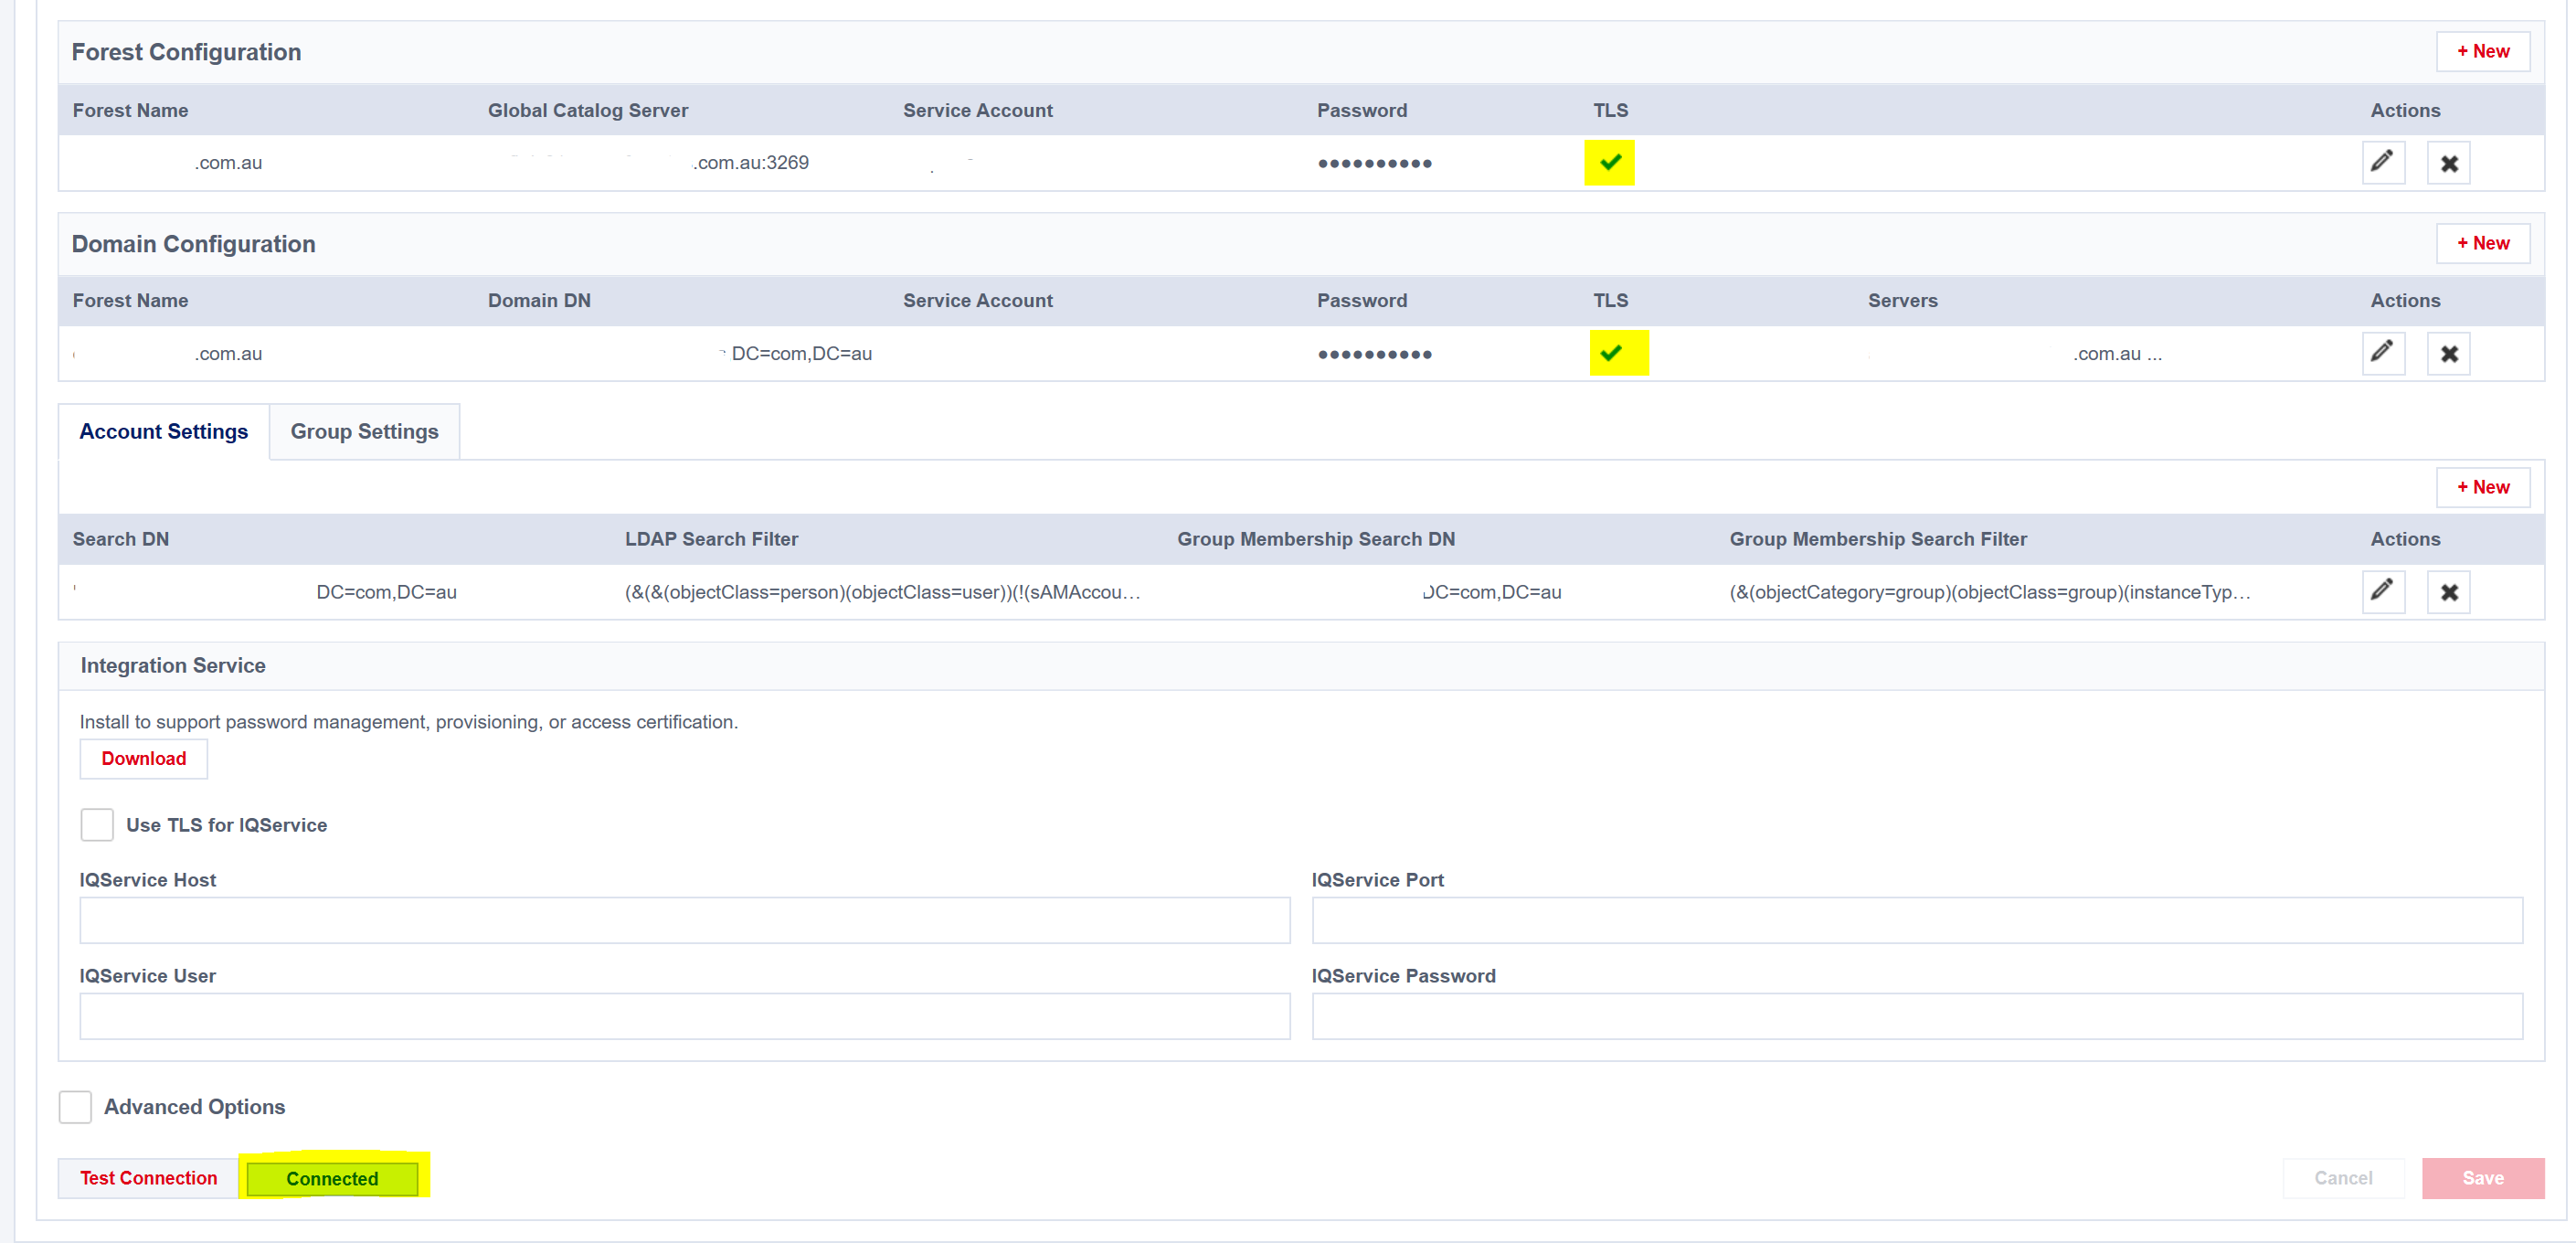
Finally, on the Active Directory Source under Admin => Connections => Sources in the IdentityNow Portal, edit the Forest and Domain configuration to enable TLS. Ensure that your configuration uses FQDN names and not hostnames or IP Addresses. I also needed to list the Domain Controllers to connect to on the Domain Configuration.
Test the connection and start aggregating.
Summary
SailPoint IdentityNow Active Directory Source TLS Configuration is pretty straight forward (once you work out the process).


