Decentralised Identity is a technology I’m passionate about and have written many posts and tools on as well as participating in hackathons. Microsoft’s Entra Verified ID solution is an offering I’ve been a part of from the early previews. It can be time consuming setting up and getting all the configuration items correct. This month (October 2023) Microsoft released a new express wizard to setup Verified ID in an Entra ID Tenant. This new express Verified ID setup process is crazily quick.
“Unlock verifiable workplace credentials. It only takes a click and will be ready for use instantly”
Search for Verified ID in the Azure Portal and select it.

Having previously setup Entra Verified ID (or as it was formally known, Azure Active Directory Verifiable Credentials) many times I’m intimate with all the configuration items required to set it up the first time. For those not familiar with the process at a high level it requires an Application Registration a Key Vault, Domain verification and many permission configurations. The full process is here.
Now you can simply click the Get started button shown in the screen above and as long as you meet the following prerequisites you will have configured Entra Verified ID in your tenant and created the first verifiable credential quicker than it took you to read this.
Prerequisites
The prerequisites are:
- you are a global administrator or have the authentication policy administrator permission for the Entra ID tenant
- you have a custom domain registered for the Microsoft Entra tenant
Credential Configuration
Having clicked just the one button the first verifiable credential will have been created and all you have to do is update the look and feel to fit your organisation. That simply involves updating the logo and colours.

The logo must be on a publically addressable location (below I put mine on this blog) and a couple of HTML colour code changes later, I was done.

After selecting update and save.

Issuing our new Verifiable Credential
Now we have a Verifiable Credential created, let’s see what the defaults are for it and who can be issued one.

By default any Entra ID user in the tenant can be issued the VC. And the new feature of being able to self request via the MyAccount portal is selected by default.

Self Service Verified ID Verifiable Credential
So lets jump over to MyAccount using an Entra ID user account and get a Verified ID VC.

Using the Microsoft Authenticator App and the VC wallet feature I scan the QR code.

I’m shown the VC and can click Add.

And it’s issued. My new Verified ID VC is now in my Authenticator Verified ID Wallet.

Looking at the new VC we can see the claims that it contains. Basically your naming information. There are additional claims but I didn’t have those attributes populated on my Entra ID user account. More details on those further below.


Verified ID Quick Setup Defaults
Selecting the credential we can then look at the default configuration.

There are 8 default claims as part of the VC.

Digging Deeper
Let’s dig deeper into where the DID configuration is located and have a look at the configuration there. From the VC I copy the manifest URL.

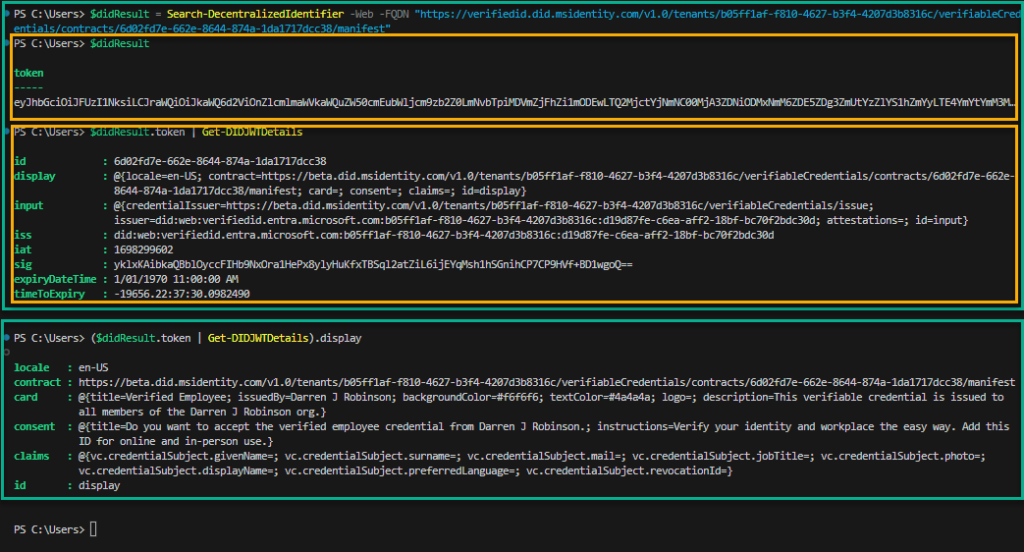
Then using my DIDSearcher PowerShell Module (GitHub link) and the Search-DecentralizedIdentifer cmdlet we can get the manifest configuration and convert the token using the Get-DIDJWTDetails cmdlet.
We can then dig down into the properties of the configuration.
Summary
If you are new to Entra Verified ID and want to have a quick painless method to get started this is definitely for you. If you want to create VCs with different claims this setup creates the foundation which you can then use to create custom VCs. Either way there has NEVER been an easier or quicker method to get started with Entra Verified ID. Give it a go.


